How to Wrap Text in PowerPoint

When designing a presentation, you’ll most likely need to add some text to your slides. For example, you might want to explain a picture or you might want to describe the steps of a process.
Do you know the concept of text wrapping? It allows you to give “shape” to the text, so that it is displayed on the screen the way you want it. Even though PowerPoint doesn’t have a dedicated option for this, there’s a workaround, so keep reading to find out how!
What Is Text Wrapping and Why Use It?
Text wrapping, as its name suggests, is a feature that makes your text wrap around other elements present in the slide, mainly images. Instead of spending a lot of time spacing out words and adjusting text boxes so that they do not overlap, there’s a little trick to do so, and it involves the use of Microsoft Word too.
So, to avoid having words cluttered and help improve readability, you can try text wrapping. In fact, it might give your text a certain visual effect, which is good for purposes such as posters or ads.
Wrapping Text Around an Image in PowerPoint
As we’ve mentioned before, the main workaround involves using Word in conjunction with PowerPoint. So, let’s see the steps to wrap text.
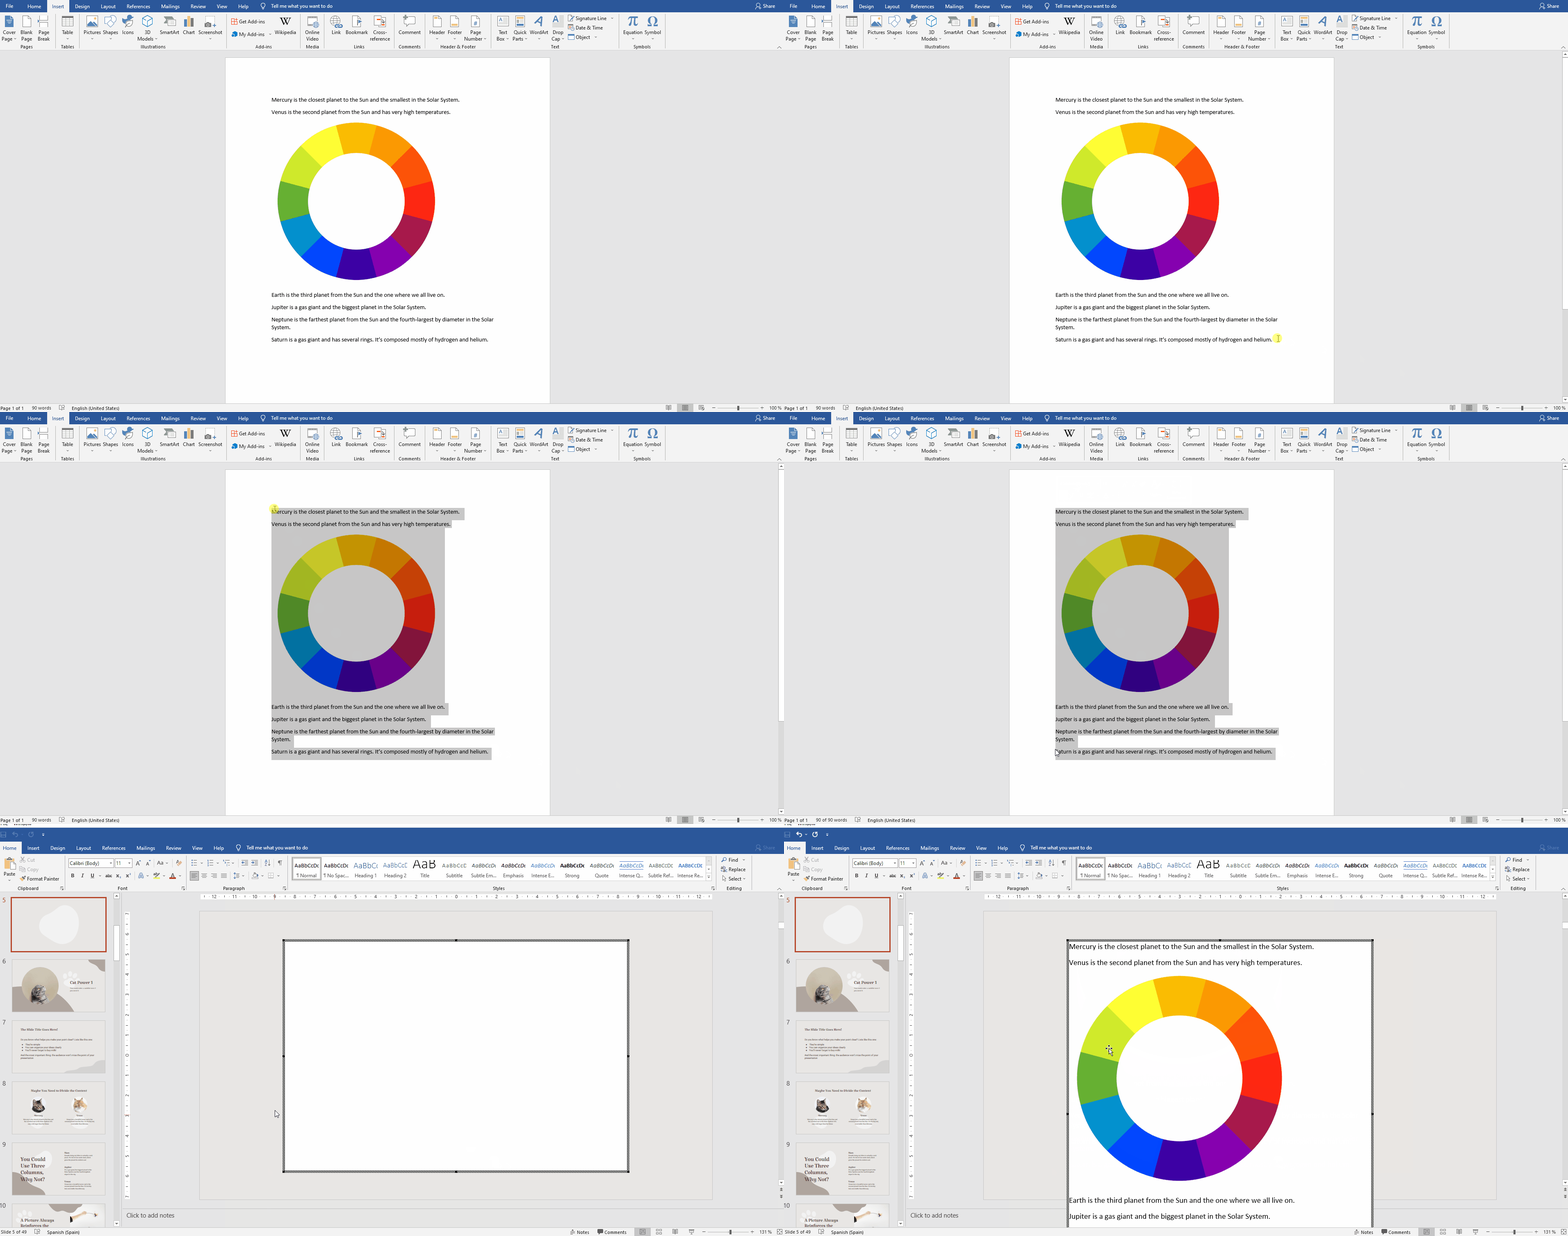
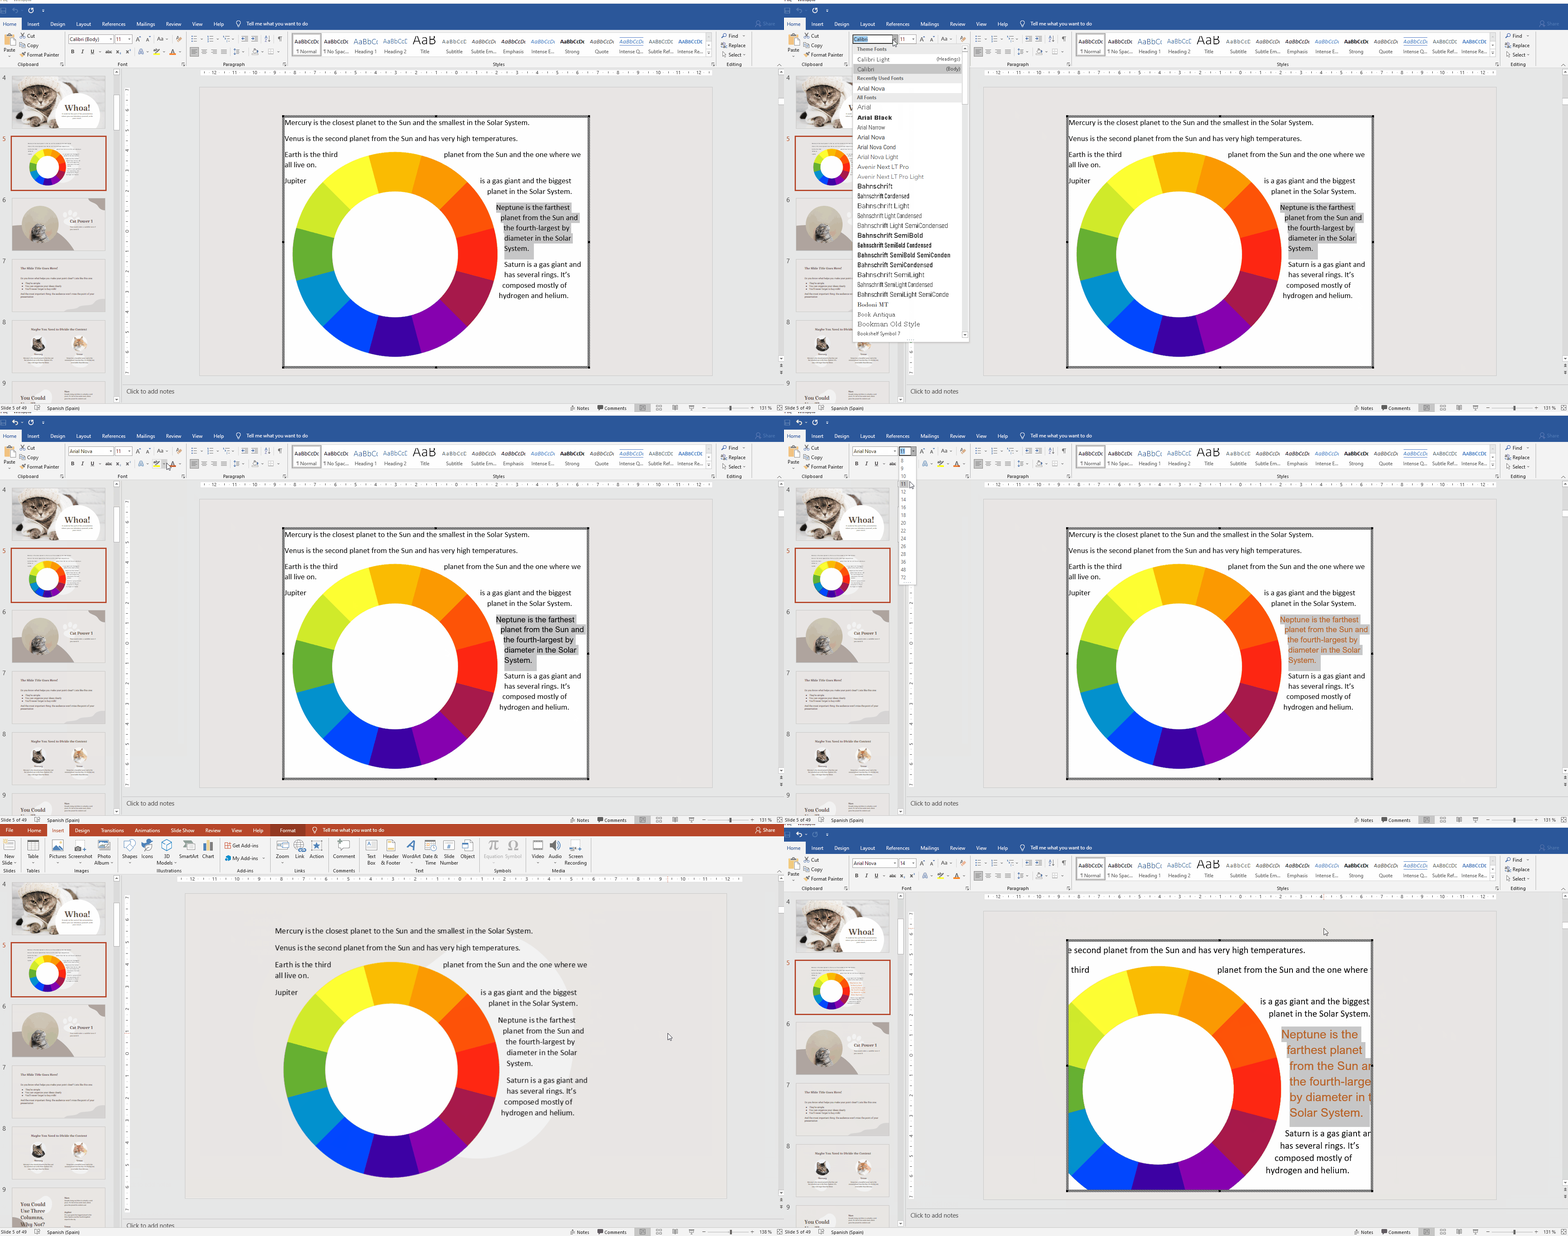
First, run Microsoft Word and enter some text. In our case, we’ll write some lines about six planets of the solar system. Now, we’ll need to insert an image. To do so, go to the Insert tab, click Pictures and then choose “This Device”. Locate the image you want to use and click Insert.

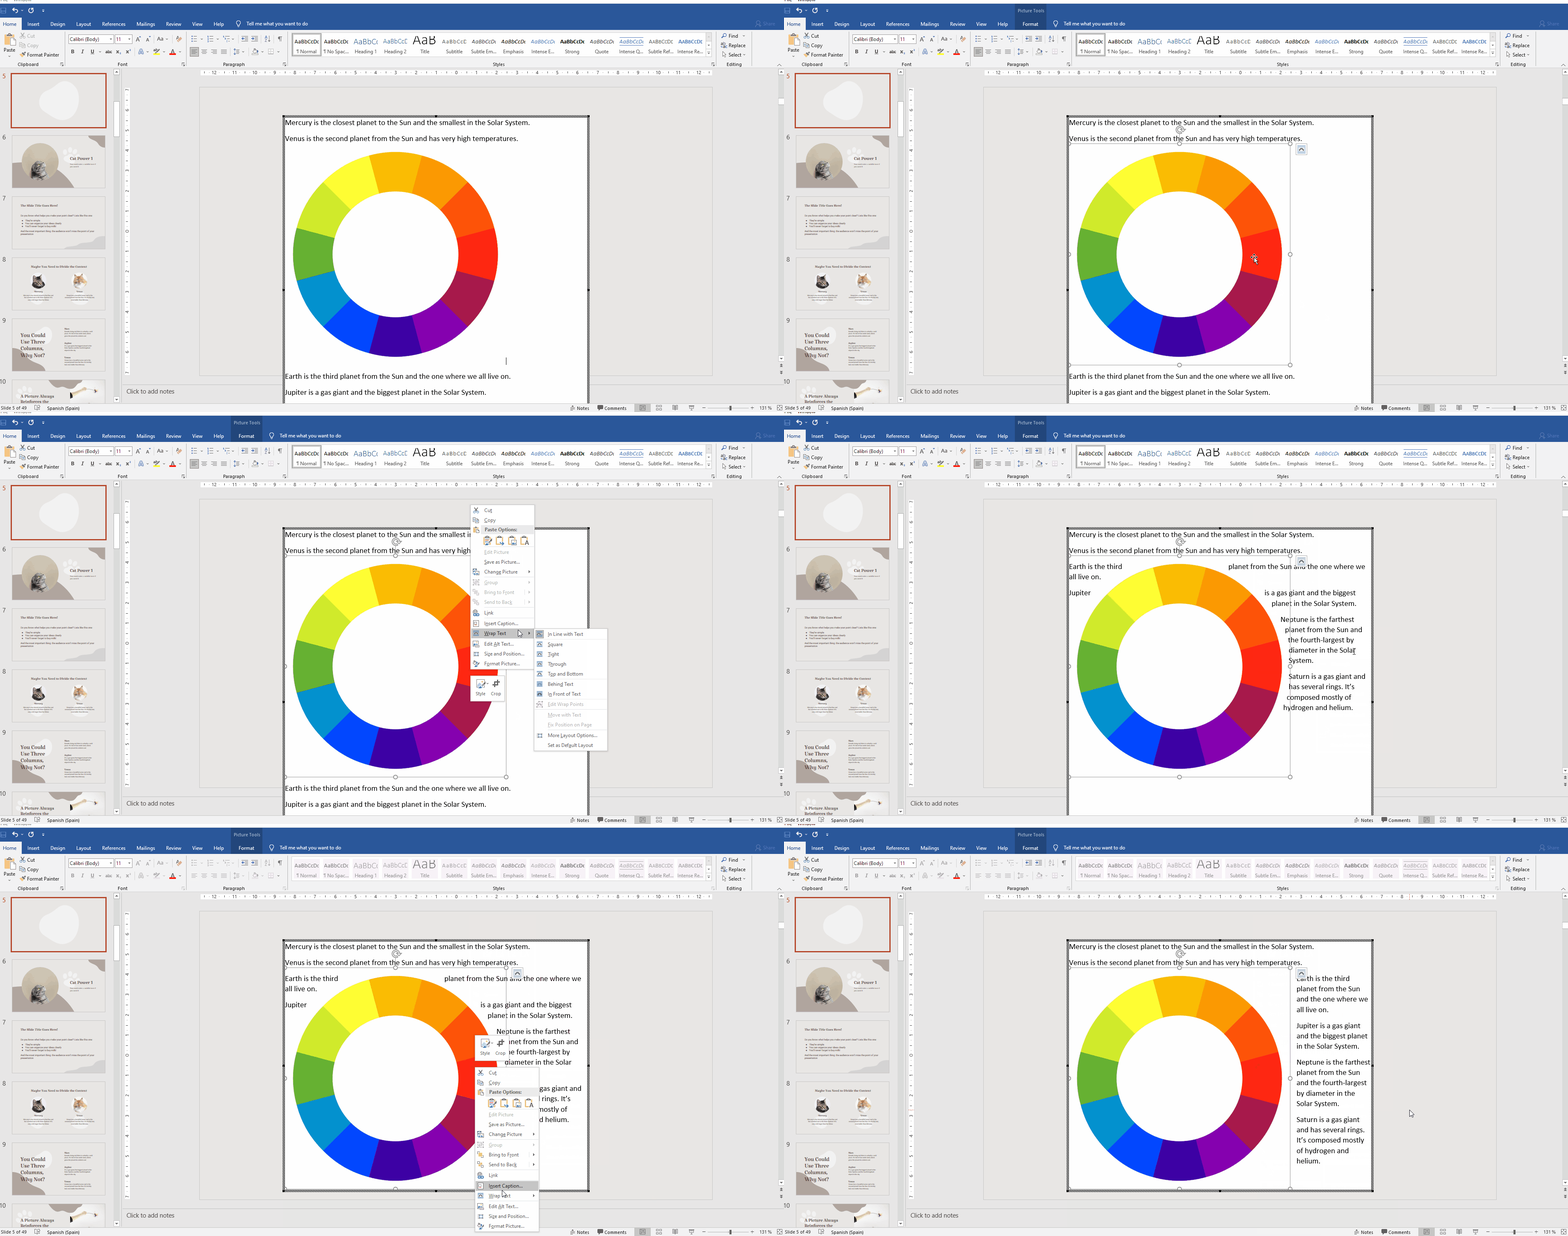
Next, right-click on the image. You’ll see some options, including “Wrap Text”, which is the one we need. If you hover over that option, you’ll see a list of different wrapping layouts. Just choose your preferred one.

Now that you have this, don’t close Word. Run PowerPoint and open your presentation. Then, go to the slide where you want to add this content that we have in Word. Now, go to the Insert tab and, on the “Text group”, click Object.

A new window will open. In the “Object type” box, you need to choose the “Microsoft Word Document” option and then click OK. This will actually create an object that can be edited as if you were in Microsoft Word, despite actually being in PowerPoint.
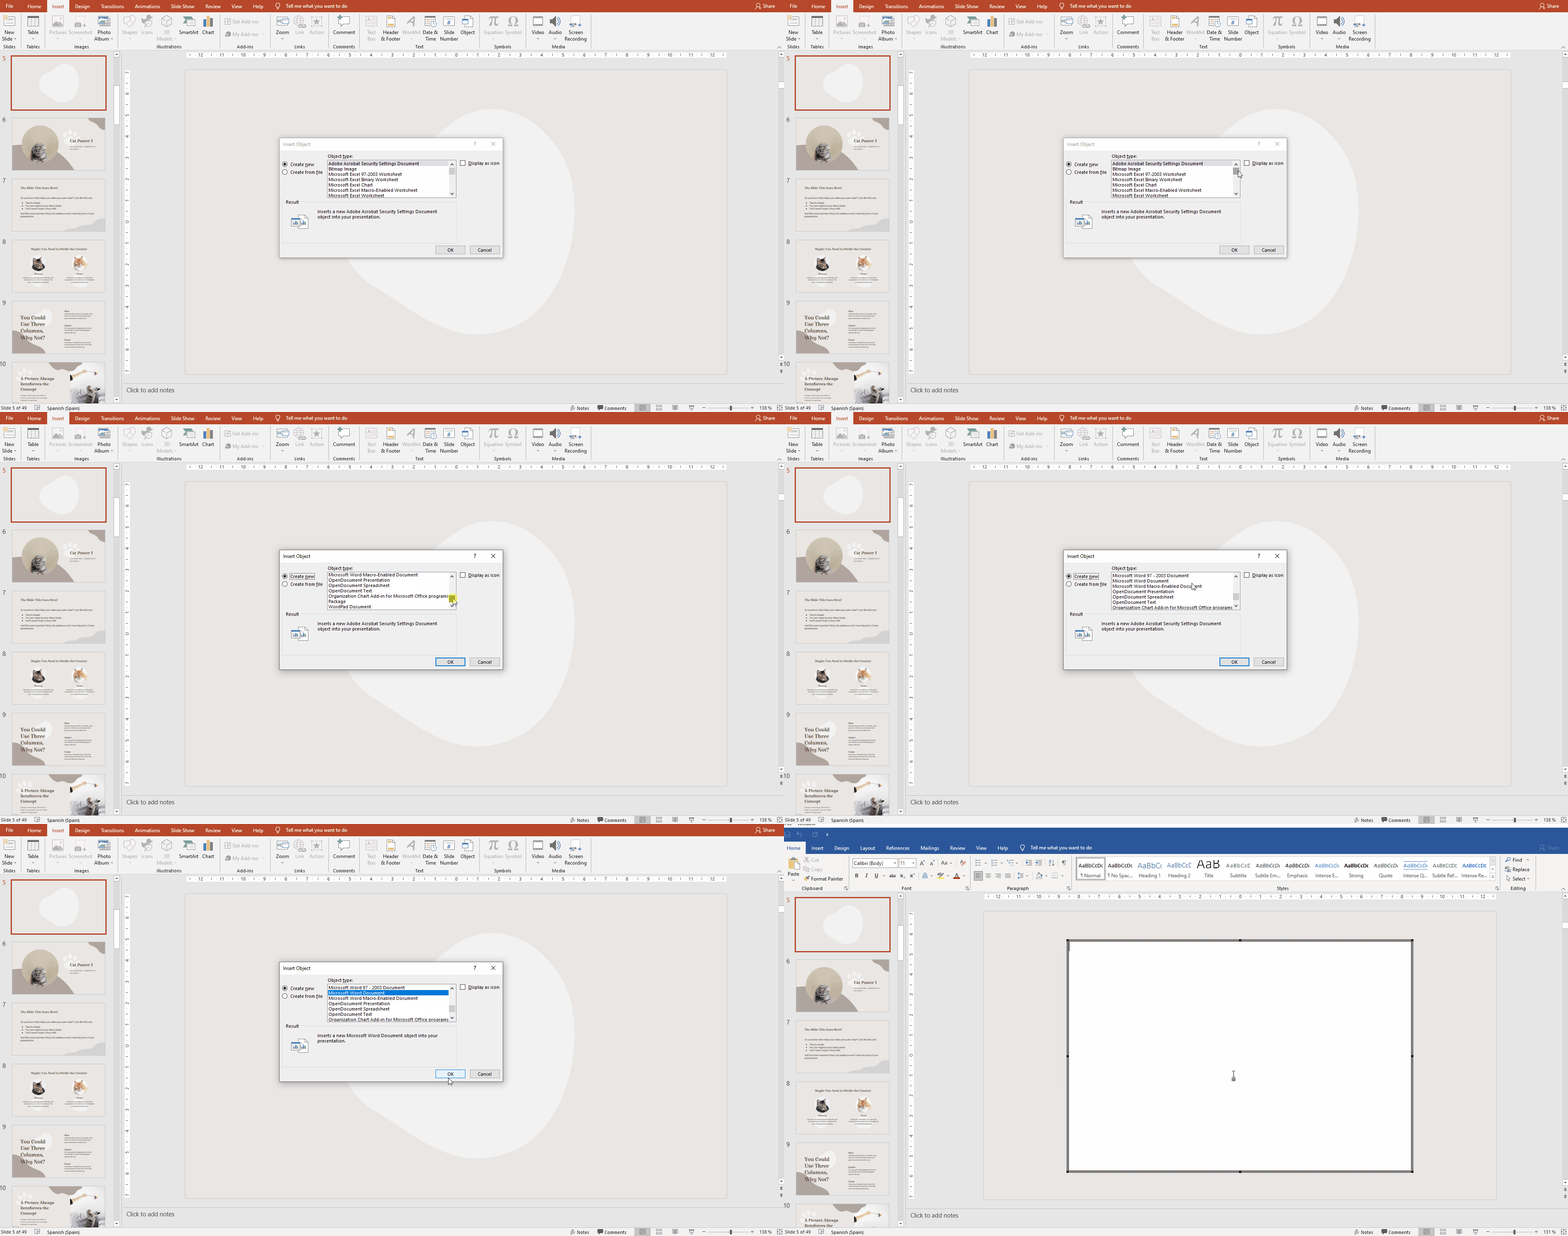
What does this mean now? We can copy the text and the image from our Word document here, and the same options will be available for you!
Try right-clicking on the image in this “Word-inside-PowerPoint” object that we have in the slide. See? The Wrap Text option is there, and you can choose a different one if you wish to do so.
There’s an interesting option called “Edit Wrap Points”. When selecting it, a series of points will appear surrounding the image that you have. This is like the “outline” of the image that the wrapping text will respect. You can select these points and drag them around and the wrapping will be adjusted automatically.
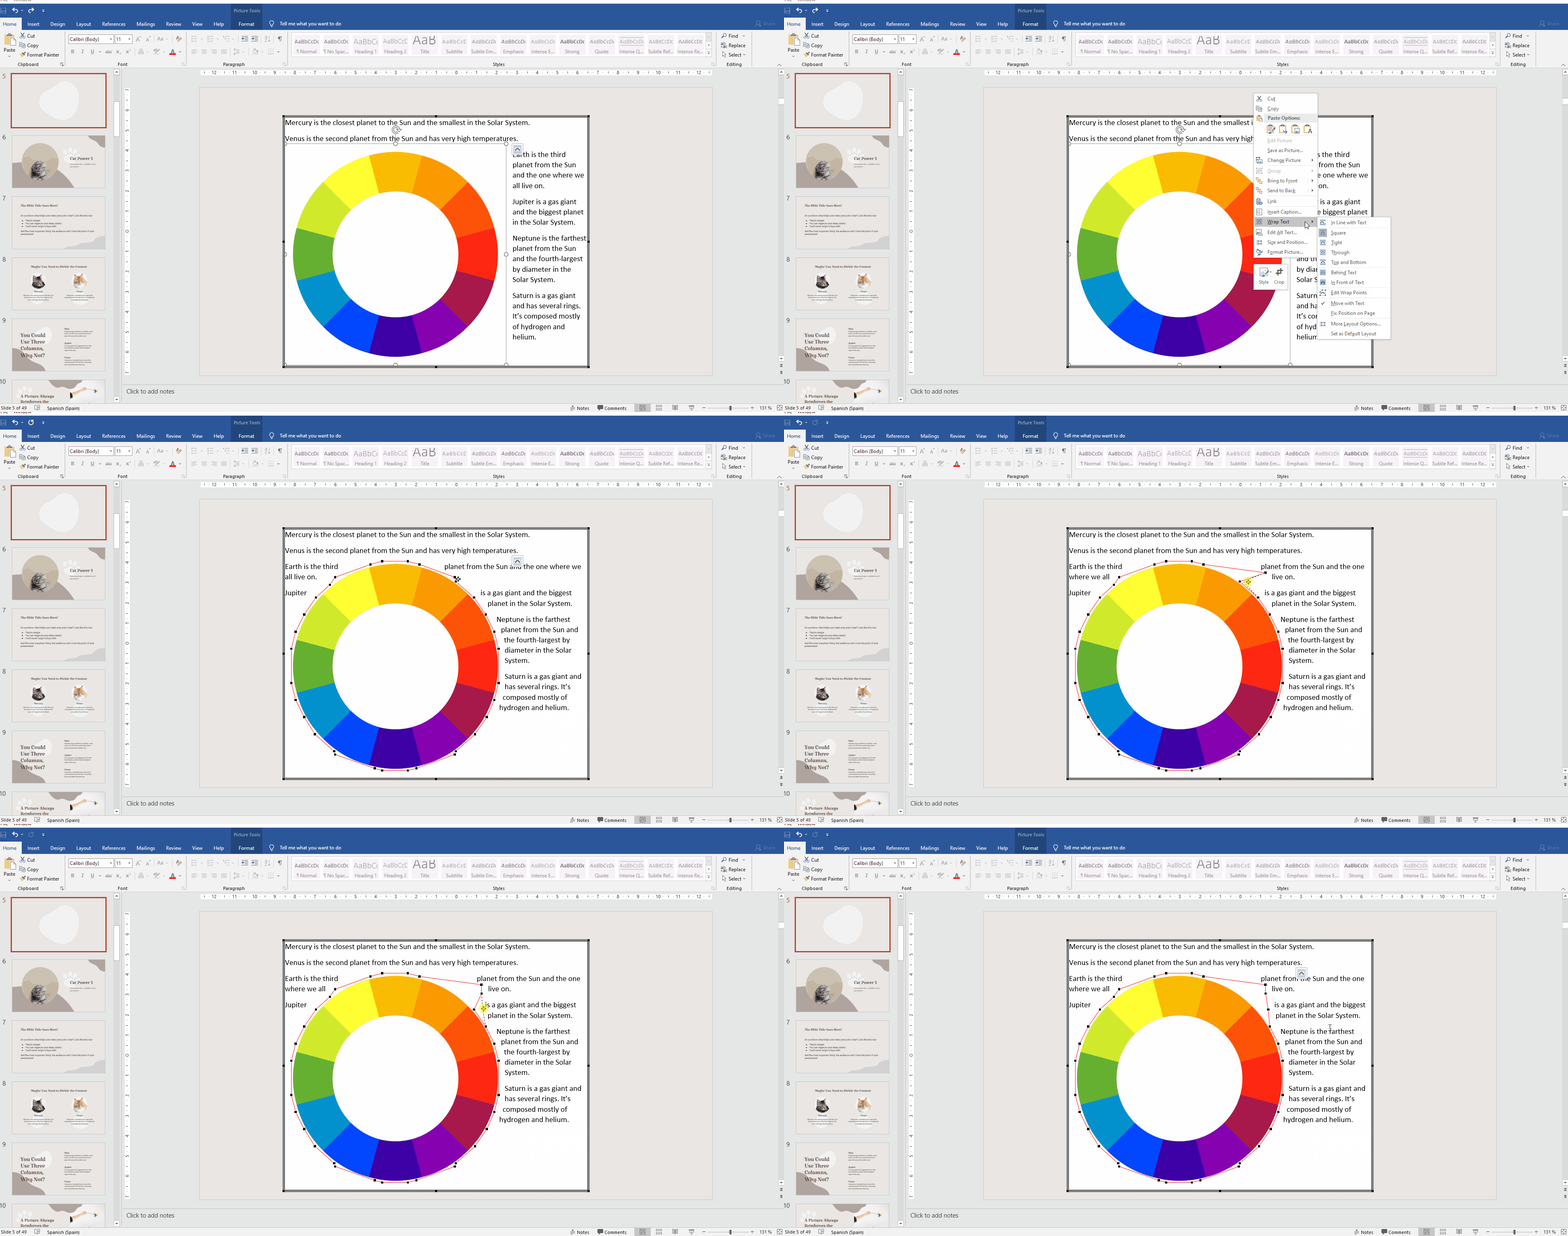
Remember that you can still modify the text however you want: size, color, font… When you’re done, click outside the object box and you’ll return to the slide. Whenever you want to modify the wrapping or the text, just double-click on it and you’ll return to this “Word-in-PowerPoint” object.
Now it’s your chance to put it into practice. Download one of our templates for PowerPoint and try to use your own images and text. Remember to use the same fonts as the ones used in your presentation so that you keep consistency!
If you need more information on how to edit text or other elements on a slide, check out all the tutorials we have for PowerPoint. You’ll be creating presentations in no time!
Tags
BasicsDo you find this article useful?
Related tutorials

How to Personalize Your Presentations with Slidesgo’s AI-Powered Tools
You’ve got the story—now make it look and sound like you. Whether you’re teaching a lesson, designing a sales pitch, or sharing your research, Slidesgo’s updated AI Presentation Maker puts more creativity and control right at your fingertips. (And we all want more control, right?).What you’ll find here:New personalization features make it easier to tailor your presentation from the start:Upload your own content (DOCX, PDF, TXT) to streamline your work instead of reinventing the wheel.Choose image styles to match your tone and bring higher engagement to your audience.Pick from Slidesgo’s gorgeous themes to wrap your content with eye-catching and professional designs. Try it...

How to Write a Great AI Prompt
Our tools are built to be simple and easy to use (though, honestly, there's a lot happening behind the scenes). Have you ever struggled with an empty text box?:Condensing all your ideas and goals into a single prompt can feel overwhelming. But don’t worry—there are a few simple tricks that can help you craft stronger prompts and get the most out of our AI tools.

How to Download Google Slides Templates
When preparing a presentation, many people start panicking because they realize how much time it will take to edit each and every slide. Creating them from scratch, filling them in, looking for pictures, moving the elements...How stressful! But there is a solution that saves you a lot of time. We're sure that you've browsed the internet for templates, or basically, pre-established designs and elements, that can be downloaded for free and can be edited to your liking. Are we right? Then, we have some good news for you!

Discover our collection of printable templates
With the advance of technology, printing has become something that is no longer a necessity. Smartphones have made the paper format less and less frequent, but there are still certain cases in which having physical resources is much more convenient. Whether it's for taking notes, handing out assignments, making worksheets or handing out business cards or invitations, it's necessary to print your customized designs.From now on, in every Slidesgo printable presentation that you download, you will find the instructions for printing on the third slide. Depending on the style, colors or format of each presentation, we will tell you if you can...
