How to print PowerPoint notes

Crafting an impactful PowerPoint slideshow and delivering a captivating presentation are distinct skills. The first focuses on designing appealing visuals to convey a clear message, while the second involves employing effective presentation techniques to ensure the audience grasps the idea.
The content of this article will help you with the latter part of this process, guiding future presenters on how to print PowerPoint with speaker notes to enhance your presentations success and effectiveness.
What are notes in PowerPoint?
The information included in the notes section of a PowerPoint is meant for the presenter's eyes only. While the slides themselves display all the visuals and text required to build a compelling visual experience for the audience, notes often contain crucial details the presenter should keep in mind during their talk.
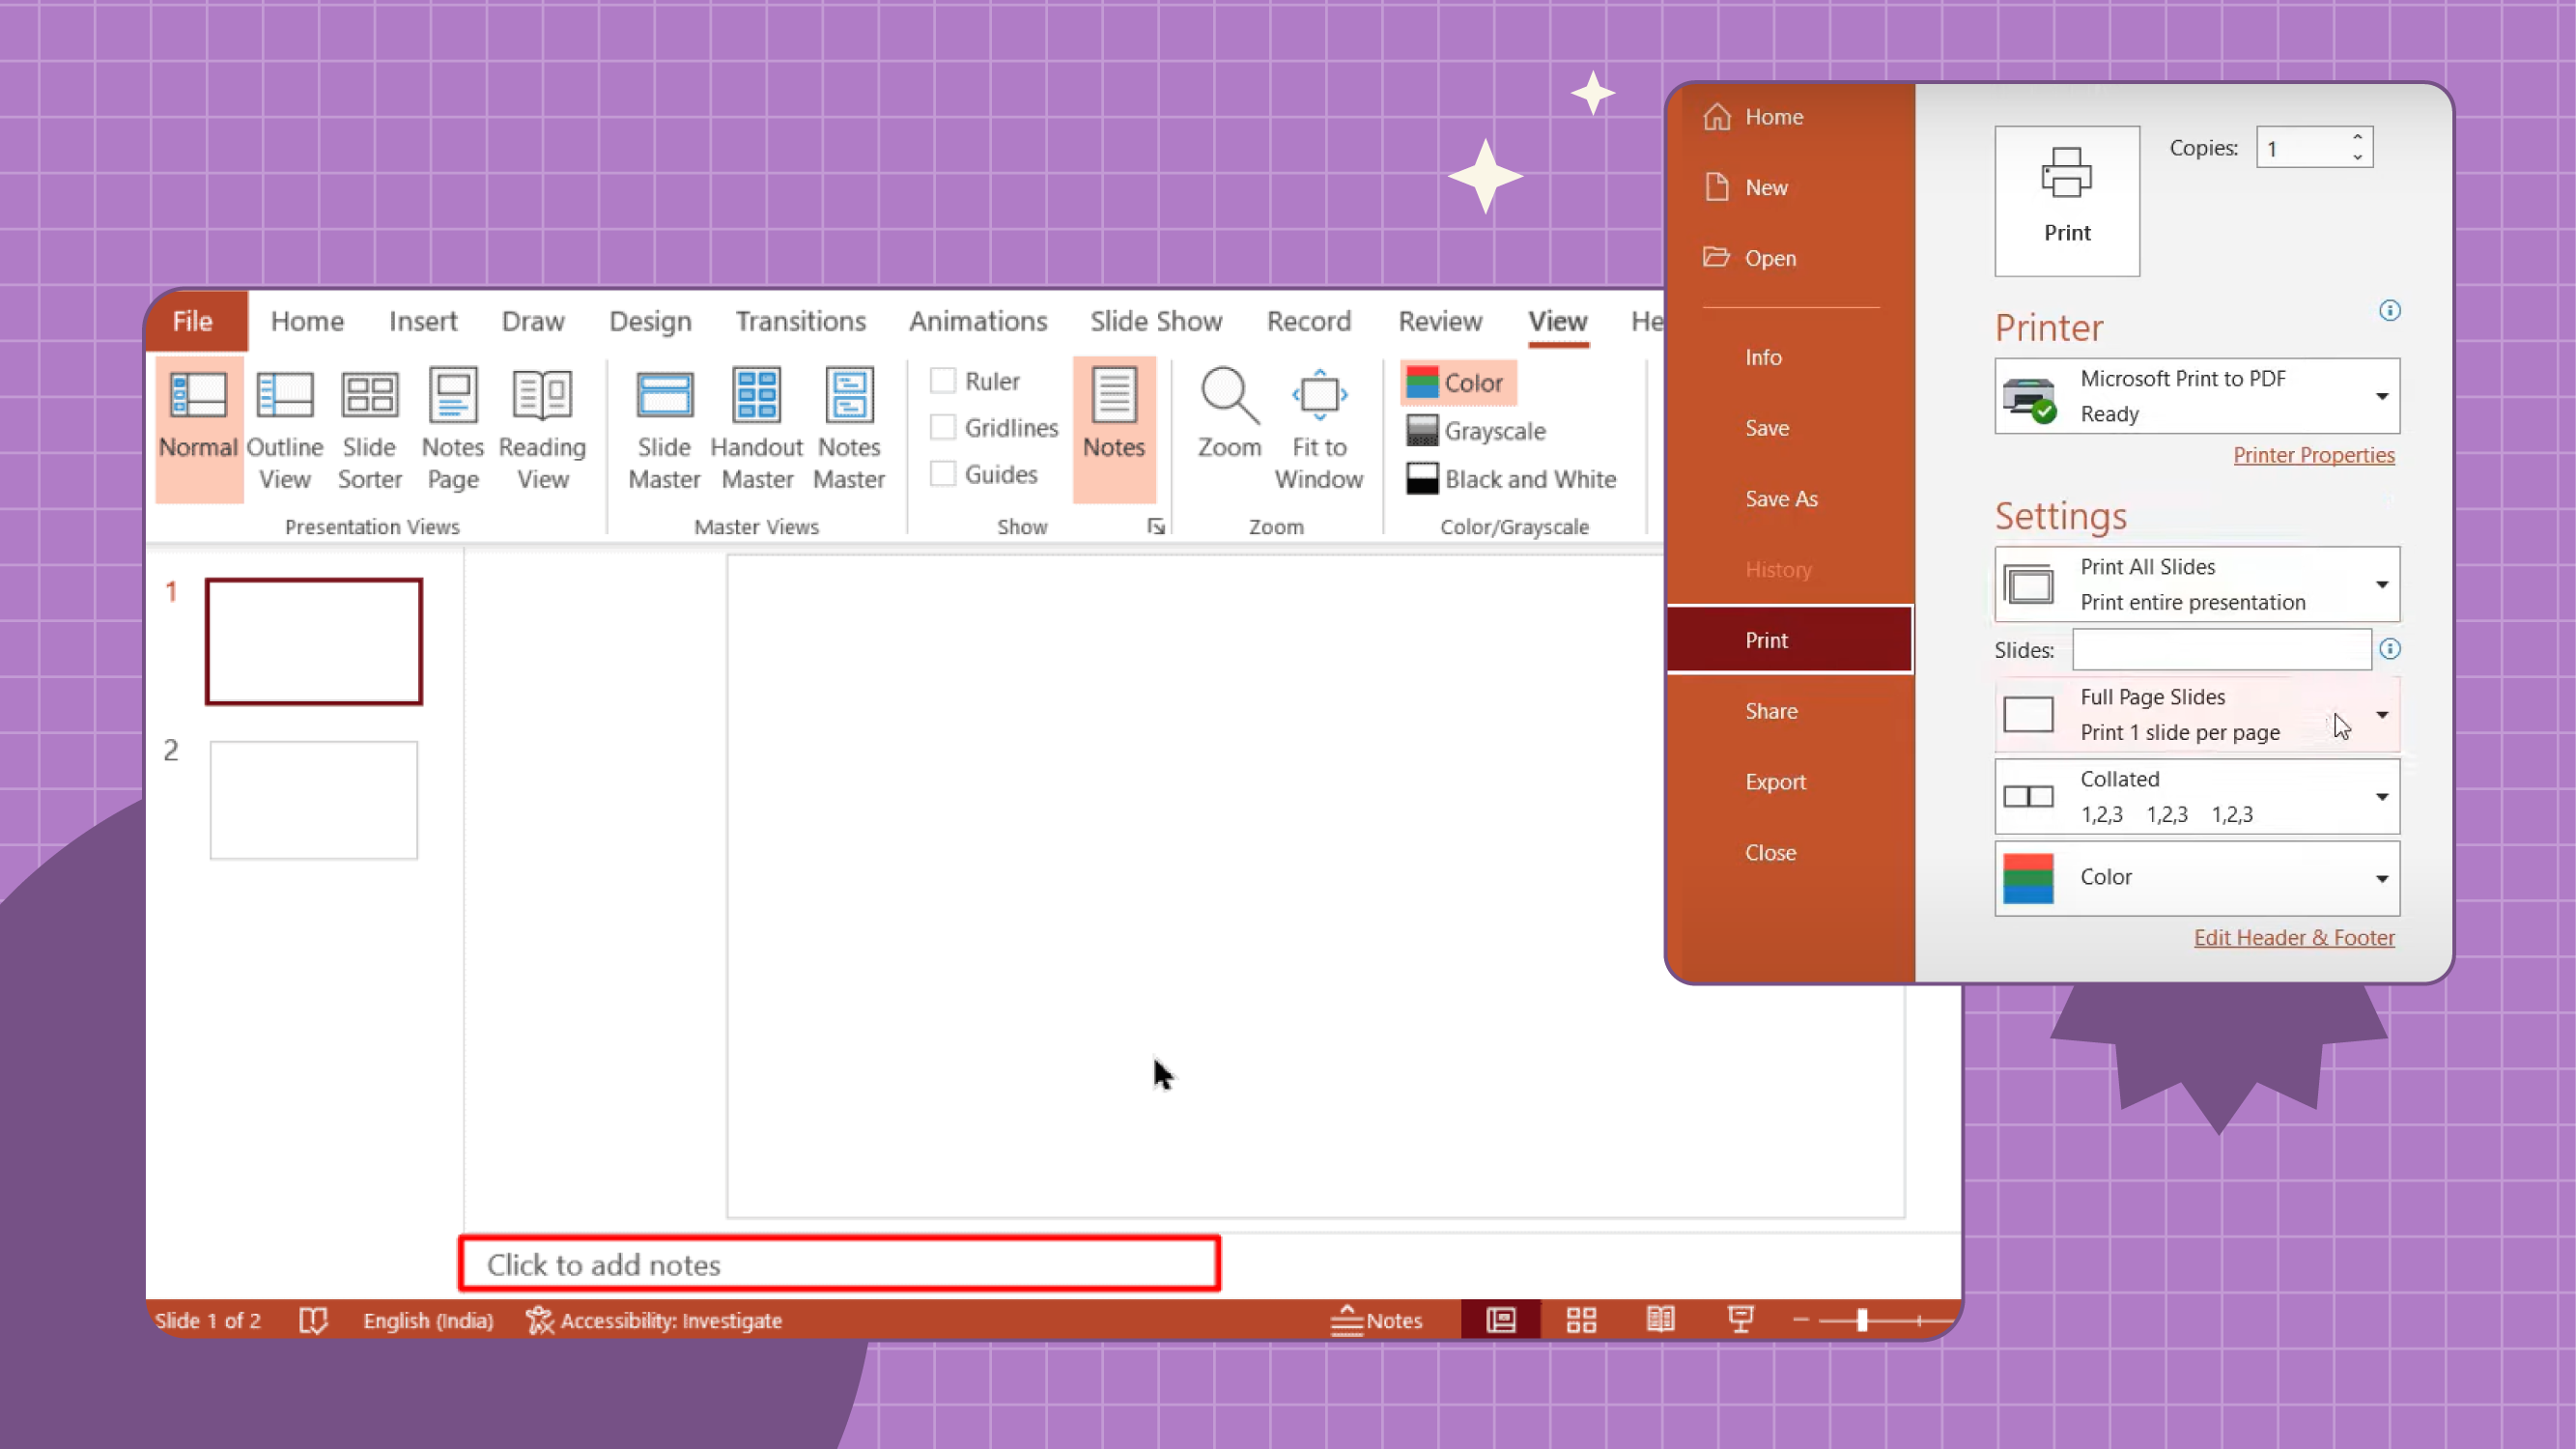
In PowerPoint, you’ll find the notes section right beneath each slide. Just click on “Notes” along the taskbar at the bottom of the PowerPoint window to get started. This article provides you a step-by-step guide to learn how to add speaker notes in PowerPoint.
During presentations, some may prefer to use Speaker Notes so they can see their notes on a second screen. However, if you’re more comfortable holding your notes or if a second screen isn't available, printing your notes is a fantastic alternative.
How to print PowerPoint with speaker notes?
Printing your PowerPoint slides along with the speaker notes attached to each is straightforward, though the steps can vary slightly whether you're using Windows, Mac, or Word. Let’s explore each one of these processes.
How to print slides with notes on Windows
Printing slides with notes on Windows involve a few simple steps:
- Open the presentation with your speaker notes.
- Go to “File” in the top left corner.
- Choose “Print” from the sidebar menu.
- Specify the number of copies in the “Copies” field.
- Select the printer you want to use in the “Printer” field.
- For extra printing settings, click on “Printer Properties”.
- Underneath “Settings”, select “Full Page Slides” to open the dropdown menu.
- Choose“Notes Pages”.
- Hit “Print” to start printing your slides with notes.

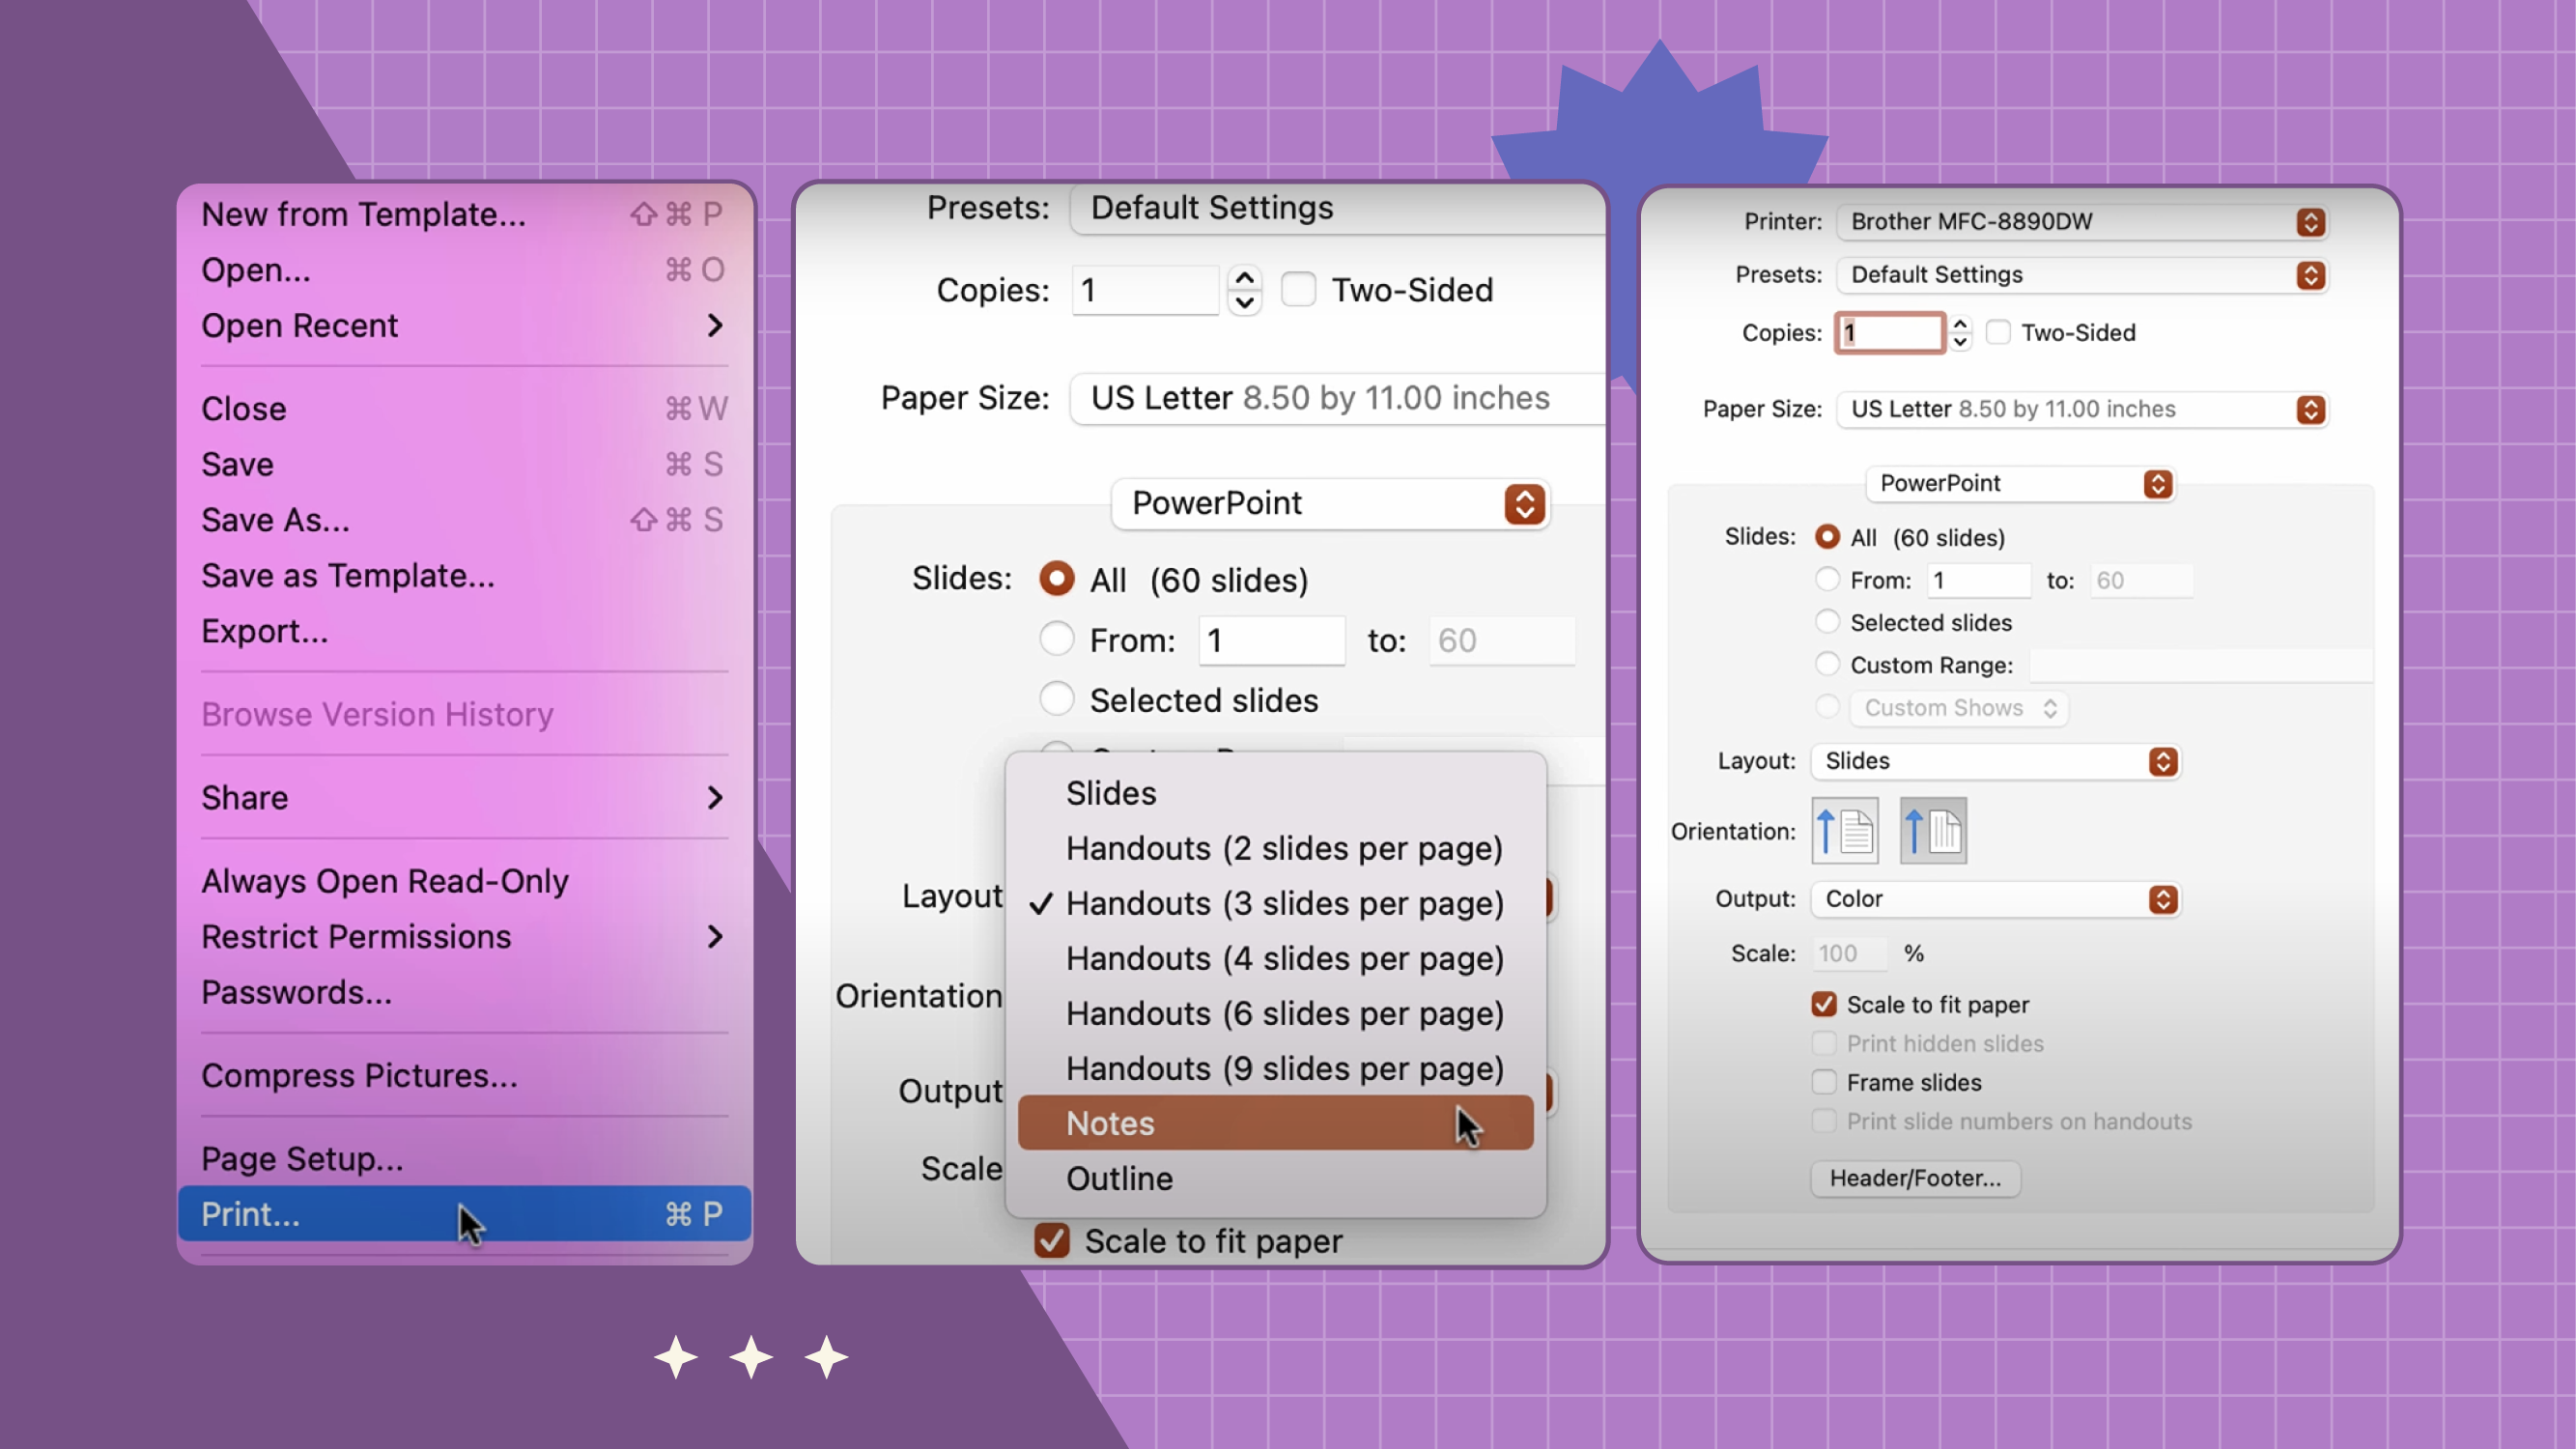
How to print a PowerPoint with notes on Mac
Printing notes from your Apple device is not rocket science. Here’s how to print PowerPoint with lines notes on Mac:
- Open your presentation with speaker notes.
- Click “File” in the top left corner.
- Select“Print”.
- Choose your printer under “Printer”.
- Go to “Show Details” at the bottom of the Print window.
- From the “Layout” menu, select “Notes”.
- Finally, click “Print” to obtain your PowerPoint slides with notes.

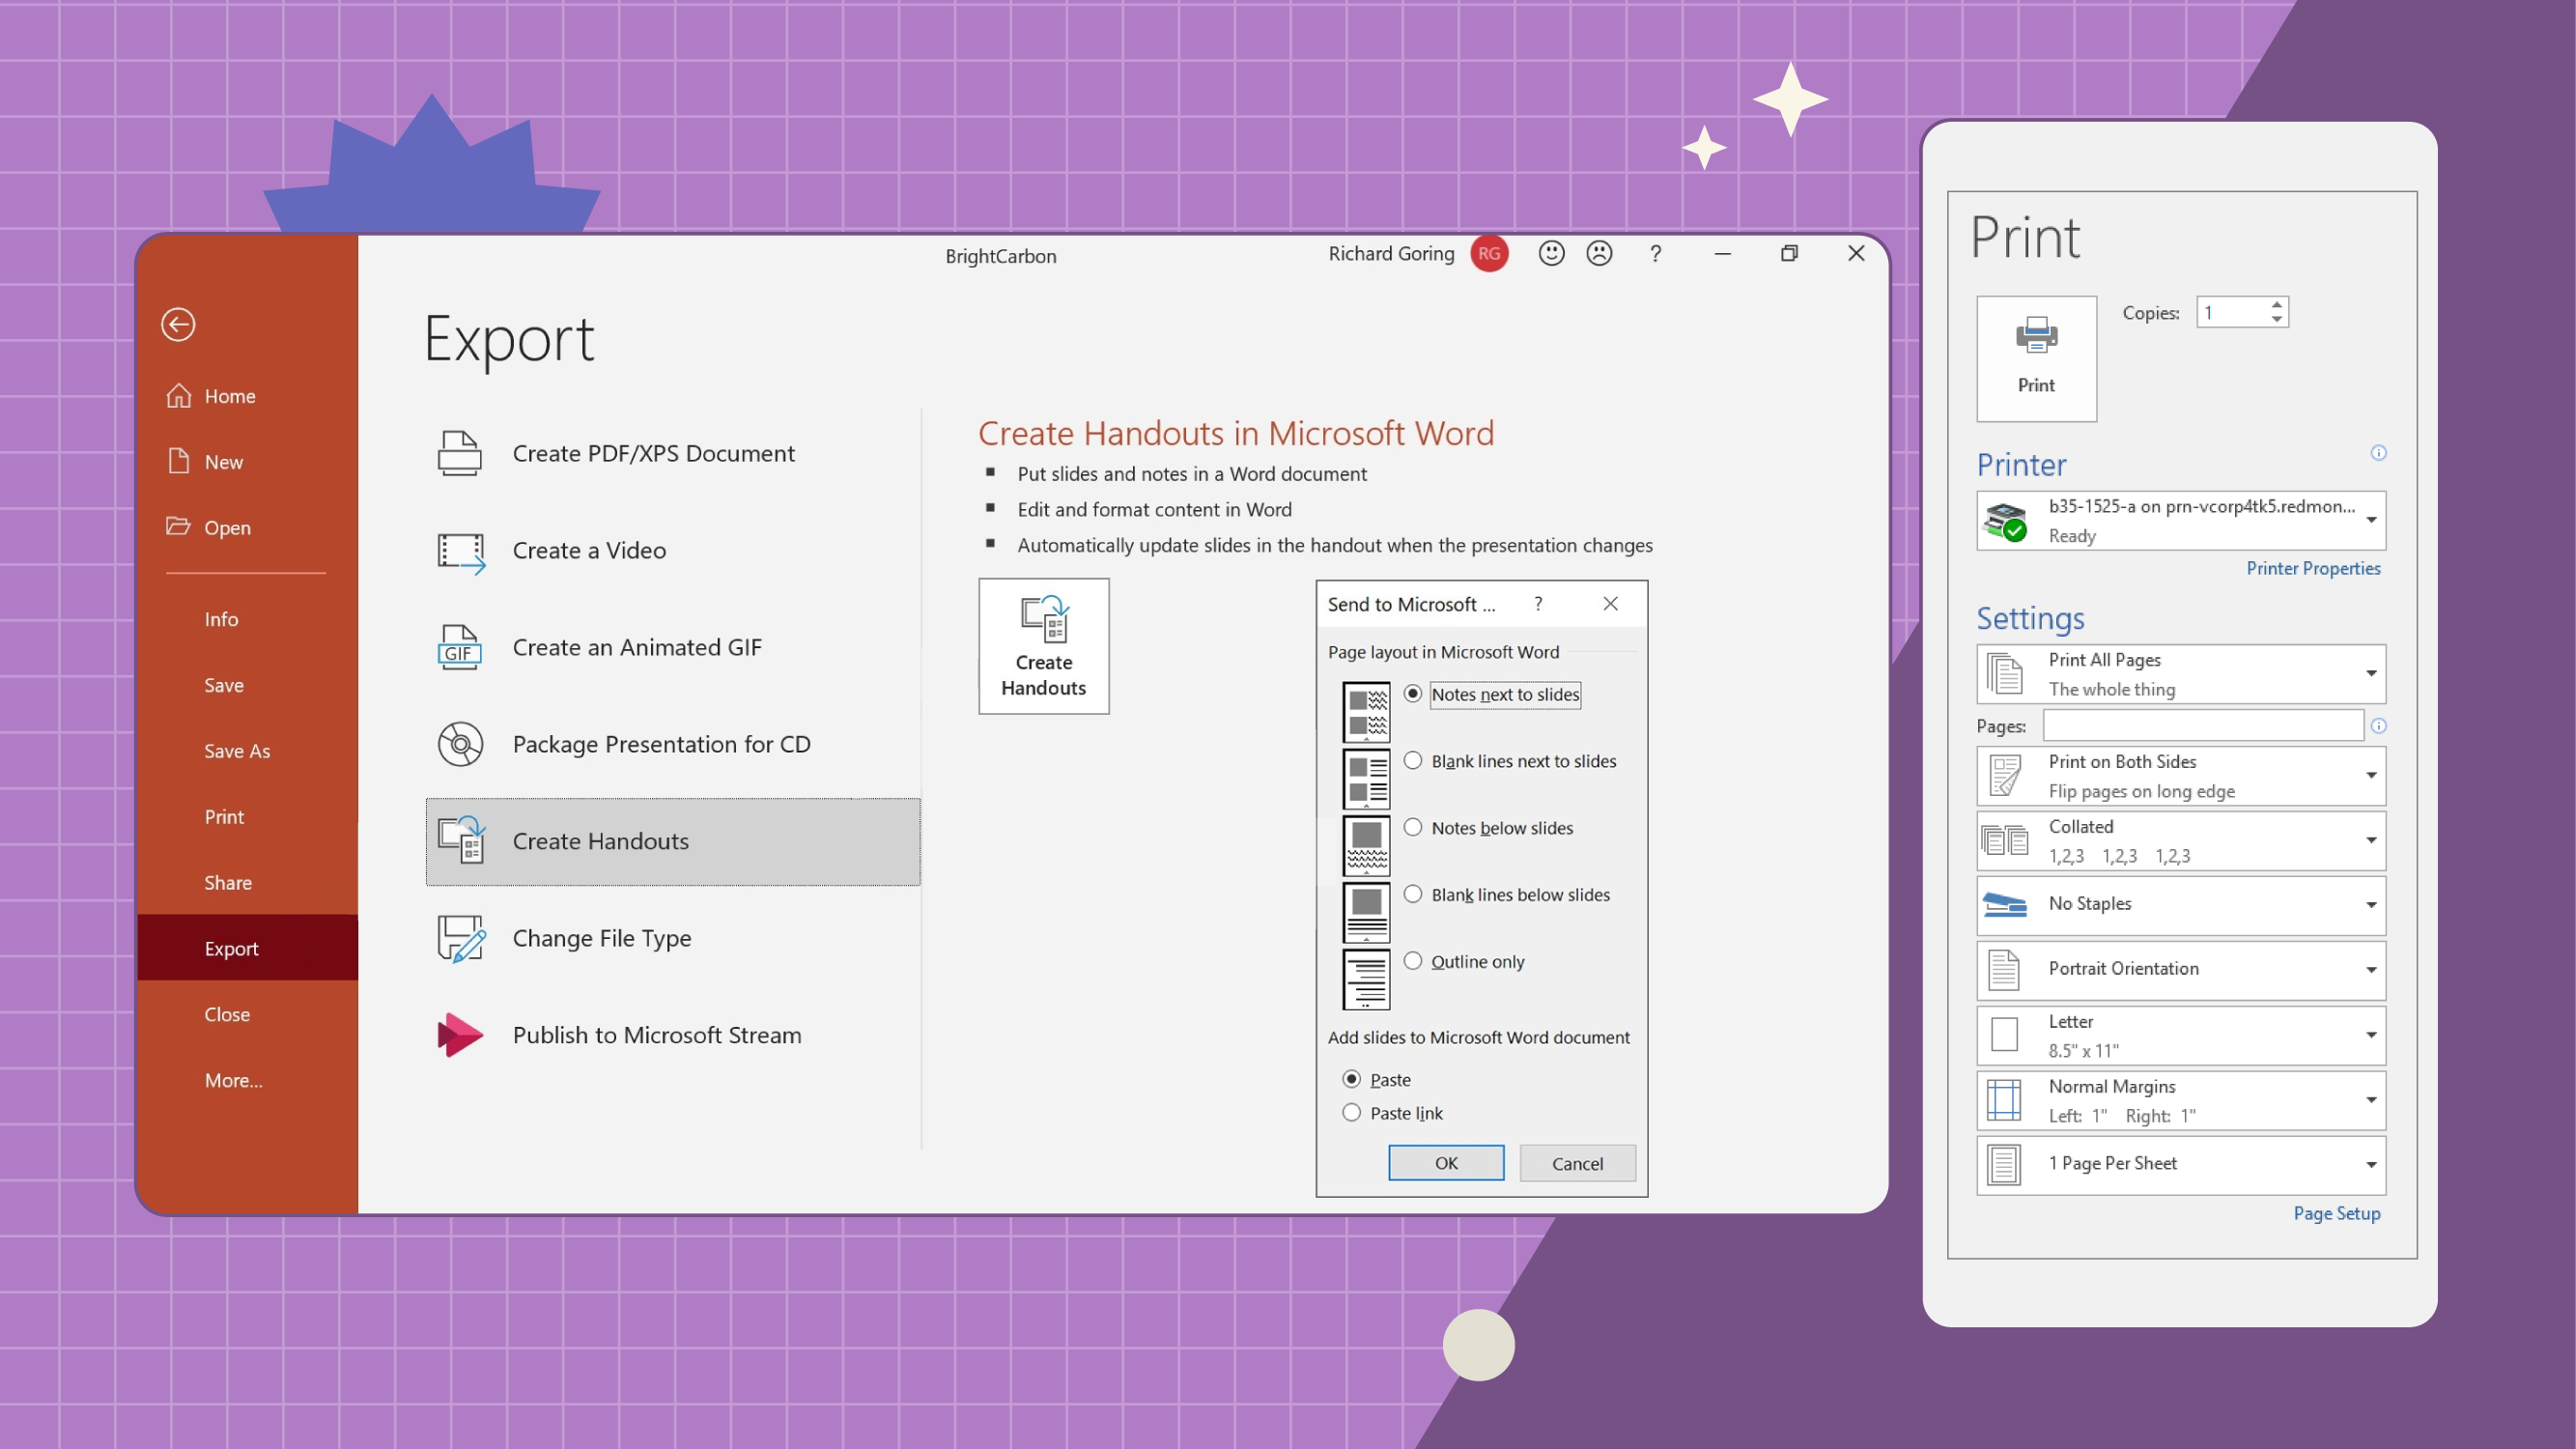
How to print a PowerPoint using Word
If you want to print notes in PowerPoint by using Word, here’s how to do it if you’re working on a PC:
- Open your PowerPoint presentation that includes your speaker notes.
- Go to “File”.
- Choose “Export”.
- From the Export panel, select “Create Handouts”.
- A “Send to Microsoft Word” dialog box will pop up. Here, you can pick either “Notes Next to Slides” or “Notes Below Slides”.
- Click the “Paste” option from the same dialog box.
- Click “OK”.
- Word will automatically open the document for you. Once open, go to “File”.
- Select “Print”.
- Adjust the printing settings as needed.
- Finally, hit “Print” to get your document with notes ready.

Conclusion
Everyone has their unique style when it comes to giving presentations. Having your speaker notes printed out is an awesome technique to keep track of the key messages you’d like to convey. You can even hand out to your audience these prints afterward so they can get further insight on your topic.
No matter which operating system you’re using, printing PowerPoint speaker notes is a pretty straightforward process. The important thing is to continually seek out new methods to elevate your presentation skills and find more dynamic and engaging ways to communicate with your audience.
Tags
Edit & FormatDo you find this article useful?
Related tutorials

New feature available: edit our templates with Canva
Whenever you need to create, Slidesgo is there. We’re continually enhancing your presentation design process with templates that are primed to impress for any occasion. And in order to let your ideas flow best, comfort is key. How could Slidesgo help you with this? By making you feel right at home with...

Discover Our Online Presentation Software for Free
We have great news for you today! If you’ve been a Slidesgo fan for years (or months, or weeks, or days, or mere hours, we welcome everyone!), you’ll probably know for now that our templates are available mostly in two formats: for use in Google Slides and PowerPoint.Google Slides is a...

Webinar: Presentation Audit
With more than 15,000 templates released on Slidesgo and a user base composed of millions of people, we estimate that the total number of presentations created adds up to… um, a lot! Our team of professional designers work very hard to provide you with editable slides so that the only thing...

How to Change Slides Orientation in Google Slides
A change of perspective is always good! Do you want your public to look at your slides in a new way? Changing slides orientation will do the work. In this tutorial you’re going to learn how to go from horizontal slides, to vertical ones (and vice versa!).
