How to Change the Language Settings in Google Slides

Change the display and authoring language in Google slides following the steps of this tutorial. It is very simple, and it will only take you a few minutes to do so!
Changing the language In Google Slides
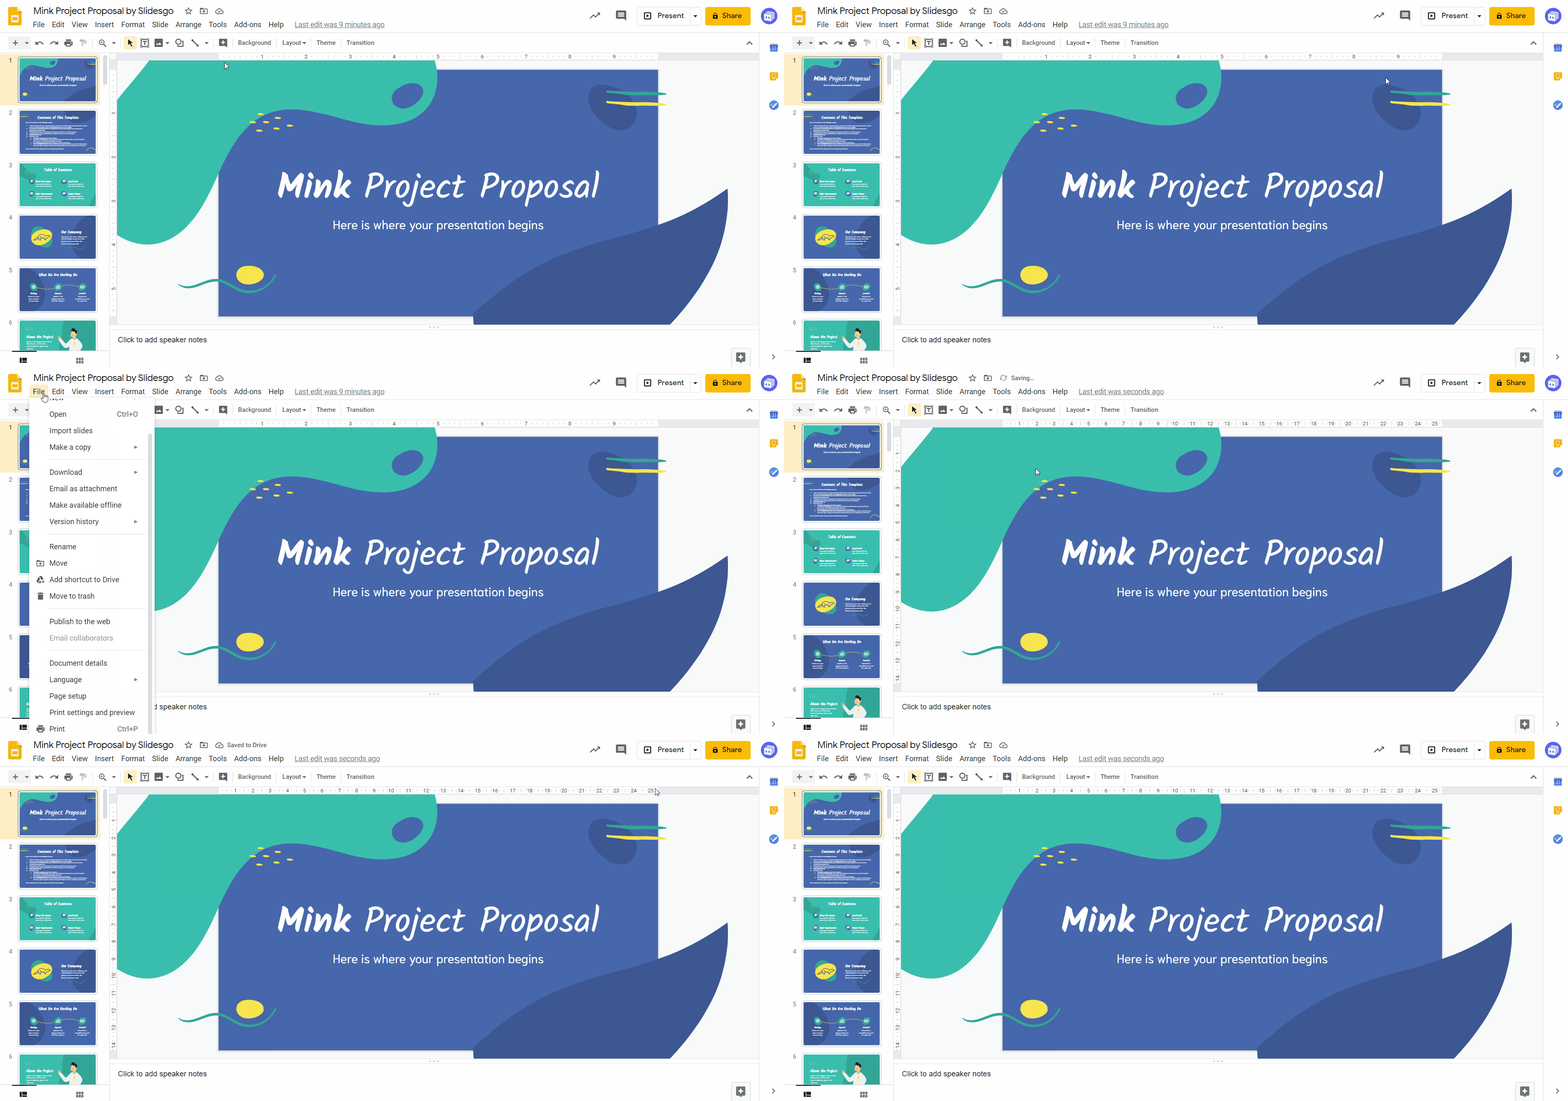
- Changing the language of your Google Slides is quite straightforward. In the toolbar, click on file → Language
- Choose any of the options.
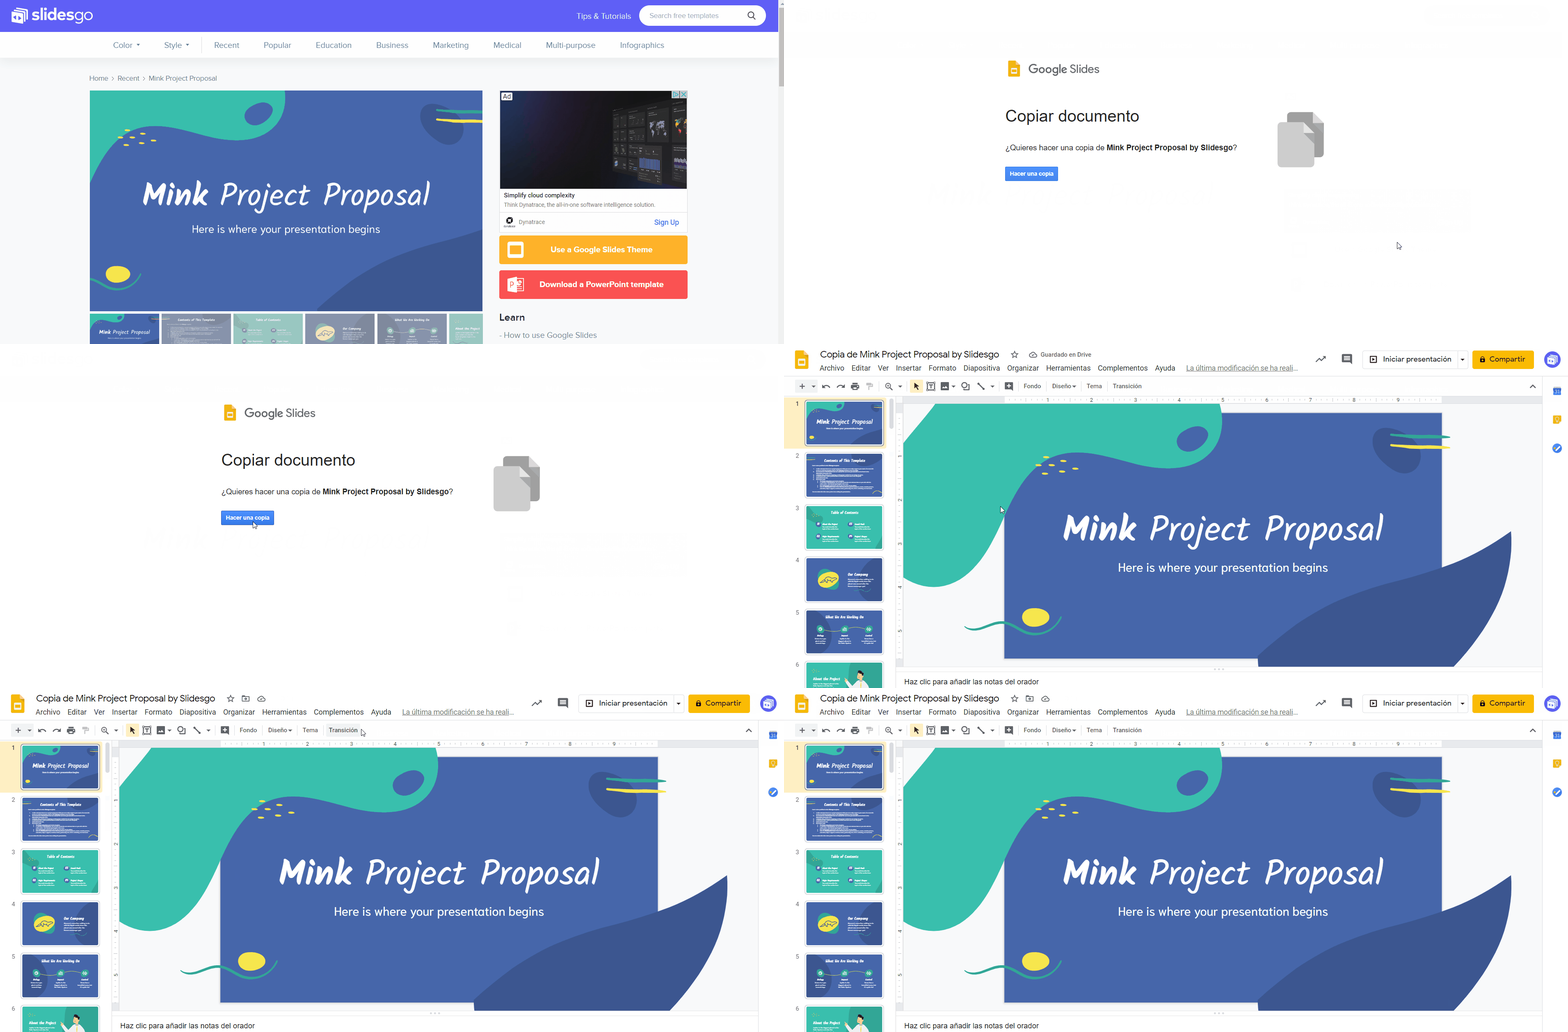
- When doing so, have a look at the rulers: they change depending on the language. In this example, we change from English (USA) to Spanish, so the upper inches will become centimeters. This is pretty important for designers, as measures play an important role when working with margins.

Changing the language of your Google Account
- Make sure that you have an account linked to Google. Otherwise, you won’t be able to access Google Slides.
- The first step is to access your Google Account. You can click on the link or follow the next steps.
- On the top-right corner, there is a bubble with your avatar. Click on it → Manage your Google Account.
- There is a menu to your left. Click on Data & Personalization.
- Scroll down until you reach General preferences for the web → Language.
- Click on the pencil icon close of the Default Language section.
- Choose an option from the list → Select.
- Click on your country → Select.
- Done!

- Now, if you open a Google Slides template, it will display the tongue that you have just selected.

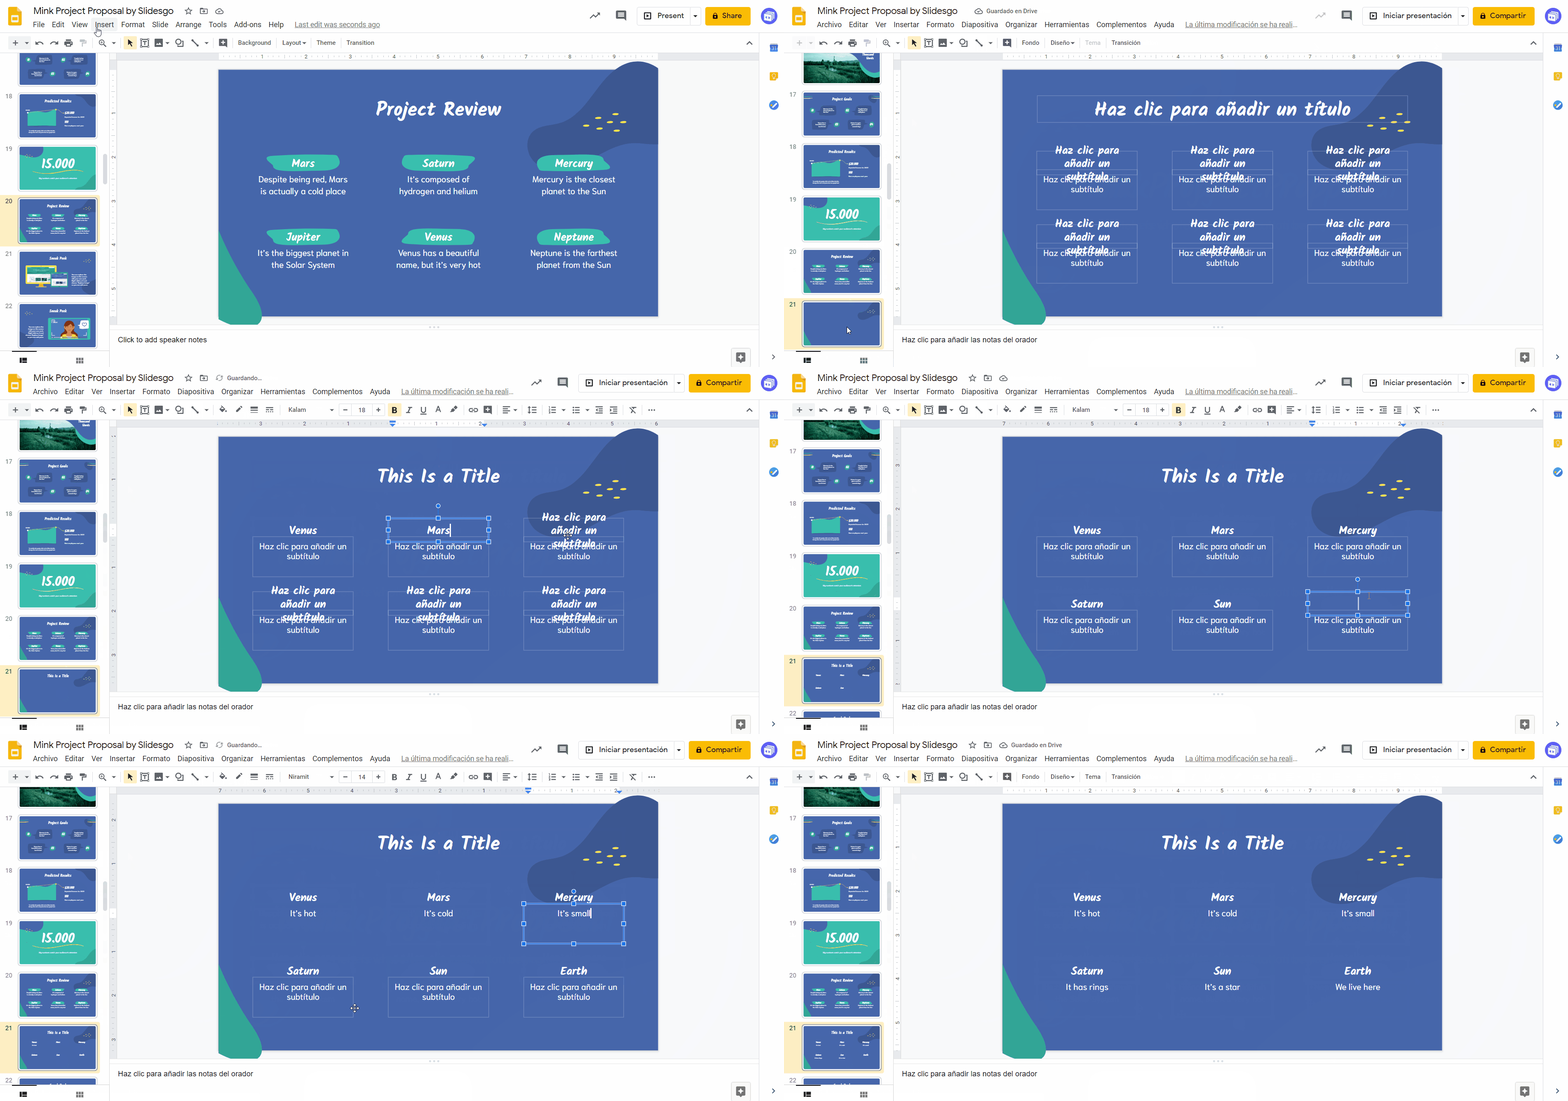
Pro Tip: if you insert a new slide, it will display some pieces of text known as markers. If you select another display language, they change as well. That’s pretty useful to know the required text length for a given piece of text.
- Click on Insert → New Slide.
- To change the tongue, you have two options: change if from your Google Account or from Google Slides. In this case, in the toolbar, go to File → Language → select one from the list.

Adding a new language to your Google Account
Do you want to add another tongue to your account? No problem. It is as simple as in the previous block:
- Go to your Google Account → Data and personalization → Language.
- Click on + Add another language.
- Choose an option from the list → Select → Click on your country → Select.
- Once that you add a new tongue, you can make it the default one. In the section Other languages you understand, there is an arrow. Click on it and you’ll modify the default tongue instantly.

Issues when changing the language
Are you facing some problems when trying to change the language in Google Slides? If the chosen tongue doesn’t display, try doing this:
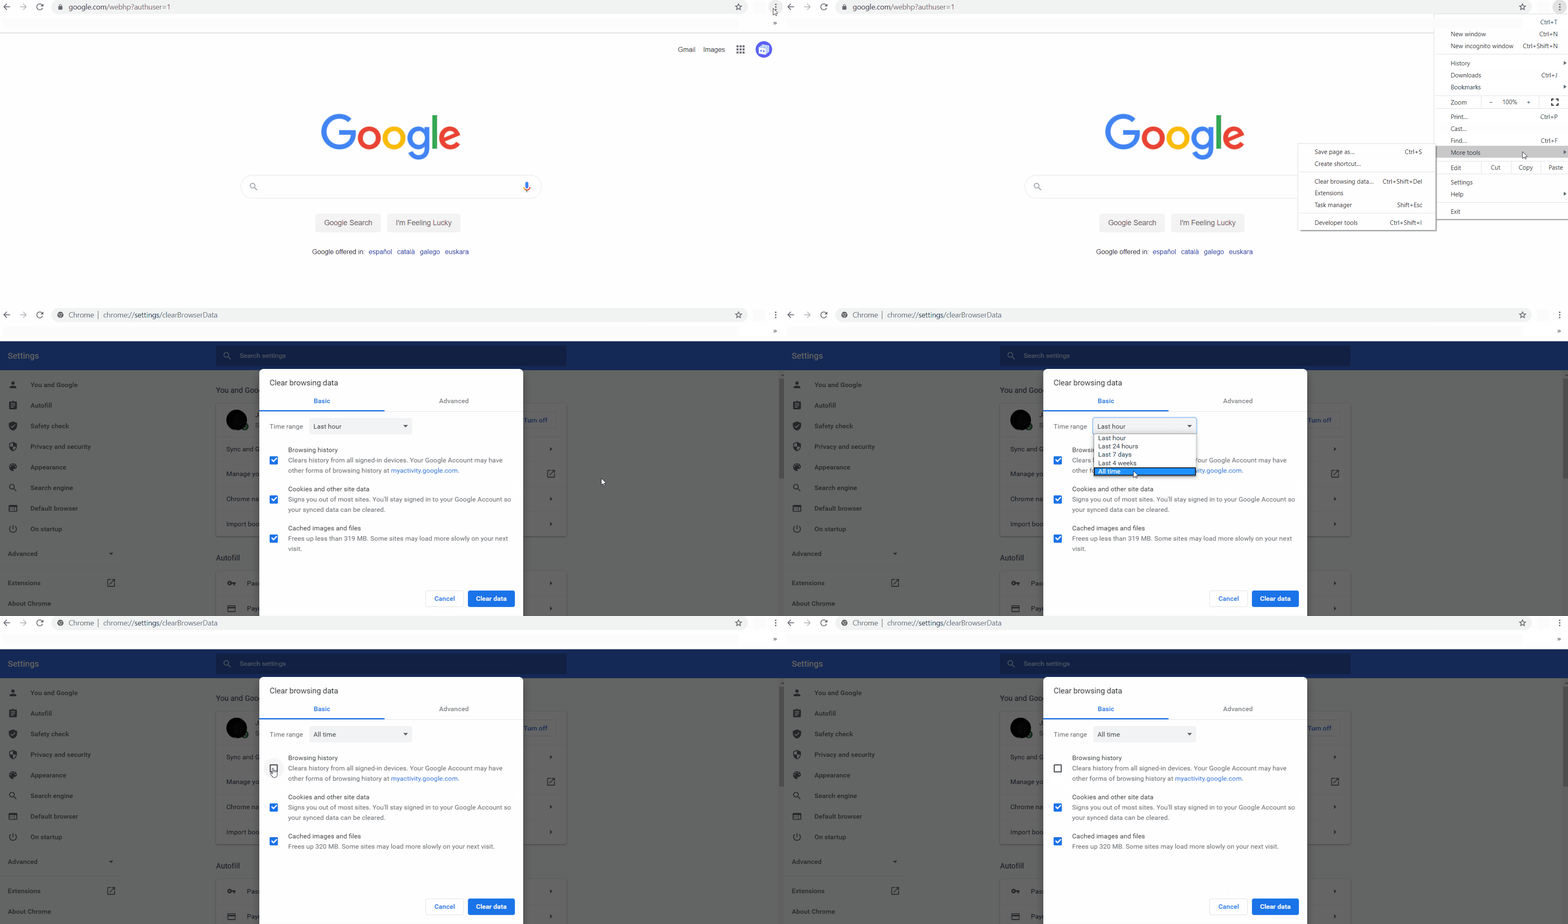
- Open Google Chrome.
- In the top-right corner, click on More.
- Then, select More Tools → Clear Browsing Data.
- In Time range, click on All time.
- Make sure that you select Cookies and other site data.
- Press Clear data.

- Now, go once again to Manage your Google Account.
- Click on Data & Personalization.
- Go to General preferences for the web → Language.
- Click on the pencil icon close of the Default Language.
- Choose an option → Select.
- Choose a country → Select.
- You are ready to go!

You have just finished and your account is ready to open any Google Slides theme in the chosen language.
For this tutorial, we have used the Mink Project Proposal template. Give it a go, it’s super cool! If you like presentations related to tongues, have a look at our most recent themes.
Tags
BasicsDo you find this article useful?
Related tutorials

How to Personalize Your Presentations with Slidesgo’s AI-Powered Tools
You’ve got the story—now make it look and sound like you. Whether you’re teaching a lesson, designing a sales pitch, or sharing your research, Slidesgo’s updated AI Presentation Maker puts more creativity and control right at your fingertips. (And we all want more control, right?).What you’ll find here:New personalization features make it...

How to Write a Great AI Prompt
Our tools are built to be simple and easy to use (though, honestly, there's a lot happening behind the scenes). Have you ever struggled with an empty text box?:Condensing all your ideas and goals into a single prompt can feel overwhelming. But don’t worry—there are a few simple tricks that can...

How to Download Google Slides Templates
When preparing a presentation, many people start panicking because they realize how much time it will take to edit each and every slide. Creating them from scratch, filling them in, looking for pictures, moving the elements...How stressful! But there is a solution that saves you a lot of time. We're...

Discover our collection of printable templates
With the advance of technology, printing has become something that is no longer a necessity. Smartphones have made the paper format less and less frequent, but there are still certain cases in which having physical resources is much more convenient. Whether it's for taking notes, handing out assignments, making worksheets...
