
How to create a word cloud in Google Slides
There are many ways to improve your Google Slides presentation. From choosing the right font to finding the right template, good presentations keep an audience engaged and convey a message in a clear way.
Knowing how to visualize data in a slideshow is one of those actions that have a huge impact on the success of a presentation. At the end of the day, plain data fails to motivate decisions as effectively as clear insights do. This is when powerful visual tools like word clouds step in. Let us tell you all about them.
What is a word cloud?
Imagine you only have a few seconds to deliver the key concepts of a long text to an audience. Well, that’s how word clouds came to be.
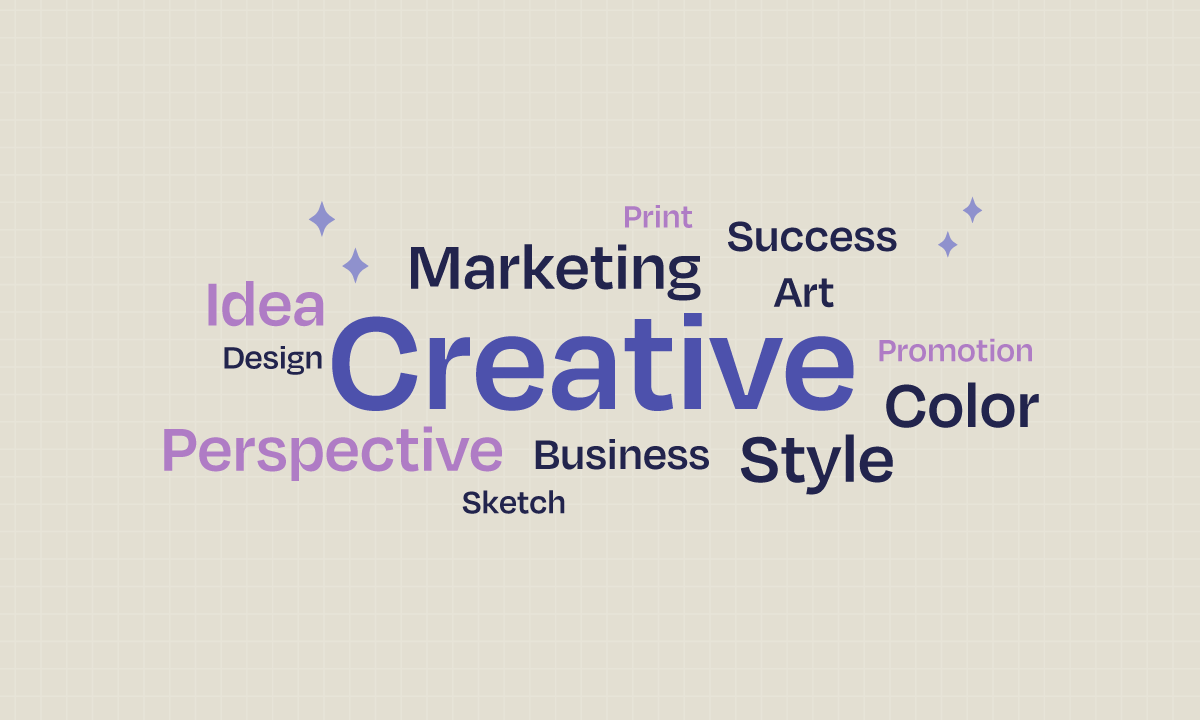
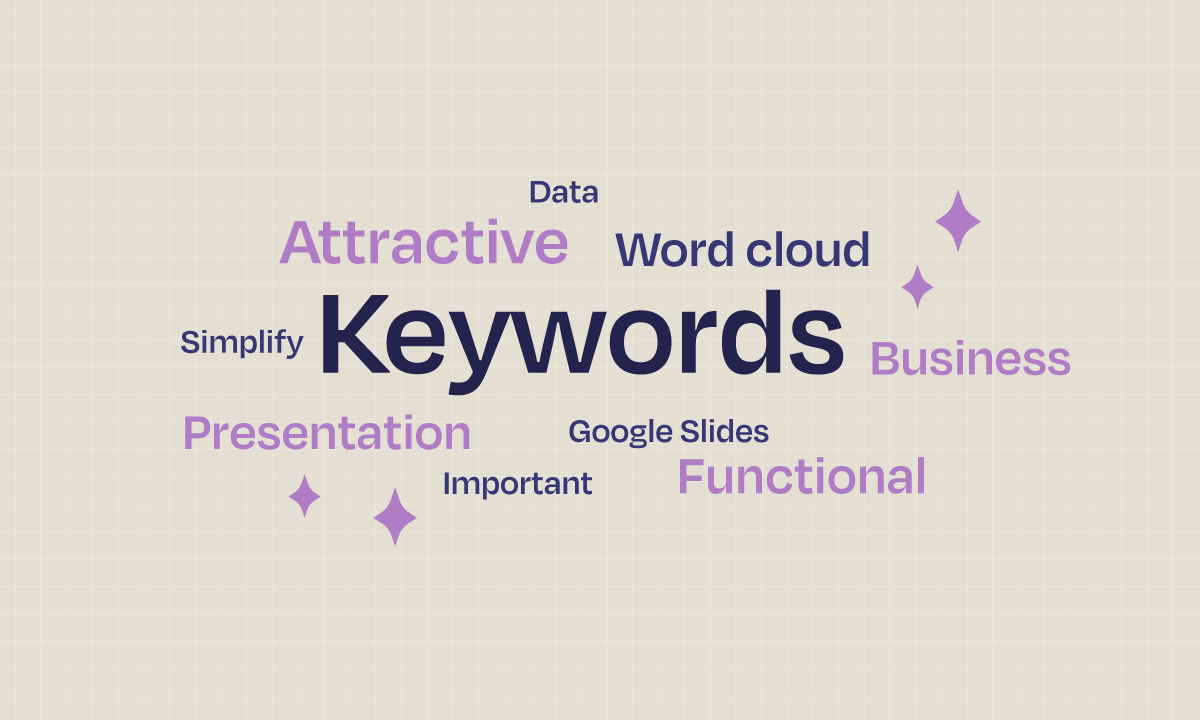
Word clouds serve as a visually captivating method for displaying the most frequent words within a text. This means that the more a word is featured, the bigger it will be.
Some benefits of using word clouds in your presentation
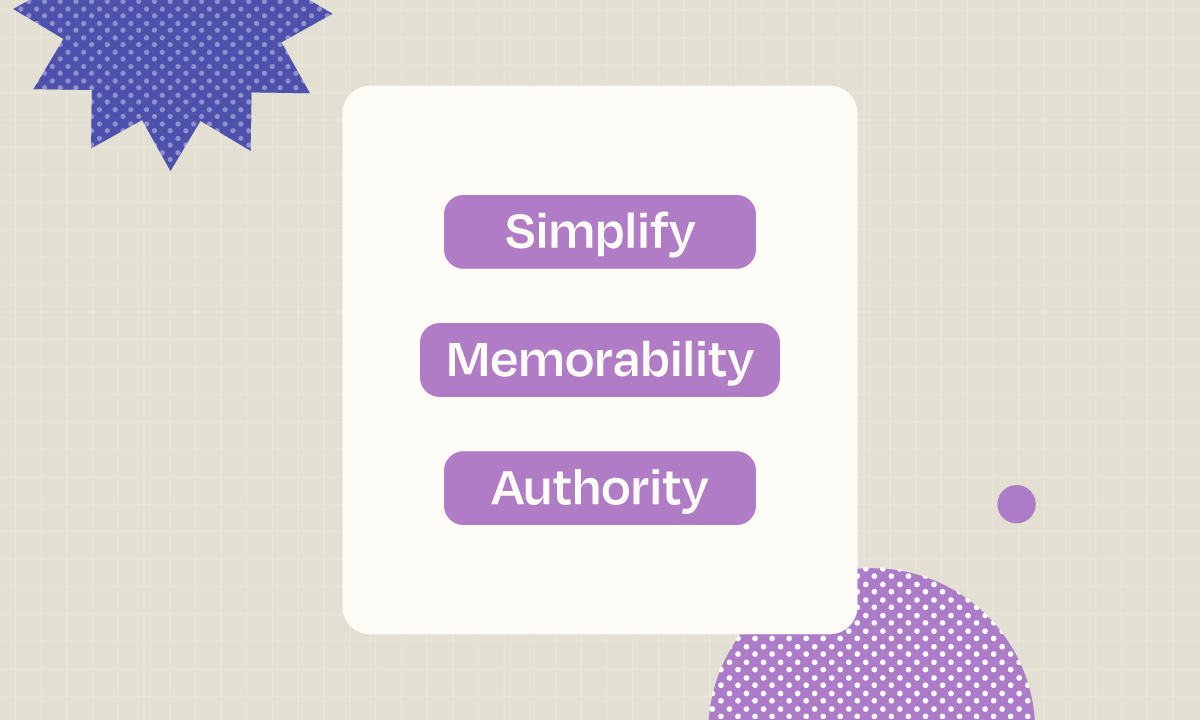
As we already mentioned, word clouds can communicate the essence of a large text with a quick glance. However, the right usage of this tool can have other advantages:
- Simplify: word clouds can break down complex data into an easy-to-understand image.
- Memorability: it’s a proven fact that a visually appealing presentation is more likely to be registered and remembered.
- Authority: showing solid proof of the key points of a particular topic encourages an audience to take your arguments more seriously.
A great thing about this tool? You can tweak your word cloud to get your point across to your audience more effectively.
What types of words can you use to create your word cloud?
After you’ve inputted your text into a word cloud generator and obtained the final graphic, you’re likely to notice a few words that aren’t very relevant.
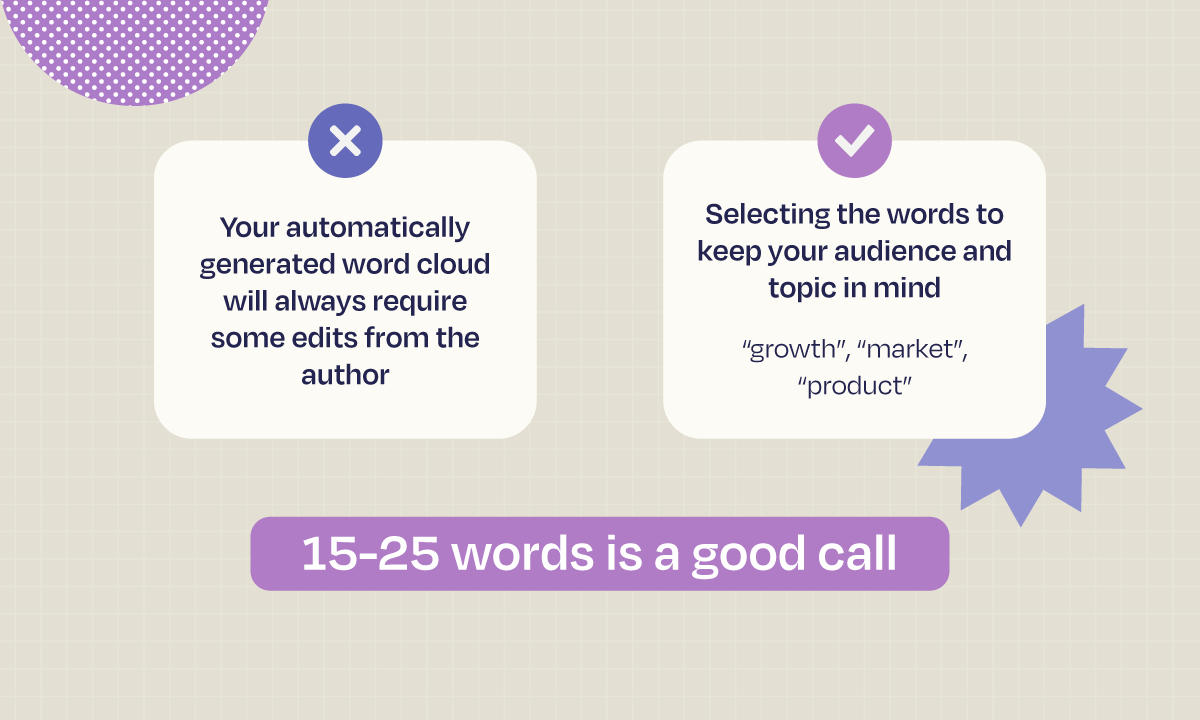
When it comes to word cloud generators, it’s important to remember that your automatically generated word cloud will always require some edits from the author.
Another thing to consider is to keep both your audience and your subject in mind when choosing the words for your cloud. For example, if you’re working on a business presentation, words such as “growth”, “market” and “product” are terms that you’d like to keep in.
Last up, consider the amount of words you’ll include in your word cloud. A number between 15–25 words is a good balance between depth and simplicity.
How to make a word cloud in Google Slides
First things first: Google Slides lacks a built-in tool for creating word clouds. However, you can easily integrate a word cloud into your slideshow by using an online word cloud generator. Just follow these two simple steps!
Step 1: Generate a word cloud with Word Art
There are plenty of online tools to build your own word cloud. Word Art will be our primary focus due to its straightforward and flexible nature.
- To get started, you need to go to WordArt.com and click on the Create button.
- Enter the title of your word cloud in the top left section.
- Click on the Import button to copy and paste your source text. You can also import words from a text file or a website.
- Make sure to keep the “remove common words”, “remove numbers” and “stemming” options selected so that only the most relevant words are considered.
- Once you’ve entered your text, click on the Import Words button, then the Visualize button. This will generate your word cloud whose shape, font, layout, and style can be customized.
- At this point, you can also delete any terms you consider irrelevant to keep your cloud as succinct as possible.
- Finally, click the Download button to get the file with your word cloud. We recommend downloading it as a Standard PNG so it can be easily included in your slideshow.
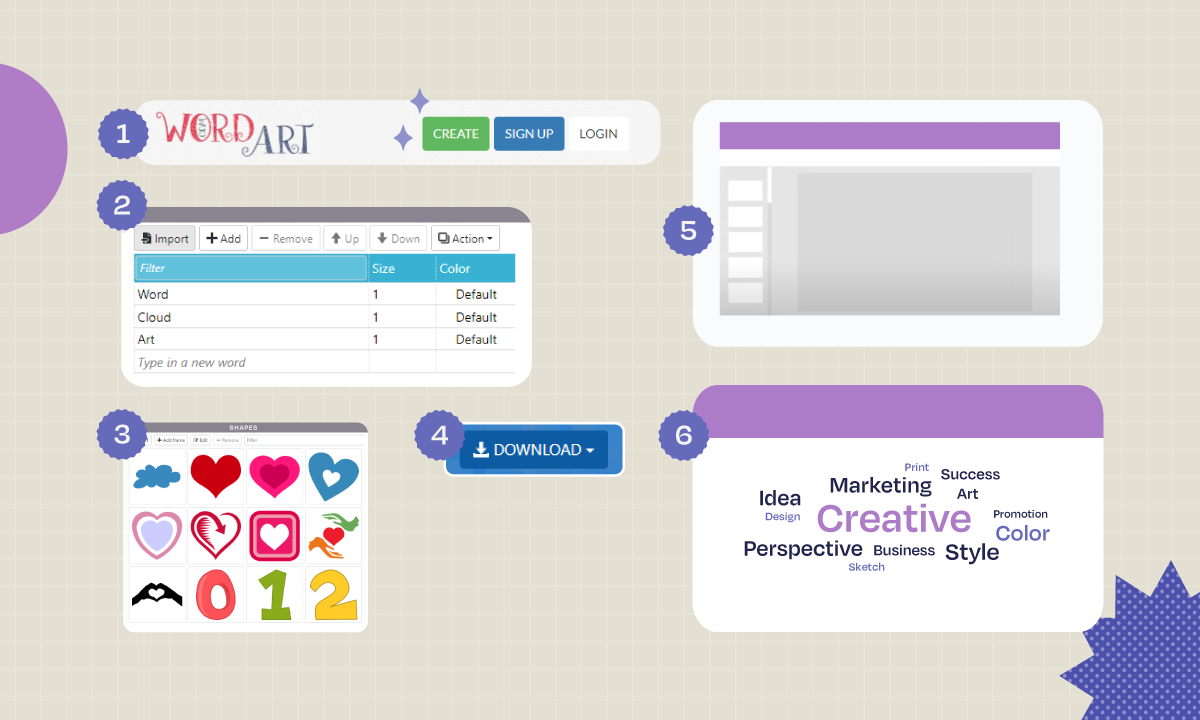
Step 2: Insert your word cloud into Google Slides
After successfully downloading your word cloud from the online tool, you’ll be able to add it to your slideshow like any other image.
- First, place yourself in the slide you want to insert your word cloud in.
- From the main menu, click Insert, then hover over Image.
- Select Upload from Computer and look for your word cloud file.
- Click Open to include your word cloud and resize it to fit your slideshow.
And just like that, your Google Slides presentation will now feature an eye-catching word cloud.
Tips to consider when creating a word cloud
Automatically-generated word clouds are amazing, but if you really want to make an impression, you should remember three essential things:
- Relevancy: the terms you include in your word cloud should be spot-on for your topic.
- Amount: The number of words you include in your word cloud counts, so avoid using too many.
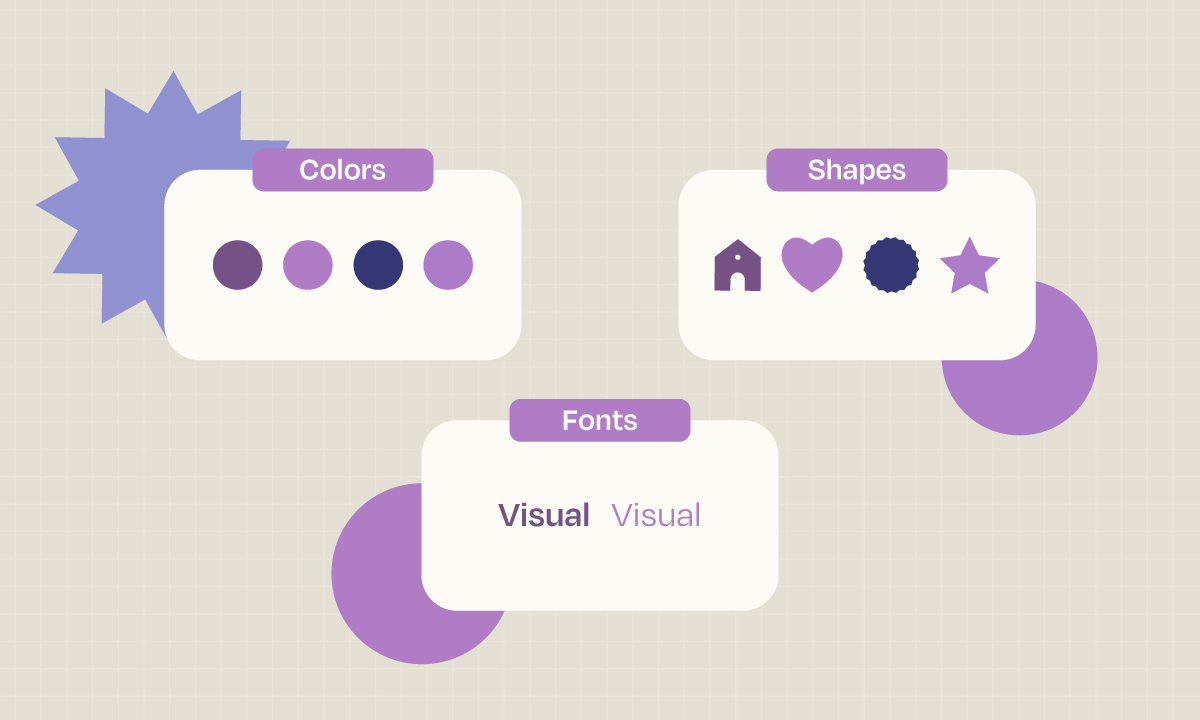
- Personalize: Customizing your word cloud’s color, font, and shape can amp up the impact of your message.
Conclusion
Translating data into easy-to-understand graphics has never been more critical. A word cloud isn’t just simple to whip up, but it’s also effective for highlighting the main points of a large text source. With the customization features that online tools such as Word Art offers, you can fine-tune your word cloud to impact your audience in an even bigger way. Don’t hesitate to include word clouds in your next Google Slides presentation, and let the data do all the talking!
Tags
Communication SkillsDo you find this article useful?
Related tutorials

Presentation Design Trends 2026: 10 Styles Shaping Your Slides
In 2026, presentations are no longer just visual support tools—they’re becoming clear, human, and emotionally engaging experiences. Typography steps into the spotlight, shapes soften, and colors aim to restore focus on what really matters. Data and stories aren’t just shown; they’re spoken in a way that feels natural and considered.The way...

How to Personalize Your Presentations with Slidesgo’s AI-Powered Tools
You’ve got the story—now make it look and sound like you. Whether you’re teaching a lesson, designing a sales pitch, or sharing your research, Slidesgo’s updated AI Presentation Maker puts more creativity and control right at your fingertips. (And we all want more control, right?).What you’ll find here:New personalization features make it...

How to present a business plan (with tips and templates)
The aim of a good business plan is to get an external party interested in a particular business project. Whether it’s an investor or a potential partner, business plans have to be powerful enough to paint a picture and motivate action.For a long time, business projects exist only in the minds...

Lesson plan generator: AI-mazing classes that empower minds
Teaching is an art, but even the most creative educators need a little help streamlining their planning. With just 24 hours in a day, it often feels like we need days with 37 hours to get everything done. That’s where we at Slidesgo come in, tackling this issue head-on and developing a practical,...