
How to Format the Text in PowerPoint
Most if not all presentations need words, since it’s one of the most representative ways of communication. Text is an indispensable element, so you should know all there is to make it appealing and useful for your audience. In this Slidesgo School tutorial, you’ll learn how to format your text in PowerPoint step by step. We’ll also talk about the Format Painter option.
Formatting the Text
- Open your presentation in PowerPoint.
- Select the text you want to modify.
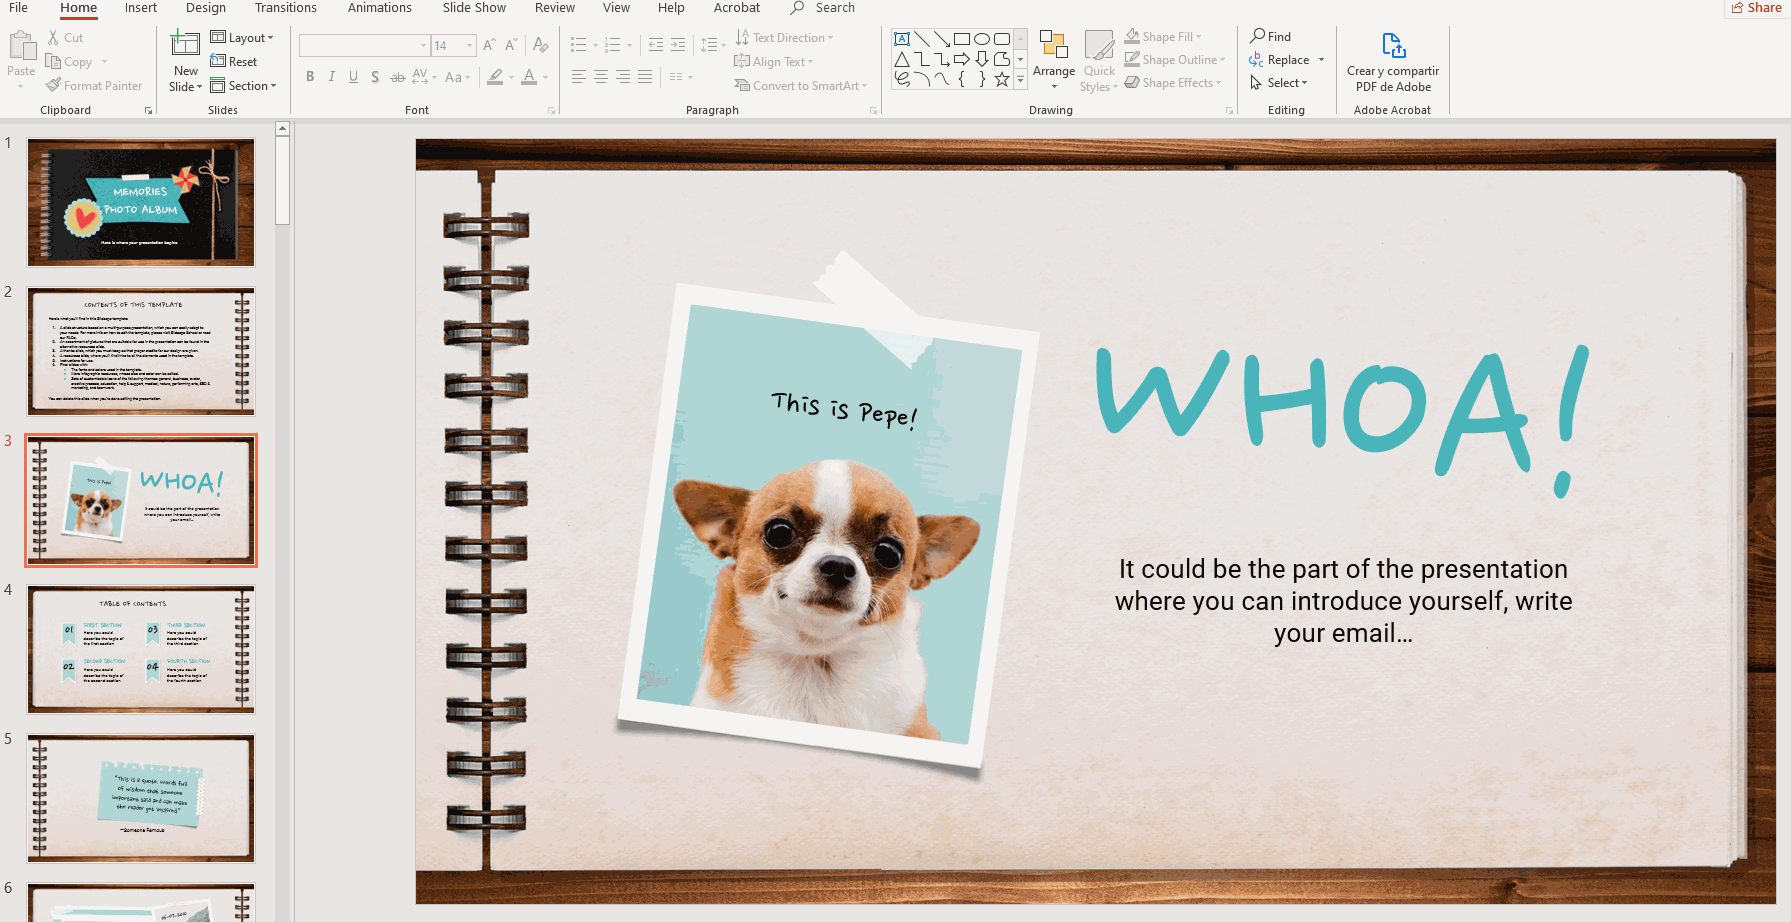
- On the Home tab, in the Font group, you’ll find a lot of buttons and settings that you can use to customize and modify the text. This group contains everything related to the font and its styles.
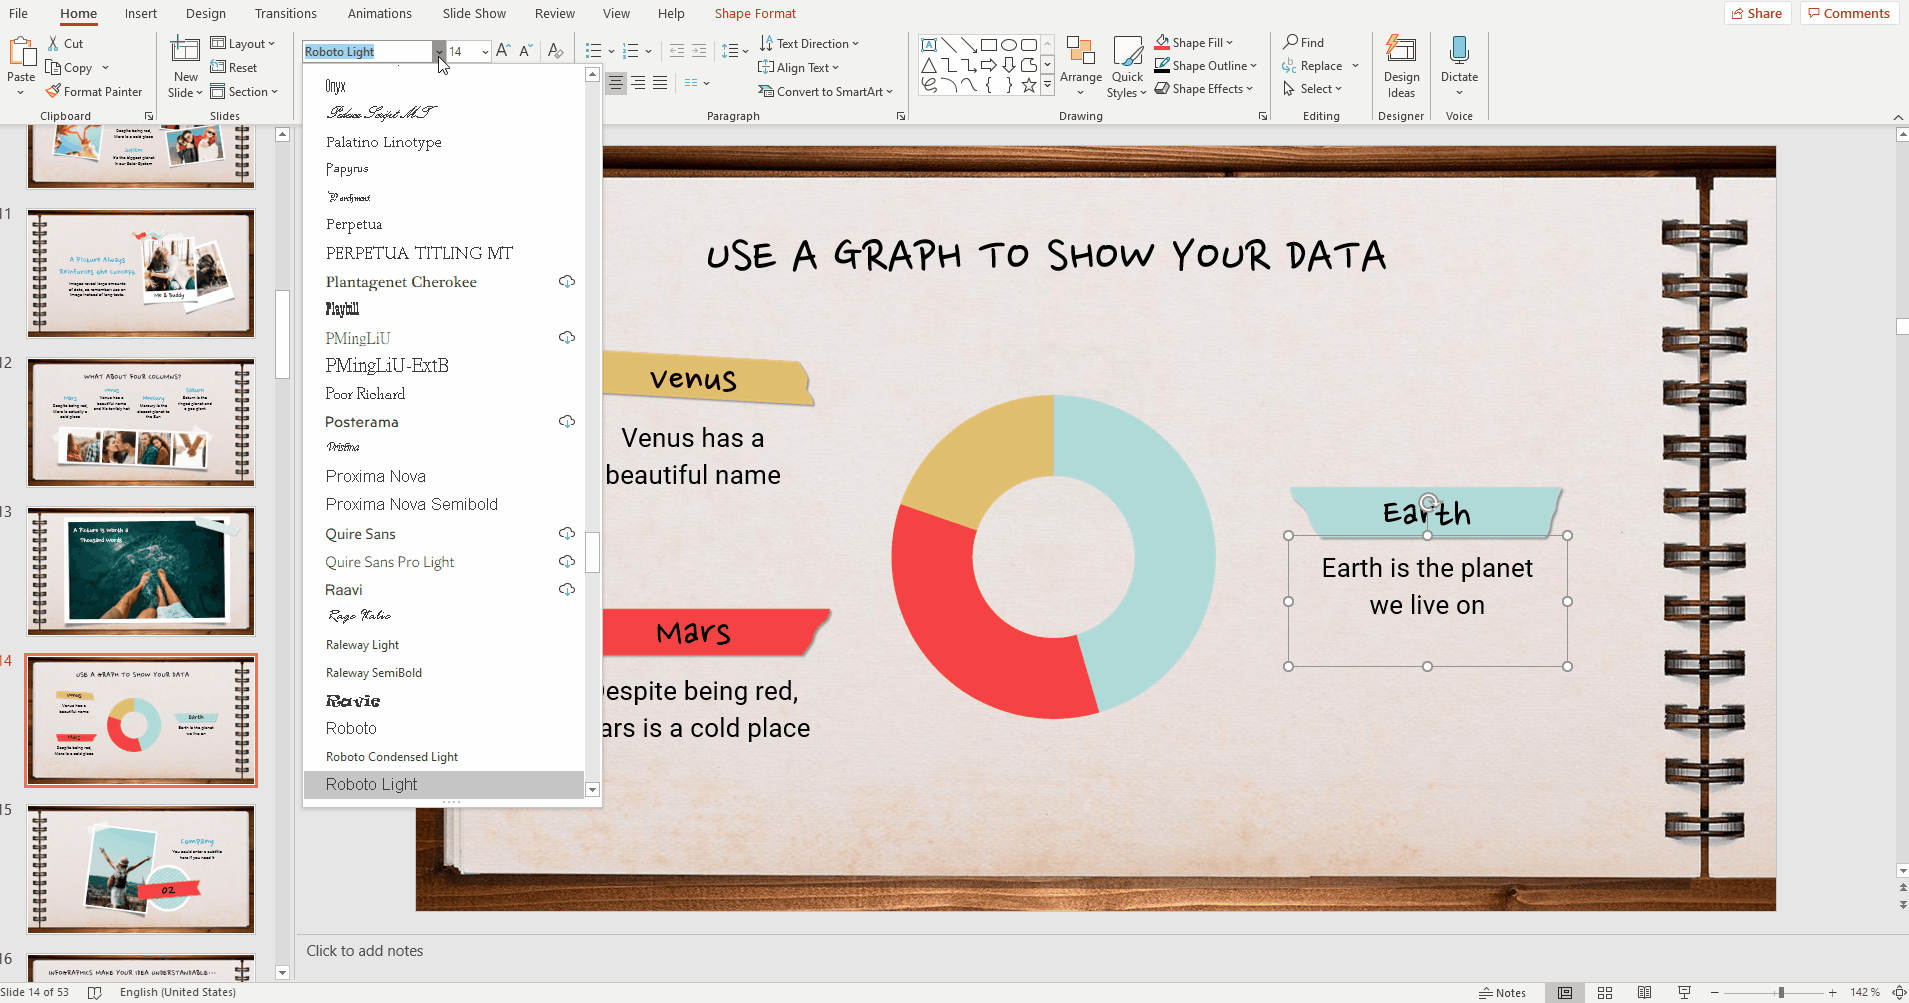
- To change the font of a text, select it and click the Font drop-down arrow. You’ll see a list of available fonts.
- Click the one you want to apply. The text will change accordingly.
- To change the size of your text, select it, click the Font Size drop-down arrow and choose the desired value.

- You can also enter your own value. To do so, click the Font Size text field (not the drop-down arrow), type the value and press Enter.

- You can also increase or decrease the font size one step at a time by clicking the Increase Font Size or Decrease Font Size buttons respectively.

- Next, we have the Bold, Italic and Underline buttons. The first one is used for emphasis. The second one makes your text lean slightly to the right. The third one draws a line under your text, in case you want to highlight something. To apply any of these styles, select the text and click the corresponding button.

- If you click the Shadow button, you can add a shadow to your text.

- Perhaps you want to cross out some words from your text. It’s easy to do so. Select the part of the text you want to cross out and click the Strikethrough button.

- Next, we have the Text Highlight Color and Font Color buttons. As their names suggest, the first one determines the color of the highlight and the second one determines the color of the text itself. It’s easy to change any of them: select the text, click the arrow next to Text Highlight Color or Font Color and choose the desired color from the list.


- For the Font Color, if you want a different color not included on the list, you can specify your own. Click More Colors and then, on the Custom tab, enter the RGB or HSL values of your desired color.
- Finally, if you want to remove all the formatting from your text, just select it and click Clear All Formatting.

Aligning the Text
- Once you’ve entered your text, you might want to align it properly so that it looks nice on the screen. The options found in the Paragraph group will help you. There are two types of alignment:
- Horizontal align: If you click the Left Align, Center Align or Right Align buttons, you’ll align the text to the left, center or right, respectively. The last button, Justify, aligns the text so that each line has the exact same length.
- Vertical align: If you click the Top, Middle or Bottom buttons found in the Align Text drop-down menu, you’ll align the text to the top, the middle or the bottom of the text box itself, respectively.
- You might want to change how much spacing there is between the lines of a text. To do so, select the text, click the Line Spacing drop-down arrow and choose your desired value.

- You can also enter a custom value for the spacing. To do so, select the text, click the Line Spacing drop-down arrow and choose Line Spacing Options. Enter the desired values under “Spacing” and click OK.

- Lastly, you can modify the direction of the text. Just click the Text Direction drop-down arrow and choose the desired option.

Using the Format Painter
- There’s an interesting tool in PowerPoint called Format Painter. This tool allows you to copy the format of a text and apply it to another text without having to change manually all the styles and settings one by one.
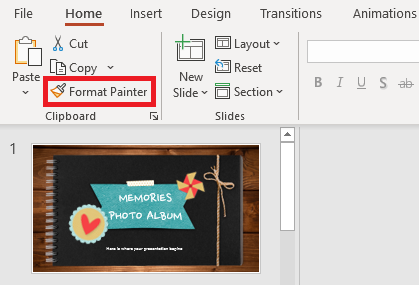
- First, select the text whose format you want to copy and then click Format Painter.
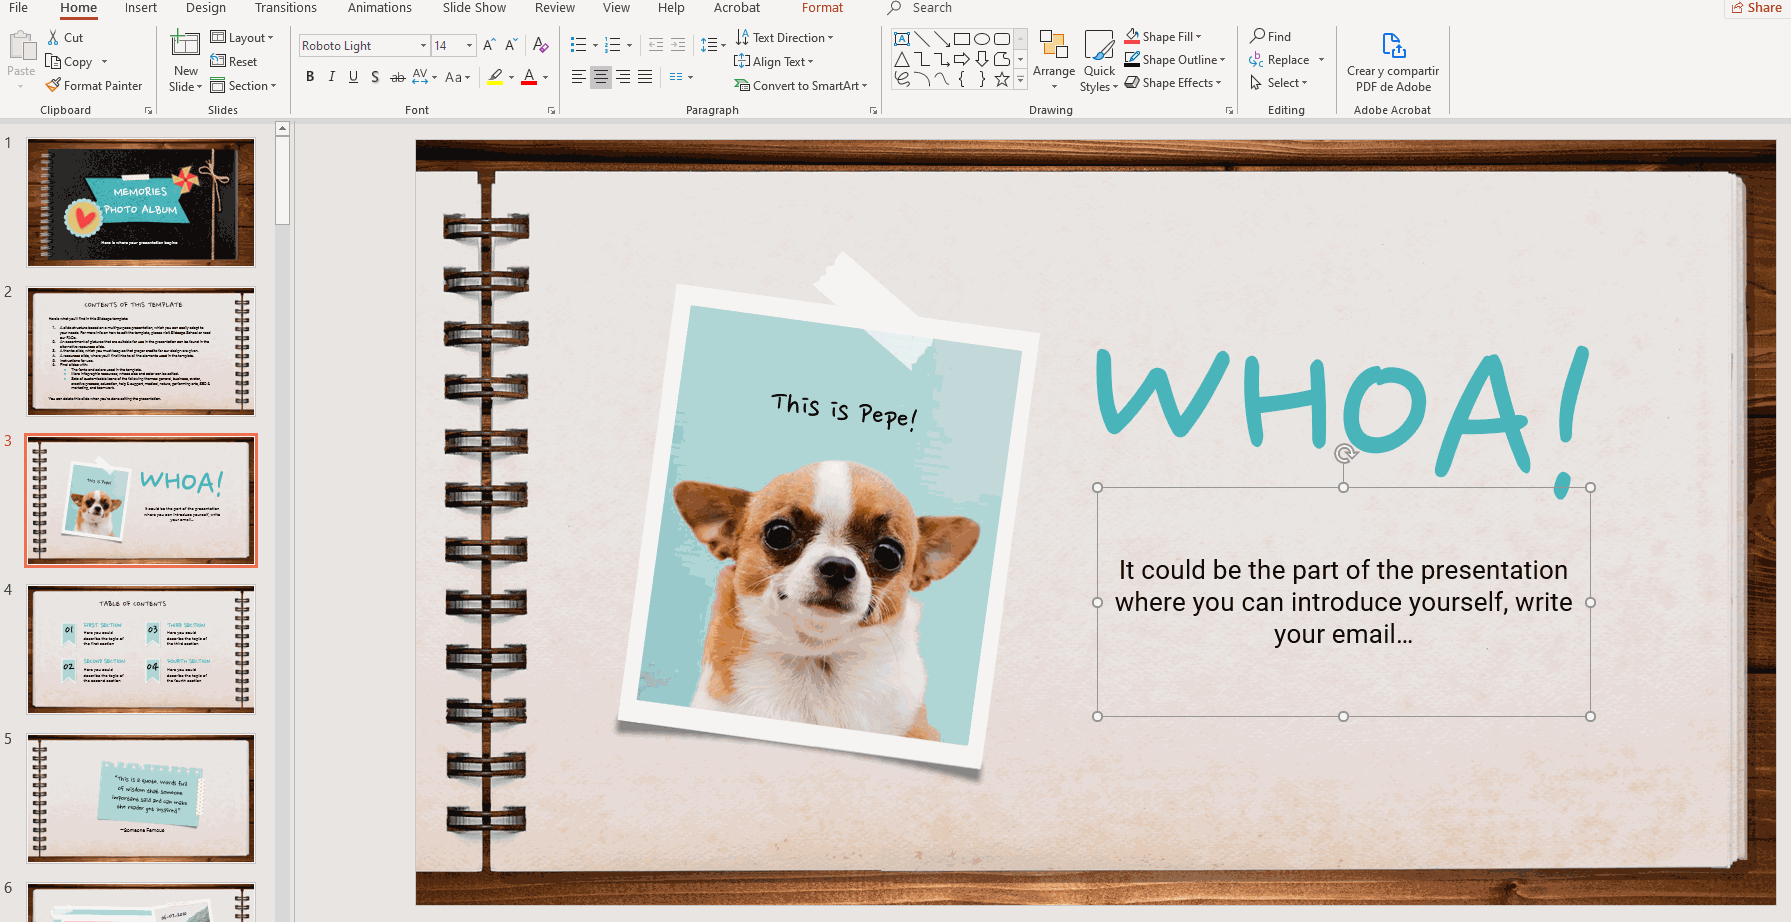
- You’ll see that a little paintbrush has appeared next to the cursor. Select the text where you want to apply the copied format. The text will automatically change.

- You can apply the copied format to multiple texts. Select the text whose format you want to copy and double-click Format Painter. After selecting any text where you want to apply the copied format, you’ll see that text has changed, but the cursor still keeps the little paintbrush next to the arrow, which means you can keep selecting other texts to apply the format.
- When you’re done, click Format Painter or just press Esc.
Tags
Edit & FormatDo you find this article useful?
Related tutorials

New feature available: edit our templates with Canva
Whenever you need to create, Slidesgo is there. We’re continually enhancing your presentation design process with templates that are primed to impress for any occasion. And in order to let your ideas flow best, comfort is key. How could Slidesgo help you with this? By making you feel right at home with...
How to print PowerPoint notes
Crafting an impactful PowerPoint slideshow and delivering a captivating presentation are distinct skills. The first focuses on designing appealing visuals to convey a clear message, while the second involves employing effective presentation techniques to ensure the audience grasps the idea. The content of this article will help you with the latter...

Discover Our Online Presentation Software for Free
We have great news for you today! If you’ve been a Slidesgo fan for years (or months, or weeks, or days, or mere hours, we welcome everyone!), you’ll probably know for now that our templates are available mostly in two formats: for use in Google Slides and PowerPoint.Google Slides is a...

Webinar: Presentation Audit
With more than 15,000 templates released on Slidesgo and a user base composed of millions of people, we estimate that the total number of presentations created adds up to… um, a lot! Our team of professional designers work very hard to provide you with editable slides so that the only thing...