
How to Arrange and Align Elements in PowerPoint
Images, icons, text boxes and shapes constitute the elements of the slides in a presentation. Keeping them properly aligned and arranged will help you grab your audience’s attention and convey your message in an effective manner. In this tutorial, we’ll teach you step by step how to arrange and align the elements in PowerPoint.
Aligning an Object
- Open your PowerPoint presentation.
- Select the object you want to align.
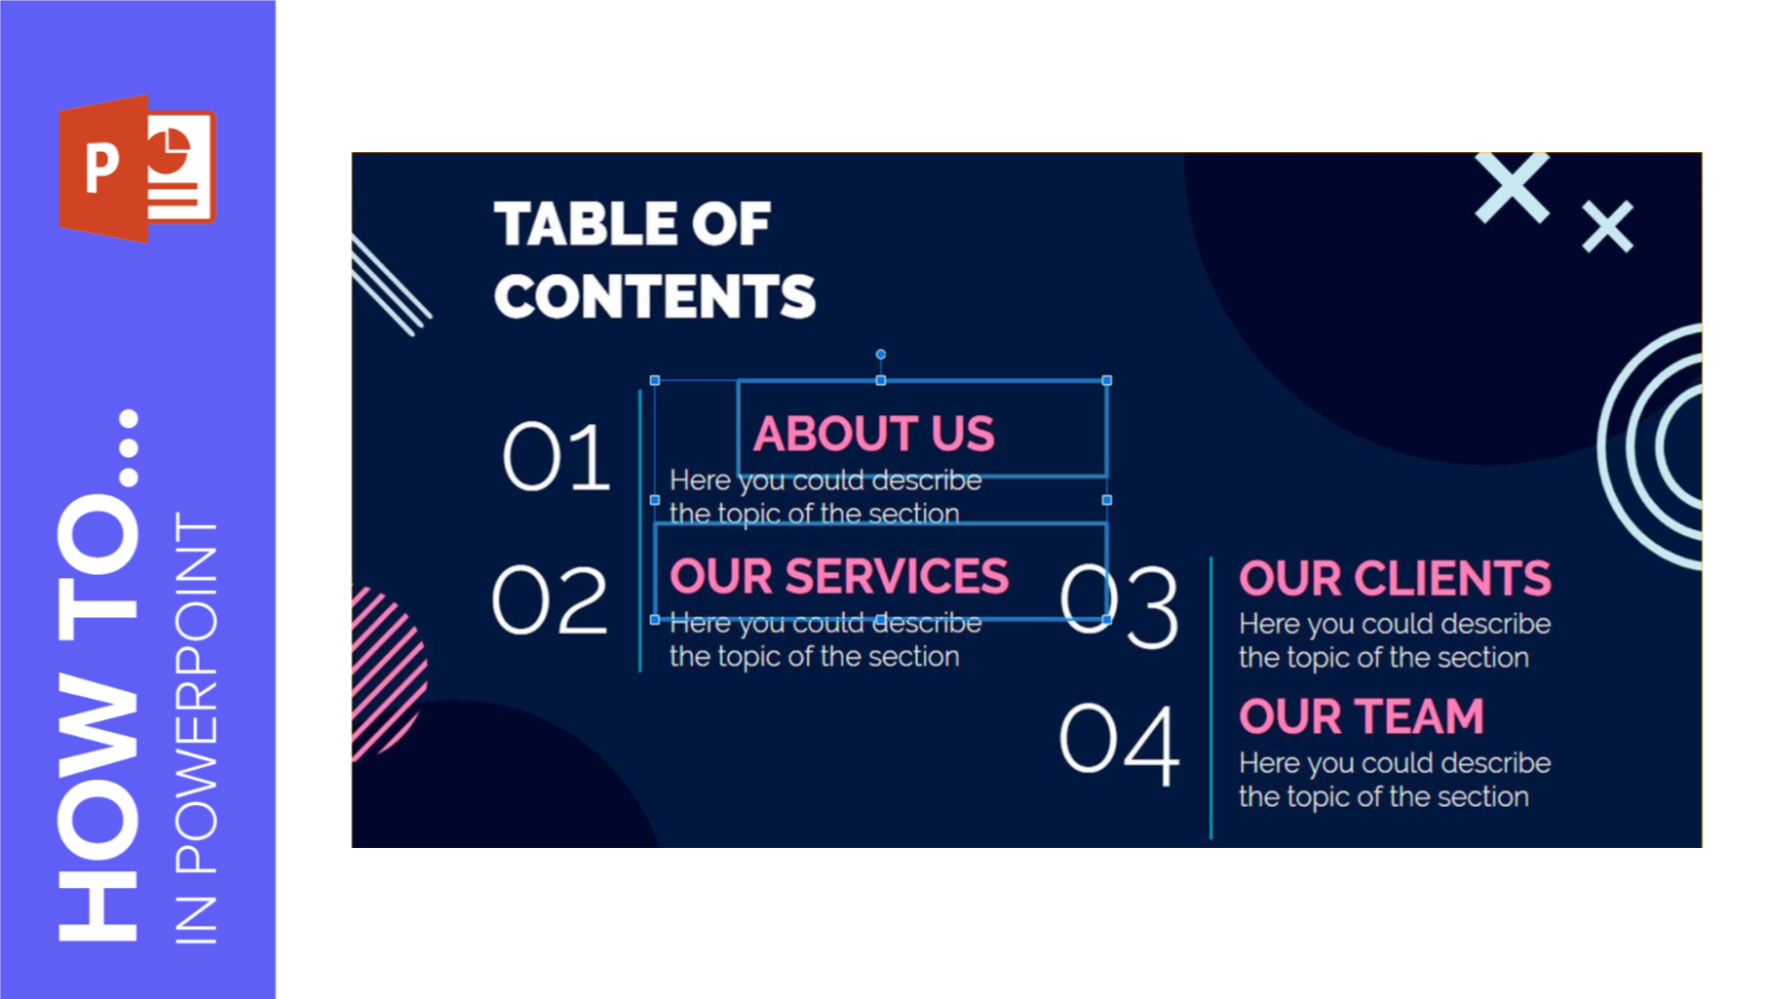
- Drag it around on the slide. You’ll see some little lines—these are the guides, which you can use as a reference to align the selected object with respect to the other elements on the slide.
Aligning Two or More Objects
- Open your PowerPoint presentation and select multiple objects. To do this, click an object, hold Shift and then click other elements to add them to the selection.

- Once you’ve selected them, go to the Home tab and click Arrange → Align → Align Selected Objects. This way, the elements will be aligned taking their own positions into account.
- Go back to Arrange → Align.
- You’ll see different options to choose from:
Align Left: The selected objects will be aligned to the left side.
Align Center: The selected objects will be vertically centered.
Align Right: The selected objects will be aligned to the right side.
Align Top: The selected objects will be aligned to the top.
Align Middle: The selected elements will be horizontally centered to the slide.
Align Bottom: The selected elements will be aligned to the bottom.

You’ll find the same options in the Align drop-down menu, which is in the Arrange group, on the Shape Format tab (please note that this tab won’t appear unless you select the objects first).

Aligning Two or More Objects to the Slide
- Open your PowerPoint presentation.
- Select multiple objects. To do so, click any object, hold Shift and then click other elements to add them to the selection.

- Once you’ve selected them, go to the Home tab and click Arrange → Align → Align to Slide.

- Go back to Arrange → Align. You’ll see different options to choose from:
Align Left: The selected objects will be aligned to the left side of the slide.

Align Center: The selected objects will be vertically centered to the slide.

Align Right: The selected objects will be aligned to the right side of the slide.
Align Top: The selected elements will be aligned to the top part of the slide.
Align Middle: The selected elements will be horizontally centered to the slide.

Align Bottom: The selected elements will be aligned to the bottom part of the slide.

You’ll find the same options in the Align drop-down menu, which is in the Arrange group, on the Shape Format tab (please note that this tab won’t appear unless you select the objects first).

Distributing Selected Objects
- Open your PowerPoint presentation and select multiple elements. To do so, hold Shift while clicking each object.
- Once you’ve selected them, go to the Home tab and click Arrange → Align → Align Selected Objects. This way, the objects will be distributed taking their own positions into account.

- Go back to Arrange → Align. If you now choose Distribute Horizontally, the selected objects will be evenly distributed horizontally.
- If you choose Distribute Vertically, the selected objects will be evenly distributed vertically.

You’ll find the same options in the Align drop-down menu, which is in the Arrange group, on the Shape Format tab (please note that this tab won’t appear unless you select the objects first).
Distributing Objects to the Slide
- Open your PowerPoint presentation.
- Select two or more elements. To do so, hold Shift while clicking each one of them.
- Once you’ve selected them, go to the Home tab and click Arrange → Align → Align to Slide. This way, the selected elements will be distributed on the entire slide.
- Go back to Arrange → Align. If you choose Distribute Horizontally, the selected objects will be evenly distributed horizontally.
- If you choose Distribute Vertically, the selected objects will be evenly distributed vertically.
- You’ll find the same options in the Align drop-down menu, which is in the Arrange group, on the Shape Format tab (please note that this tab won’t appear unless you select the objects first).
Arranging an Object
- Open your PowerPoint presentation.
- Select an object.
- Go to the Home tab and click the Arrange drop-down arrow.
- If you choose Bring to Front, the object will be placed top of the others.

- If you choose Send to Back, the selected object will be behind all the other elements.
- If you choose Bring Forward, the selected object will go up one layer, which means it will be on top of all the elements that are placed on lower levels.
- If you choose Send Backward, the selected object will go down one layer, which means it will be behind all the elements that are placed on higher levels.
You’ll find the same options in the Align drop-down menu, which is in the Arrange group, on the Shape Format tab (please note that this tab won’t appear unless you select the objects first).

Tags
Edit & FormatDo you find this article useful?
Related tutorials
New feature available: edit our templates with Canva
Whenever you need to create, Slidesgo is there. We’re continually enhancing your presentation design process with templates that are primed to impress for any occasion. And in order to let your ideas flow best, comfort is key. How could Slidesgo help you with this? By making you feel right at home with...
How to print PowerPoint notes
Crafting an impactful PowerPoint slideshow and delivering a captivating presentation are distinct skills. The first focuses on designing appealing visuals to convey a clear message, while the second involves employing effective presentation techniques to ensure the audience grasps the idea. The content of this article will help you with the latter...

Discover Our Online Presentation Software for Free
We have great news for you today! If you’ve been a Slidesgo fan for years (or months, or weeks, or days, or mere hours, we welcome everyone!), you’ll probably know for now that our templates are available mostly in two formats: for use in Google Slides and PowerPoint.Google Slides is a...

Webinar: Presentation Audit
With more than 15,000 templates released on Slidesgo and a user base composed of millions of people, we estimate that the total number of presentations created adds up to… um, a lot! Our team of professional designers work very hard to provide you with editable slides so that the only thing...