How to insert a 3D model in PowerPoint

When we talk about 3D, we refer to three-dimensional objects, that is, objects that have three dimensions: length, width, and height. Humans see the world around us in 3D, as we can perceive the length, width, and height of all the objects around us.
Of course, 3D objects can also be found in graphic design. What's more, we can include 3D resources in our PowerPoint presentations to give them an original, but, above all, realistic touch.
So, in this post, we are going to tell you how to insert 3D resources in PowerPoint to make your presentations unique. Don't worry, you won't need the famous red and blue 3D glasses to read this information! Here we go!

Although we would love to have the ability to edit and insert 3D resources in Google Slides, at the moment it is only possible in PowerPoint. If you want to share your presentation or have it in the cloud, you can first edit it in PowerPoint and when you are done, upload it to Google Drive.
Here are some techniques for editing and using 3D resources in PowerPoint. Take note because let's get started!
How to insert stock 3D models in PowerPoint
PowerPoint offers quite a large amount of stock 3D models as you can find all kinds of elements, from simple geometric shapes to elements of any category and theme such as animals, furniture, avatars, dinosaurs, food and drinks, flowers and plants, sports, and many more. You can also find models with animations.
The procedure for inserting resources is very simple:
- Insert > 3D Models > Insert 3D model from... > Stock 3D models.
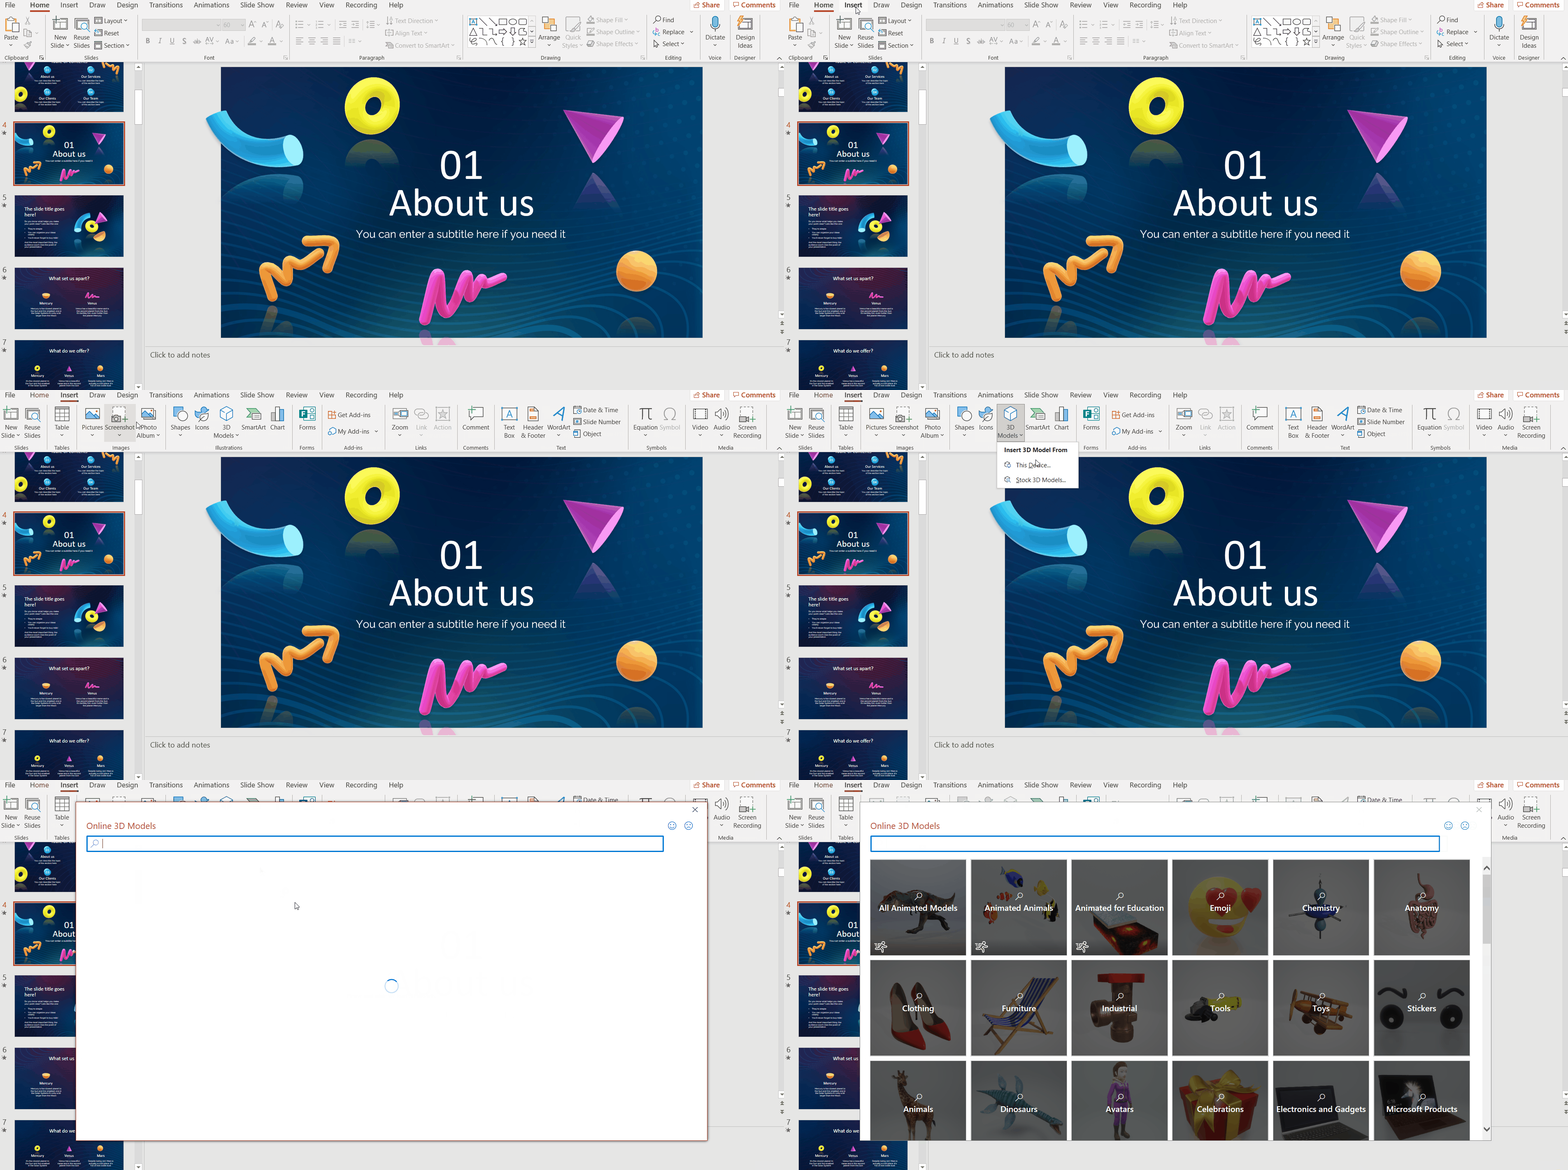
- Finally, choose the model you want. As we have mentioned, there is a wide variety of models, some of them animated, you just have to select the one that best suits the content of your presentation.
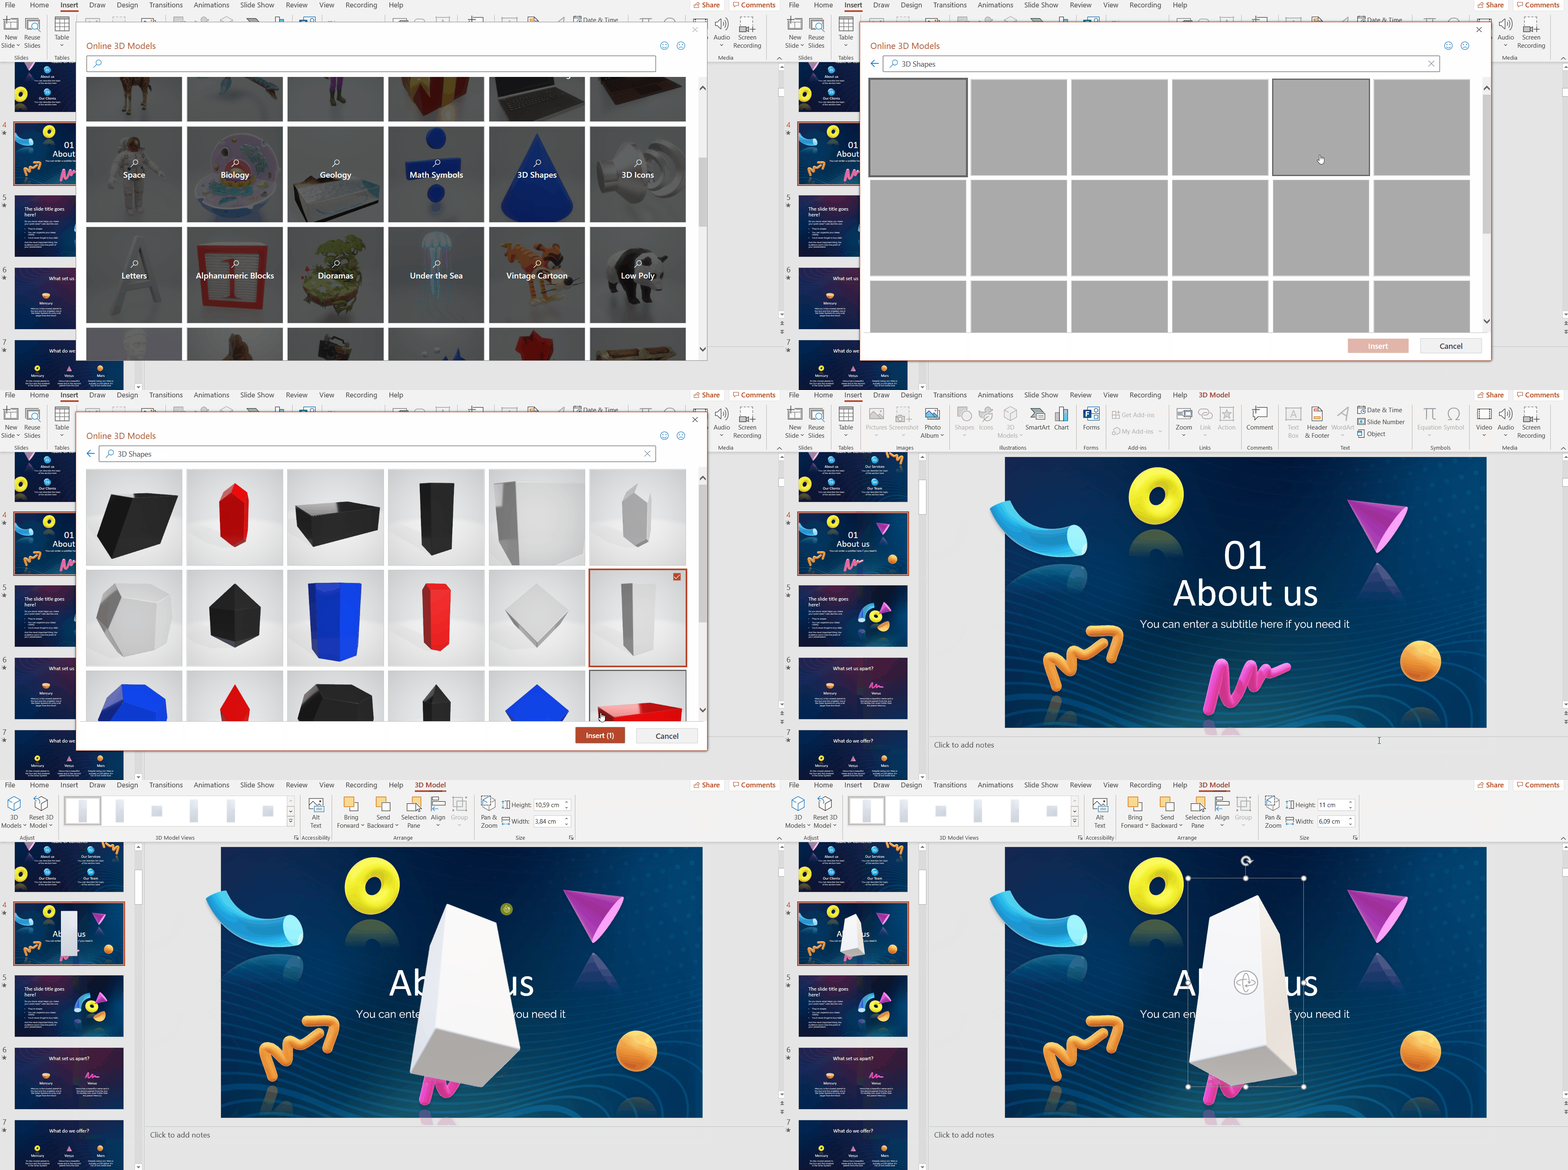
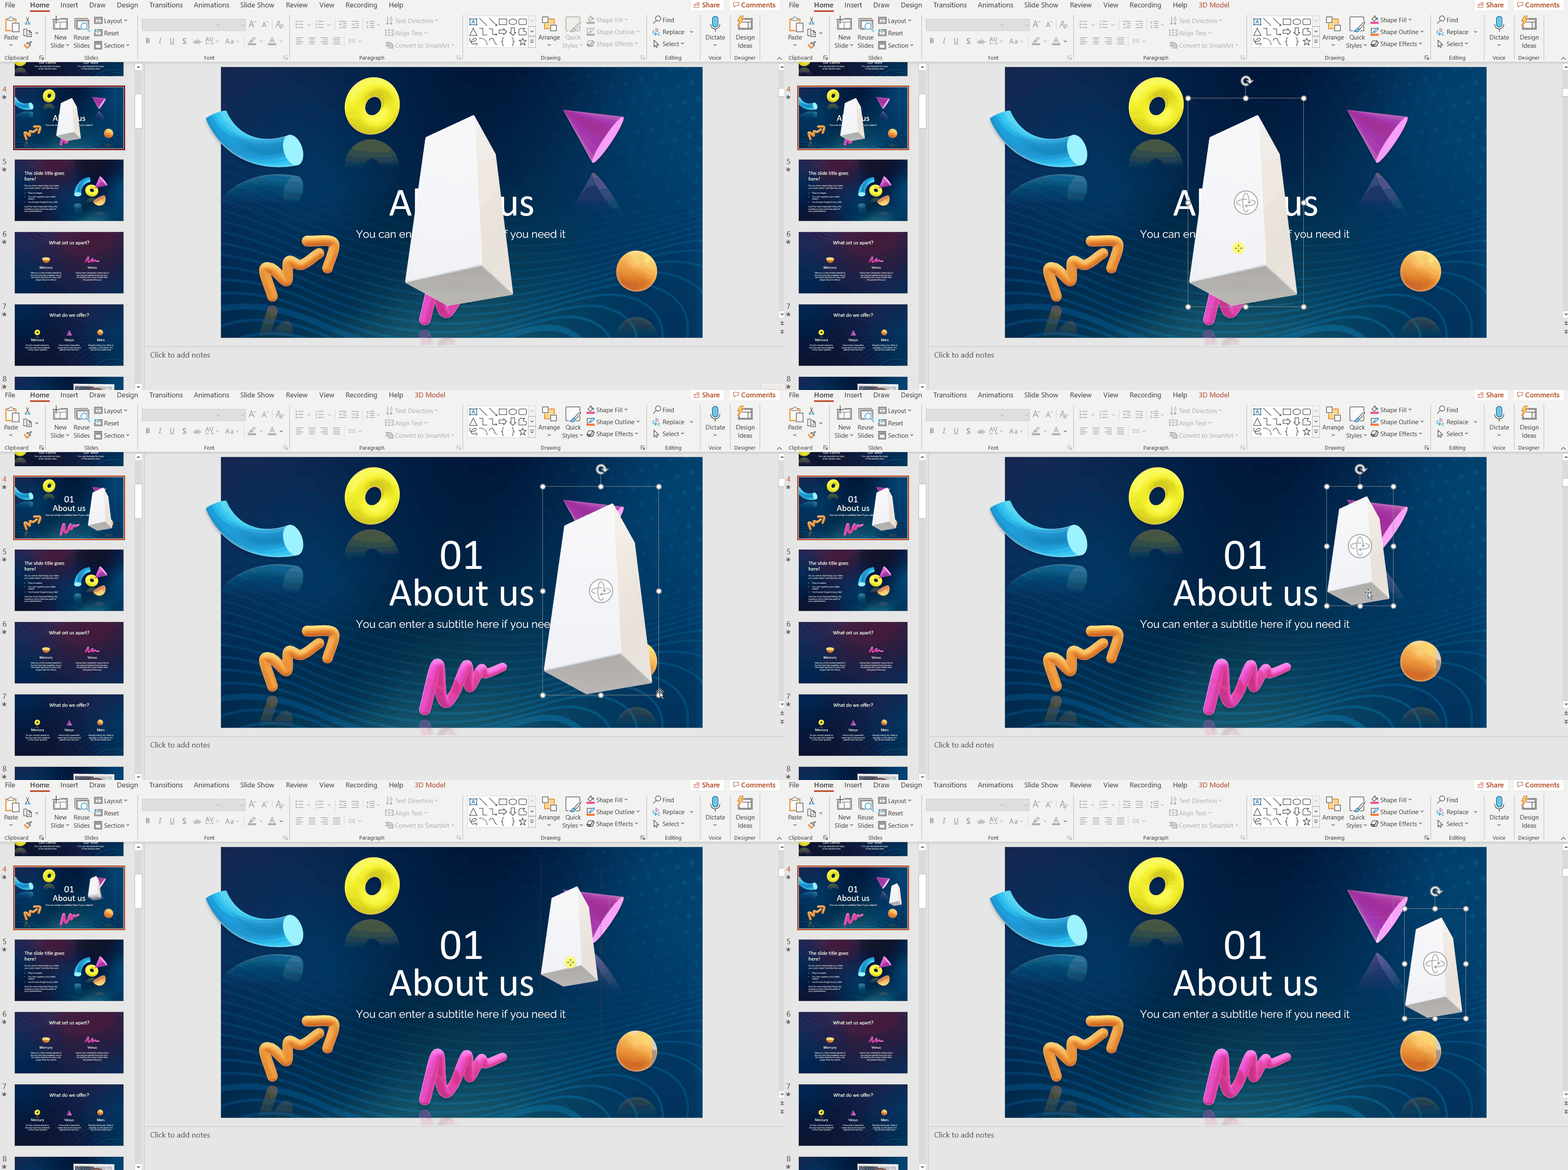
- Place the element wherever you want and with the size and orientation, you need.
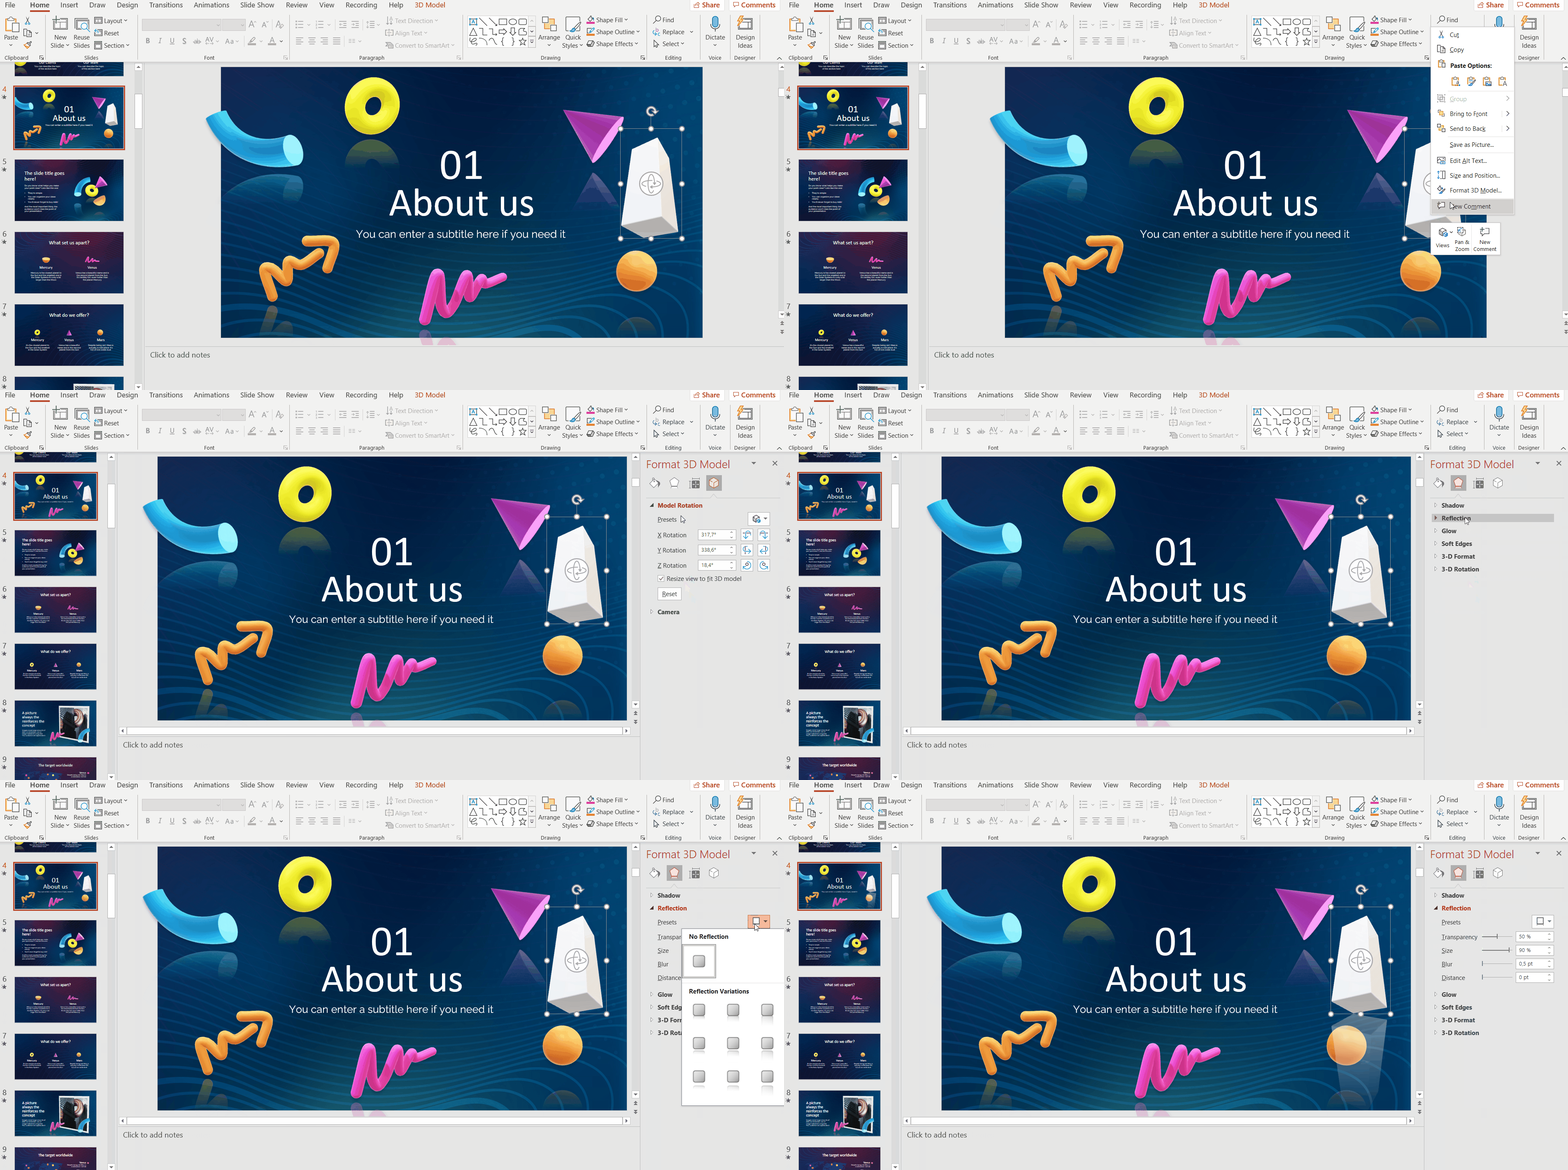
- You can also modify the format of the 3D model, for example, add a reflection effect: Right-click on the model > Format 3D model > Effects > Reflection.
How to create 3D elements
Another way to include 3D elements is to create them from scratch, and then insert them into your presentation. For this, we will use the Paint 3D application.
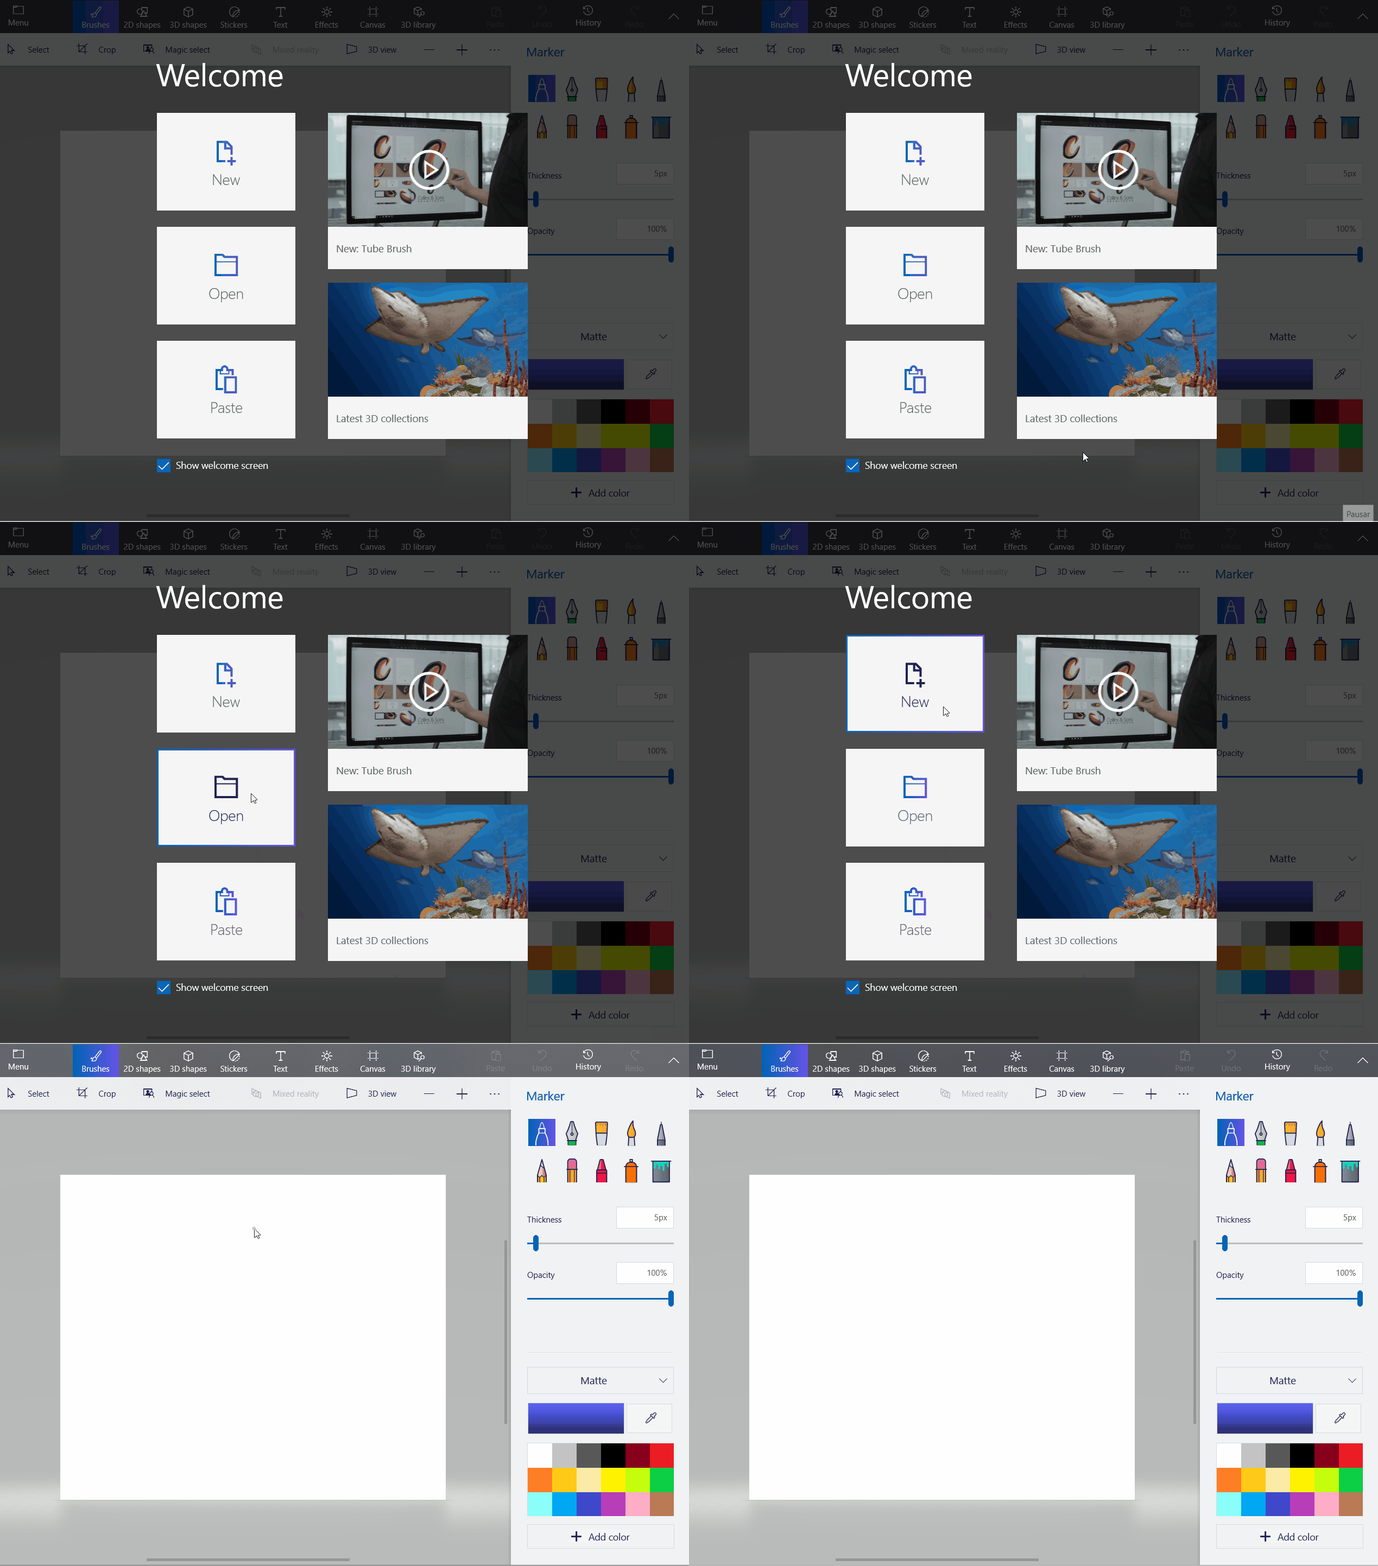
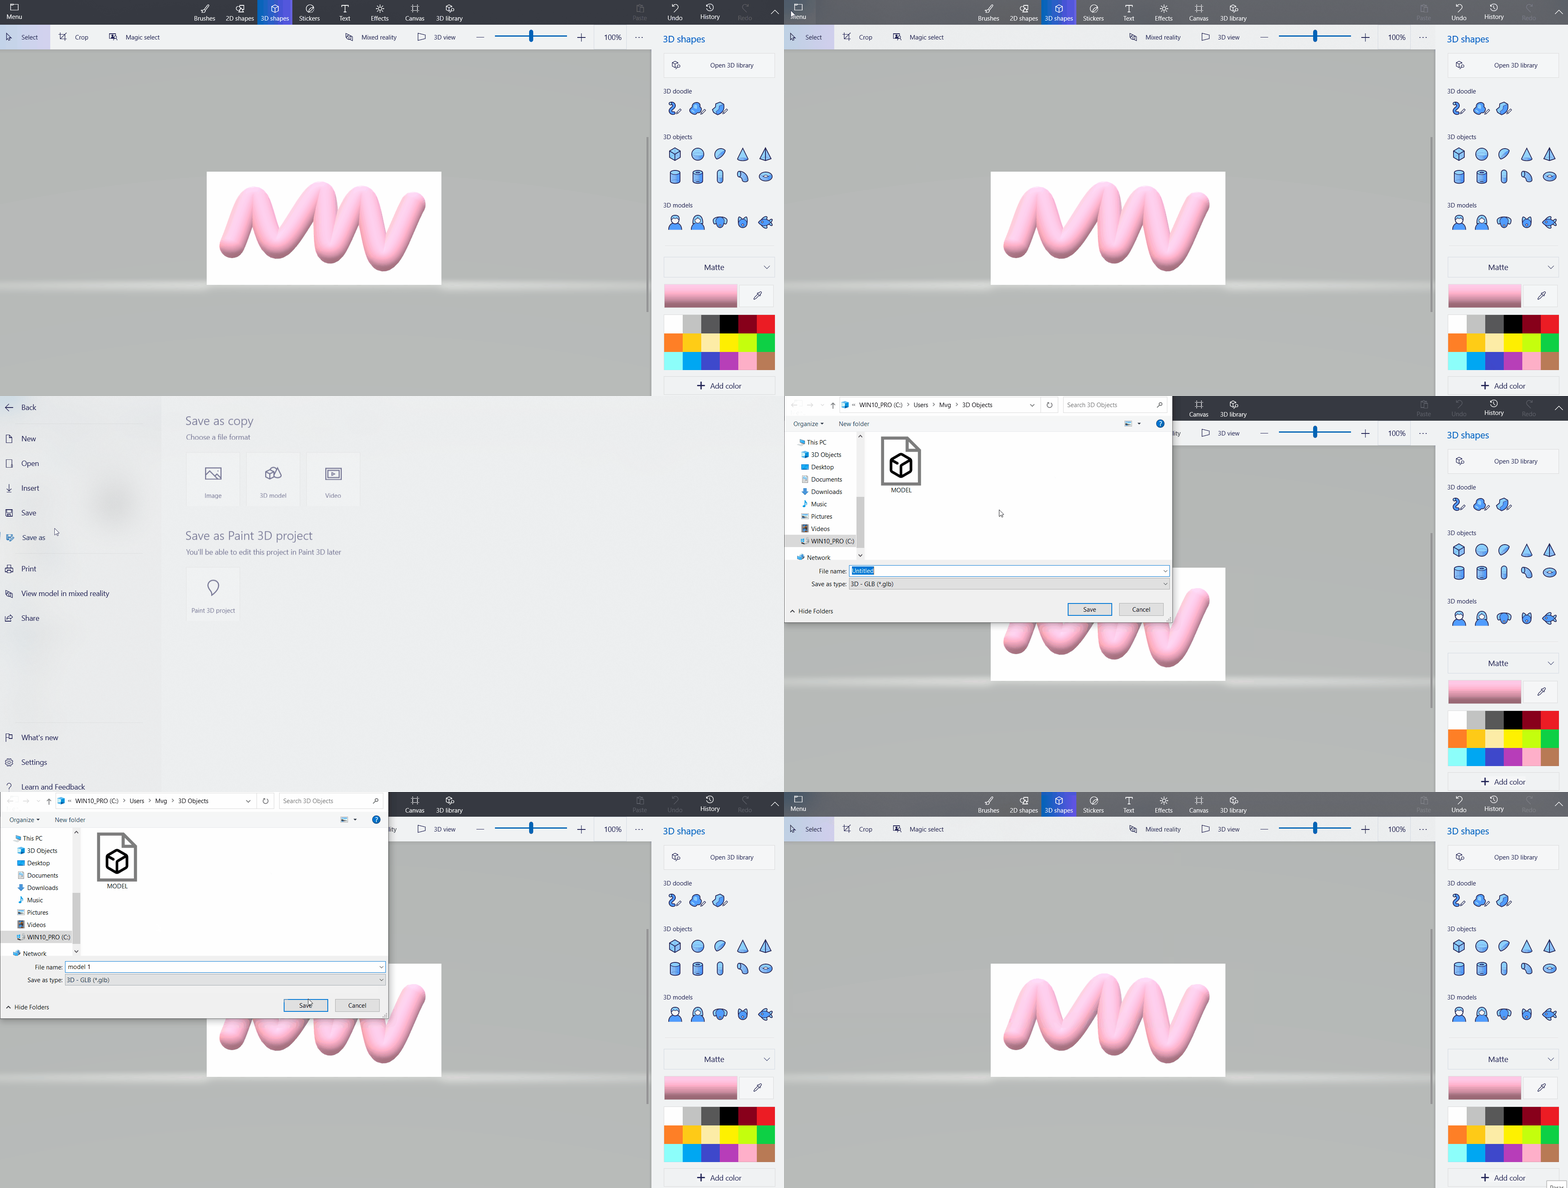
- Click on 3D Shapes. In this way, we will be able to insert, with the format we want, doodles, objects, or 3D models.
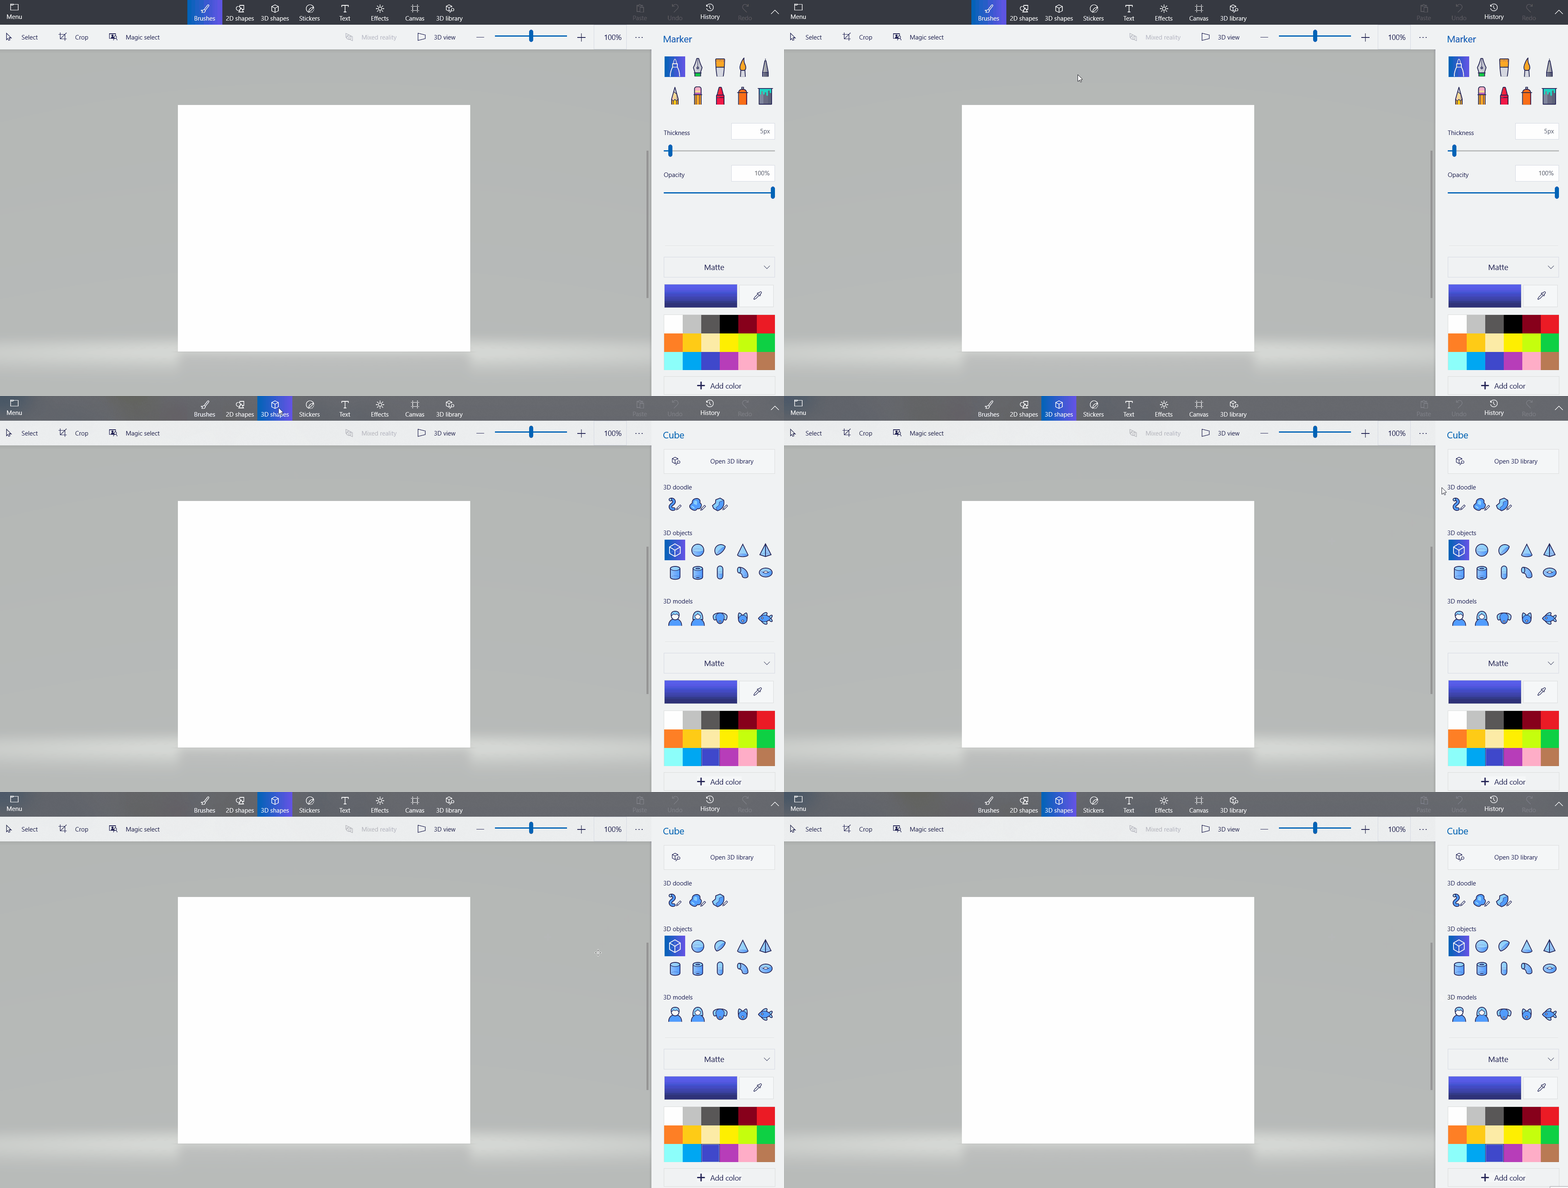
- As an example, let's insert a 3D doodle. In the options menu on the right, we can select the shape of the doodle, the color, or the thickness.
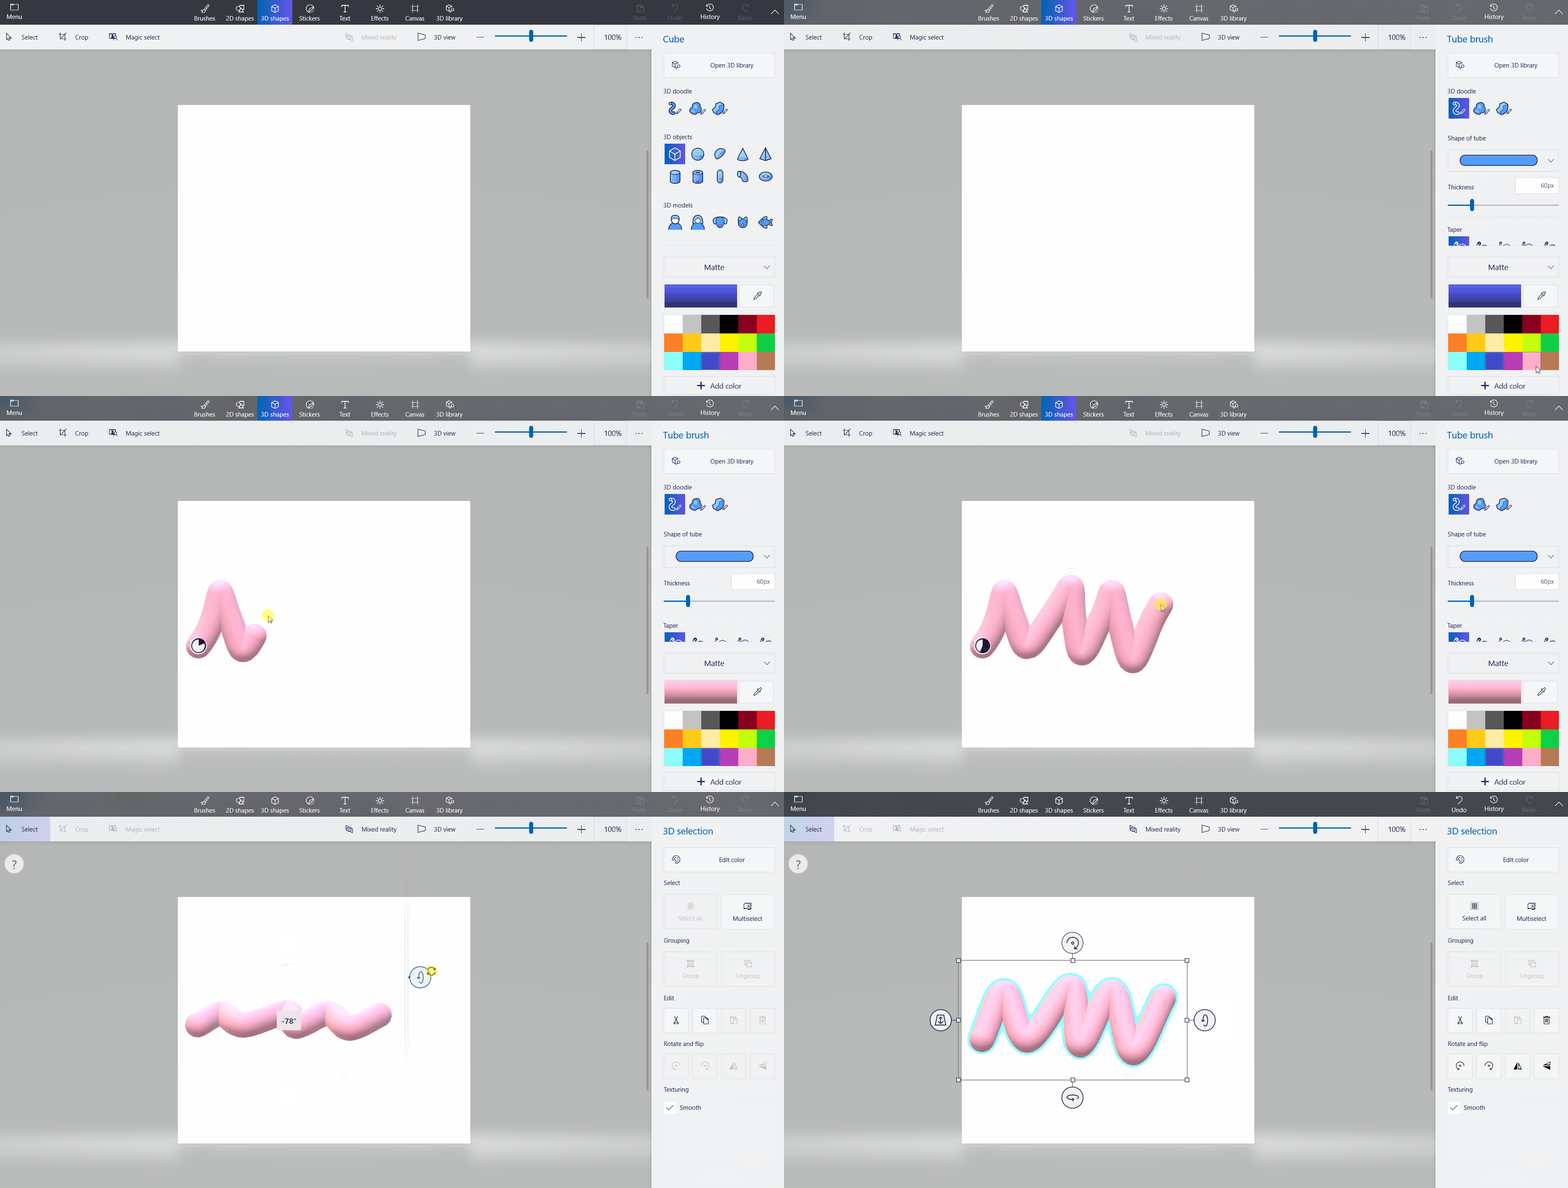
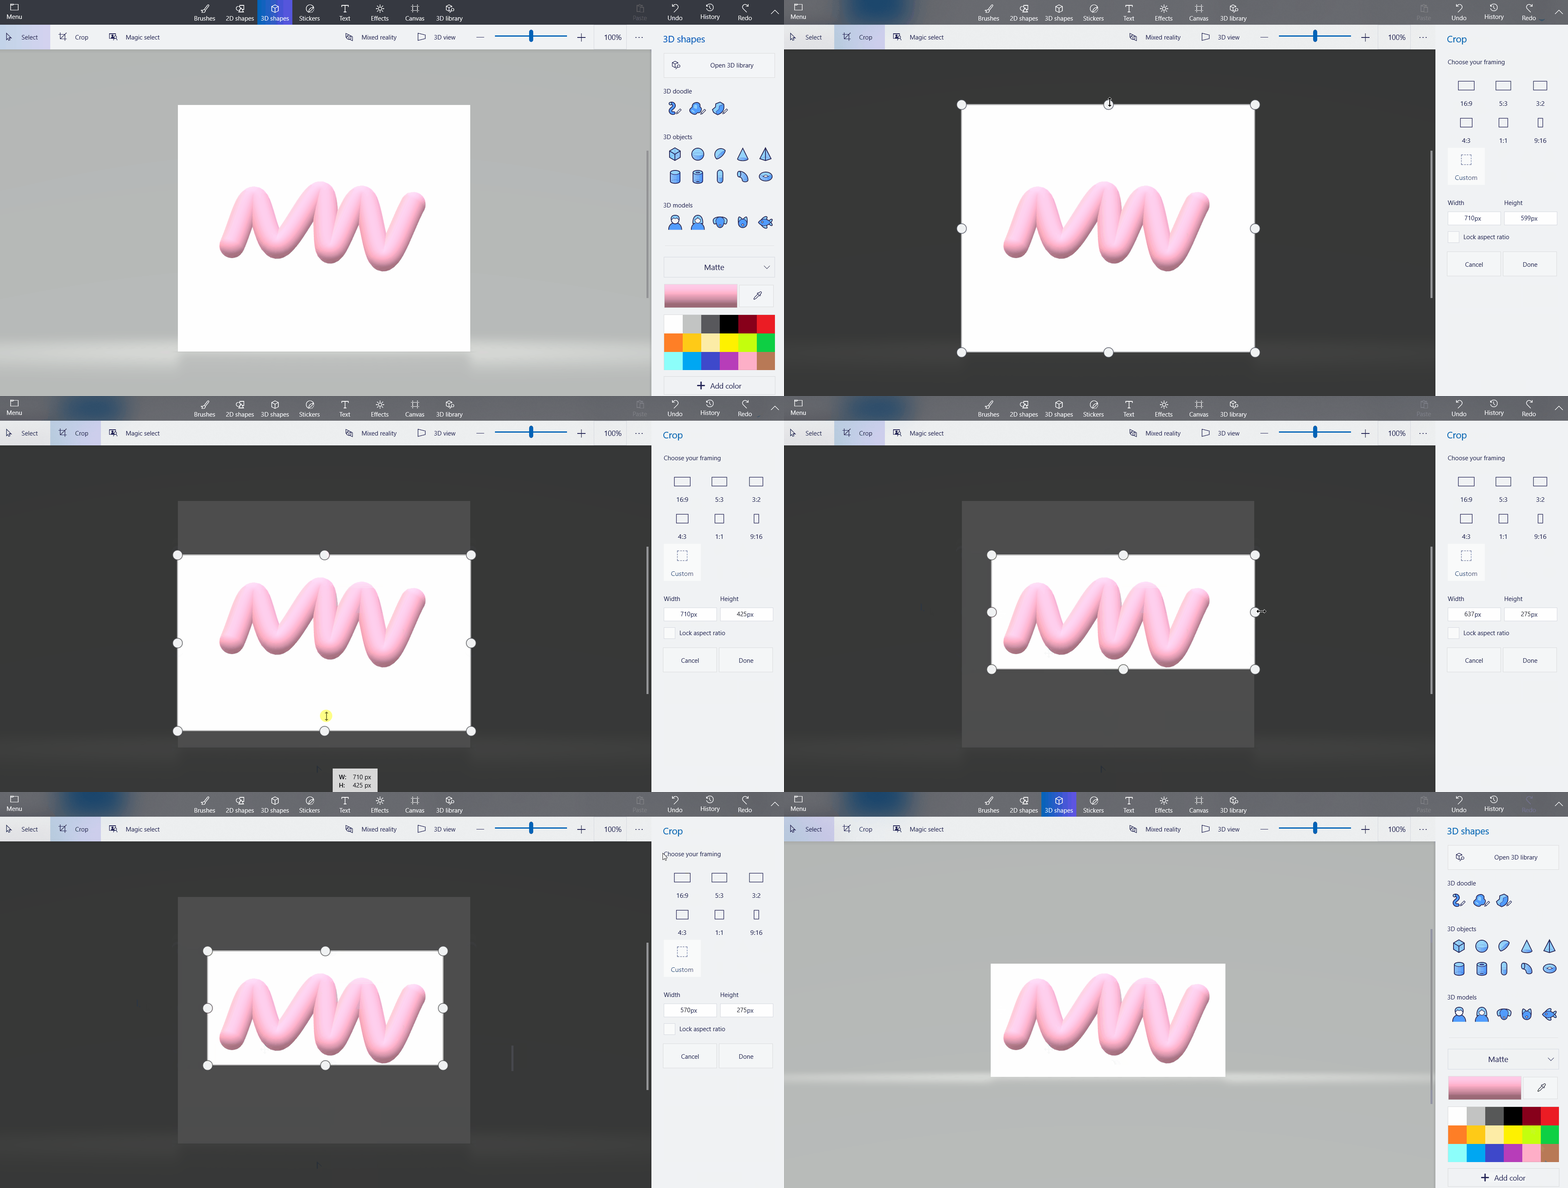
- Let's adapt the sheet to the size of the 3D element. To do this, click on crop and we adjust.
- After we have finished editing the 3D element, let's save it on our computer so that we can export it to PowerPoint. Click in the upper left corner on Menu > Save As > 3D Model. Select the folder where we are going to save it and give it a file name.
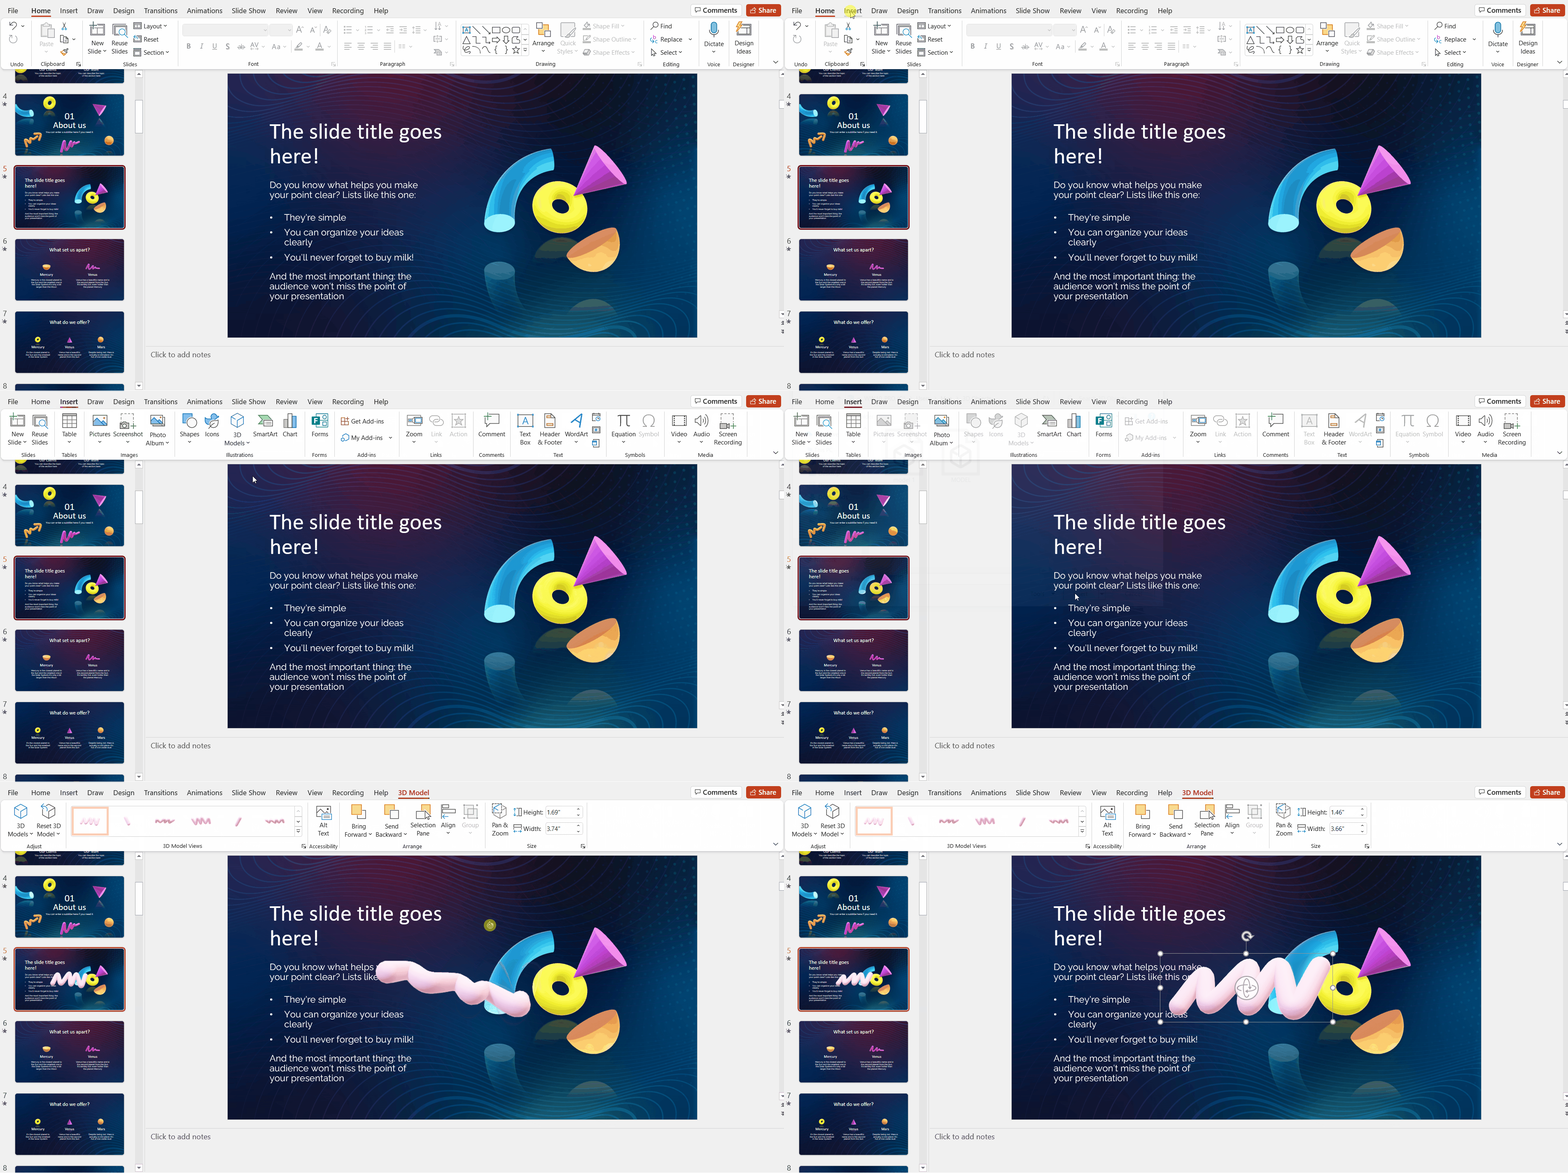
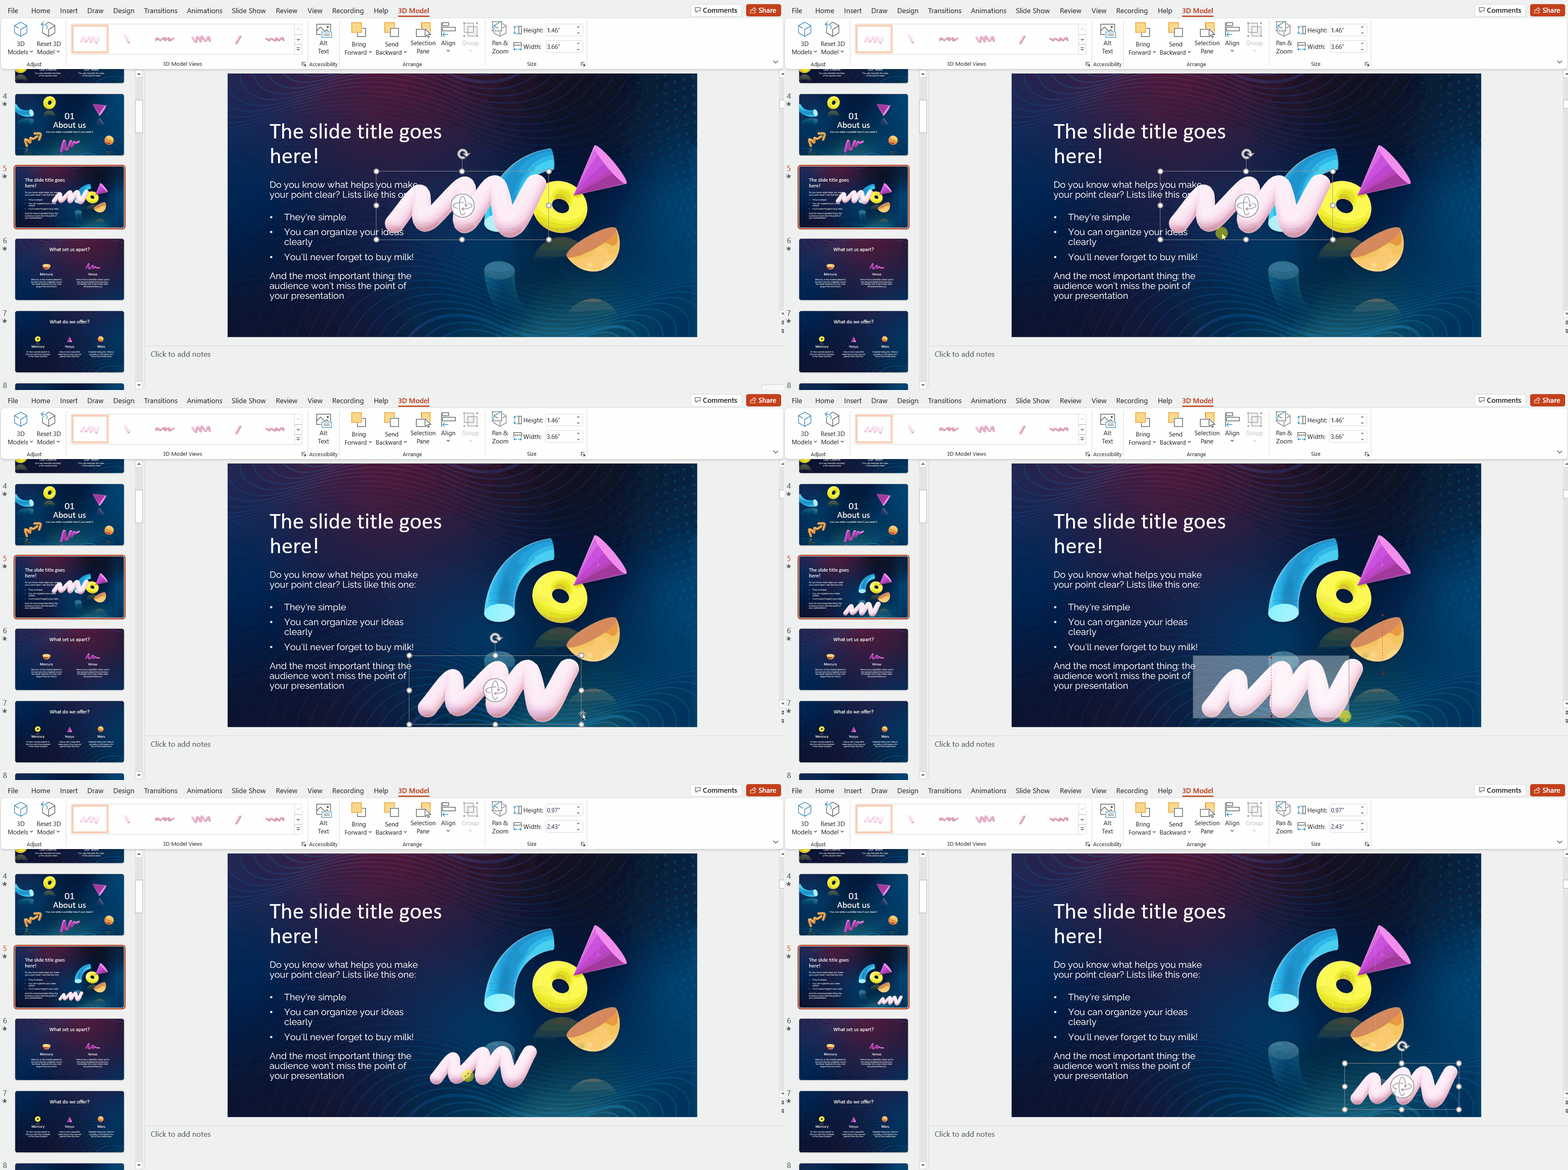
- Now we open PowerPoint to insert the 3D resource into the presentation. Click on Insert > 3D Models > Insert 3D Model From > This device > Choose the folder where the 3D model we created is and insert it.
And that's it for this post! You can insert and create 3D elements as we have explained, but if you need to, at Slidesgo we have a selection of templates that you can use in Google Slides and PowerPoint with 3D resources included. Either way, start seeing life in 3D!
Tags
Edit & FormatDo you find this article useful?
Related tutorials

New feature available: edit our templates with Canva
Whenever you need to create, Slidesgo is there. We’re continually enhancing your presentation design process with templates that are primed to impress for any occasion. And in order to let your ideas flow best, comfort is key. How could Slidesgo help you with this? By making you feel right at home with...

How to print PowerPoint notes
Crafting an impactful PowerPoint slideshow and delivering a captivating presentation are distinct skills. The first focuses on designing appealing visuals to convey a clear message, while the second involves employing effective presentation techniques to ensure the audience grasps the idea. The content of this article will help you with the latter...

Discover Our Online Presentation Software for Free
We have great news for you today! If you’ve been a Slidesgo fan for years (or months, or weeks, or days, or mere hours, we welcome everyone!), you’ll probably know for now that our templates are available mostly in two formats: for use in Google Slides and PowerPoint.Google Slides is a...

Webinar: Presentation Audit
With more than 15,000 templates released on Slidesgo and a user base composed of millions of people, we estimate that the total number of presentations created adds up to… um, a lot! Our team of professional designers work very hard to provide you with editable slides so that the only thing...
