
How to Export Your PowerPoint Presentation as a PDF File
After you’re done creating a presentation, you might want to open it in other computers, but perhaps your presentation is not compatible with the software included in them. For this reason, having a PDF version is useful. In this tutorial, you’ll learn how to export your presentation as a PDF file in a few steps.
Exporting without Speaker Notes, One Slide per Page
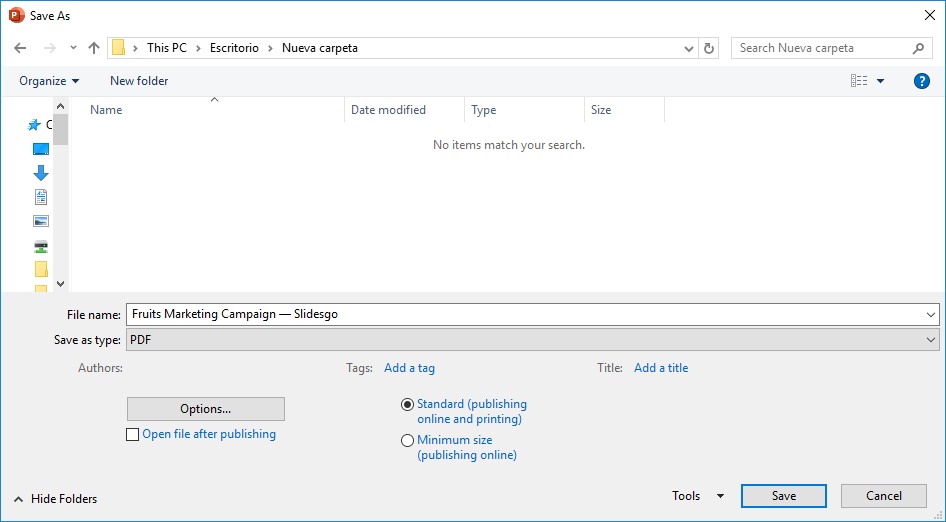
- Click File → Save As. Select the PDF option from the drop-down menu. Then enter a name for the file and click Save.
If you have Adobe Acrobat PDF, there are two more options available for you:
- Click File → Save as Adobe PDF.
- On the Home tab, click Create and Share Adobe PDF.
Exporting with Speaker Notes or with Multiple Slides per Page
- Click File → Save As. Choose the PDF option from the drop-down menu.

- Now you can optimize the size of the document for online publication, and add data such as tags, the author or a short title. Depending on your PowerPoint version, you may need to click More Options… to access these settings.

- To choose what will appear in the PDF document, click Options…
- Now you can choose the slides range, the publish options, the non-printing information and other settings. To change the number of slides per page or the orientation, choose Notes pages from the Publish what drop-down menu.

If you’re using a Mac and you can’t find these options, follow these steps:
- Click File → Print… or press Cmd + P.
- Now you can choose the slides range, the format and the orientation, the number of pages, whether you want to print it in color or in black & white, and whether to include a frame, headers, footers and speaker notes. If you decide to include speaker notes, you’ll only be able to choose one slide per page.
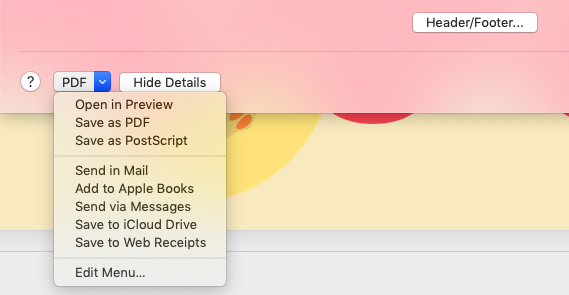
- To save, click the PDF button in the lower-right corner and select Save as PDF.
Tags
BasicsDo you find this article useful?
Related tutorials

How to Write a Great AI Prompt
Our tools are built to be simple and easy to use (though, honestly, there's a lot happening behind the scenes). Have you ever struggled with an empty text box?:Condensing all your ideas and goals into a single prompt can feel overwhelming. But don’t worry—there are a few simple tricks that can help you craft stronger prompts and get the most out of our AI tools.

How to Download Google Slides Templates
When preparing a presentation, many people start panicking because they realize how much time it will take to edit each and every slide. Creating them from scratch, filling them in, looking for pictures, moving the elements...How stressful! But there is a solution that saves you a lot of time.We're sure that you've browsed the internet for templates, or basically, pre-established designs and elements, that can be downloaded for free and can be edited to your liking. Are we right? Then, we have some good news for you!

Discover our collection of printable templates
With the advance of technology, printing has become something that is no longer a necessity. Smartphones have made the paper format less and less frequent, but there are still certain cases in which having physical resources is much more convenient. Whether it's for taking notes, handing out assignments, making worksheets or handing out business cards or invitations, it's necessary to print your customized designs.From now on, in every Slidesgo printable presentation that you download, you will find the instructions for printing on the third slide. Depending on the style, colors or format of each presentation, we will tell you if you can...
How to Add Superscript and Subscript in PPT
It can be a registered brand, a footnote or a math formula that you need to properly write. “2^2+2” is not the same as “22+2”, is it? Using superscript or subscript in a proper way makes a whole difference in texts. If it’s for your mathematical or physics complex formulas or just an anecdotic footnote, let’s figure out how to write them in a powerpoint presentation!