How to Create a Quiz for Your Online Classes Using Google Slides

Quizzes are great tools to get your audience involved, as they need to participate and give their own answers. In fact, they are particularly useful when teaching children, as their attention gets diverted quite easily. This way, they will learn in an interactive and entertaining way.
Creating a quiz is not a complex thing to do, but it requires some time. In this tutorial, we are going to teach you how to create some question slides for your students using Google Slides. Let’s get started!
Creating the Main Page of the Quiz
- Open your Google Slides presentation.
- Select or create the slide to which you want to add the quiz.
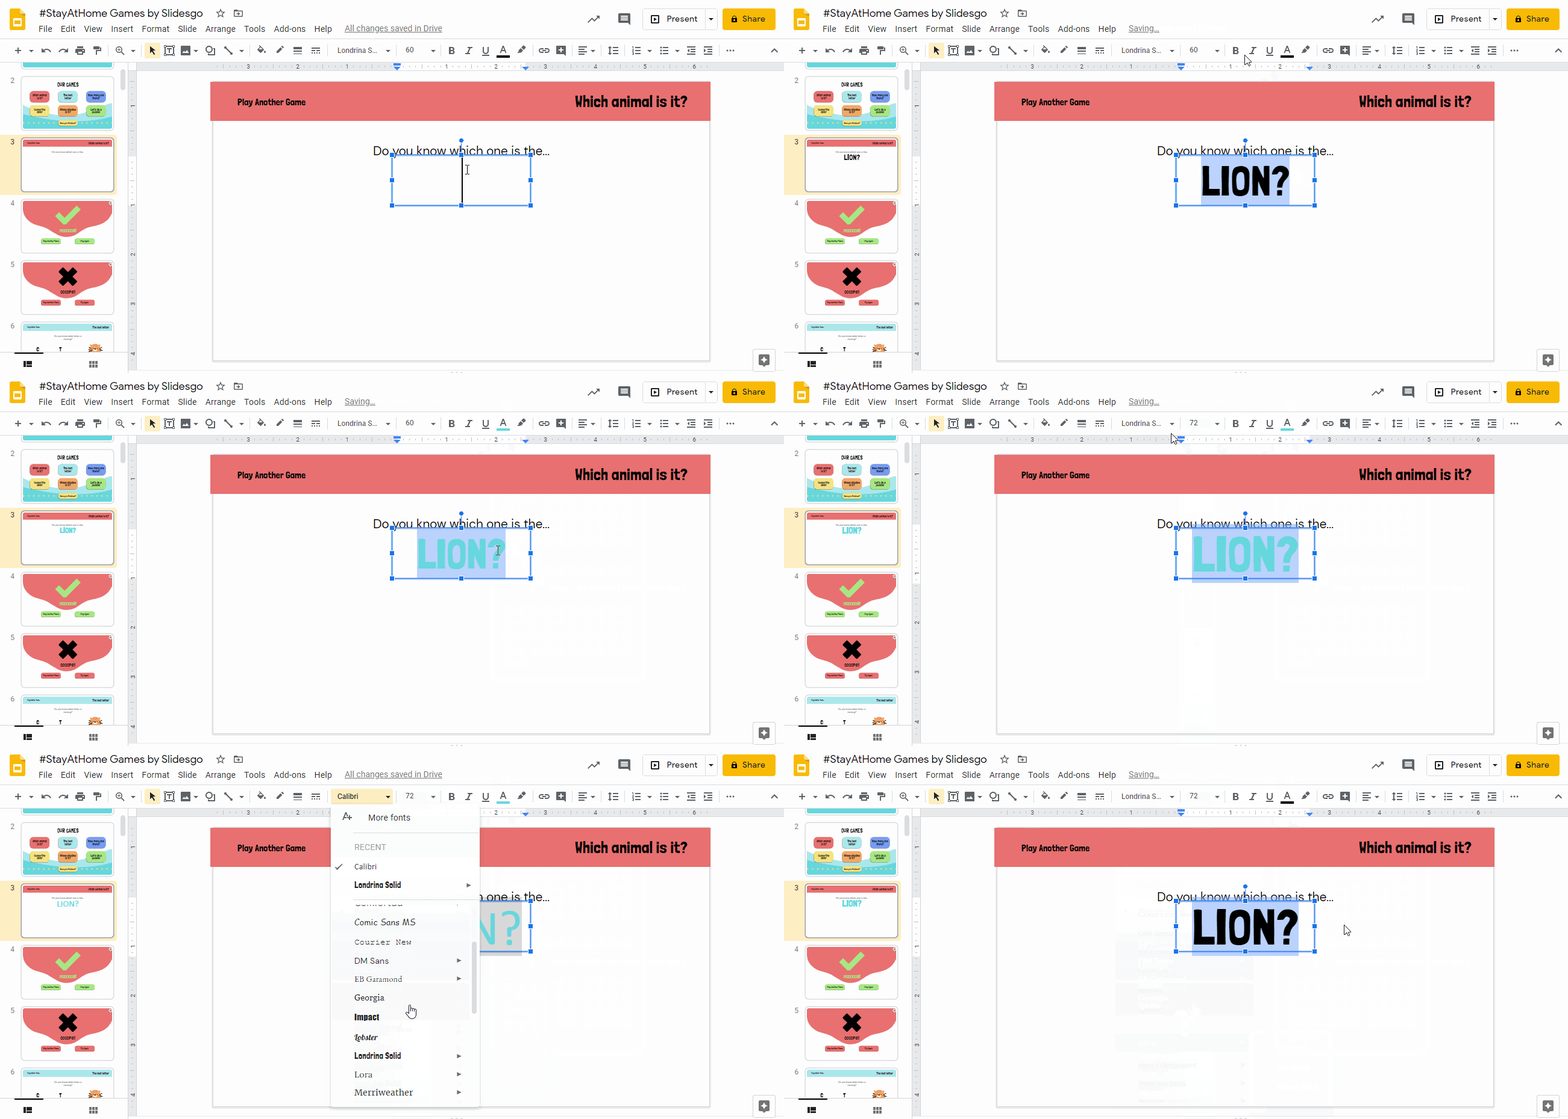
- Type the title and the subtitle of your question using text boxes. Remember to use the fonts of the theme. The resulting slide will be coherent with the rest of the presentation and aesthetically appealing.
- If you need to change the font, size or style of your text, use the edition tools in the toolbar.
- Add images if you need them. If you are creating this interactive game for children, it is worth adding some cute pictures or drawings to make it more appealing. If you don’t know how to insert, crop or mask images, you can learn more about it in this tutorial. Here, we have embedded three different illustrations that will work as reply options.
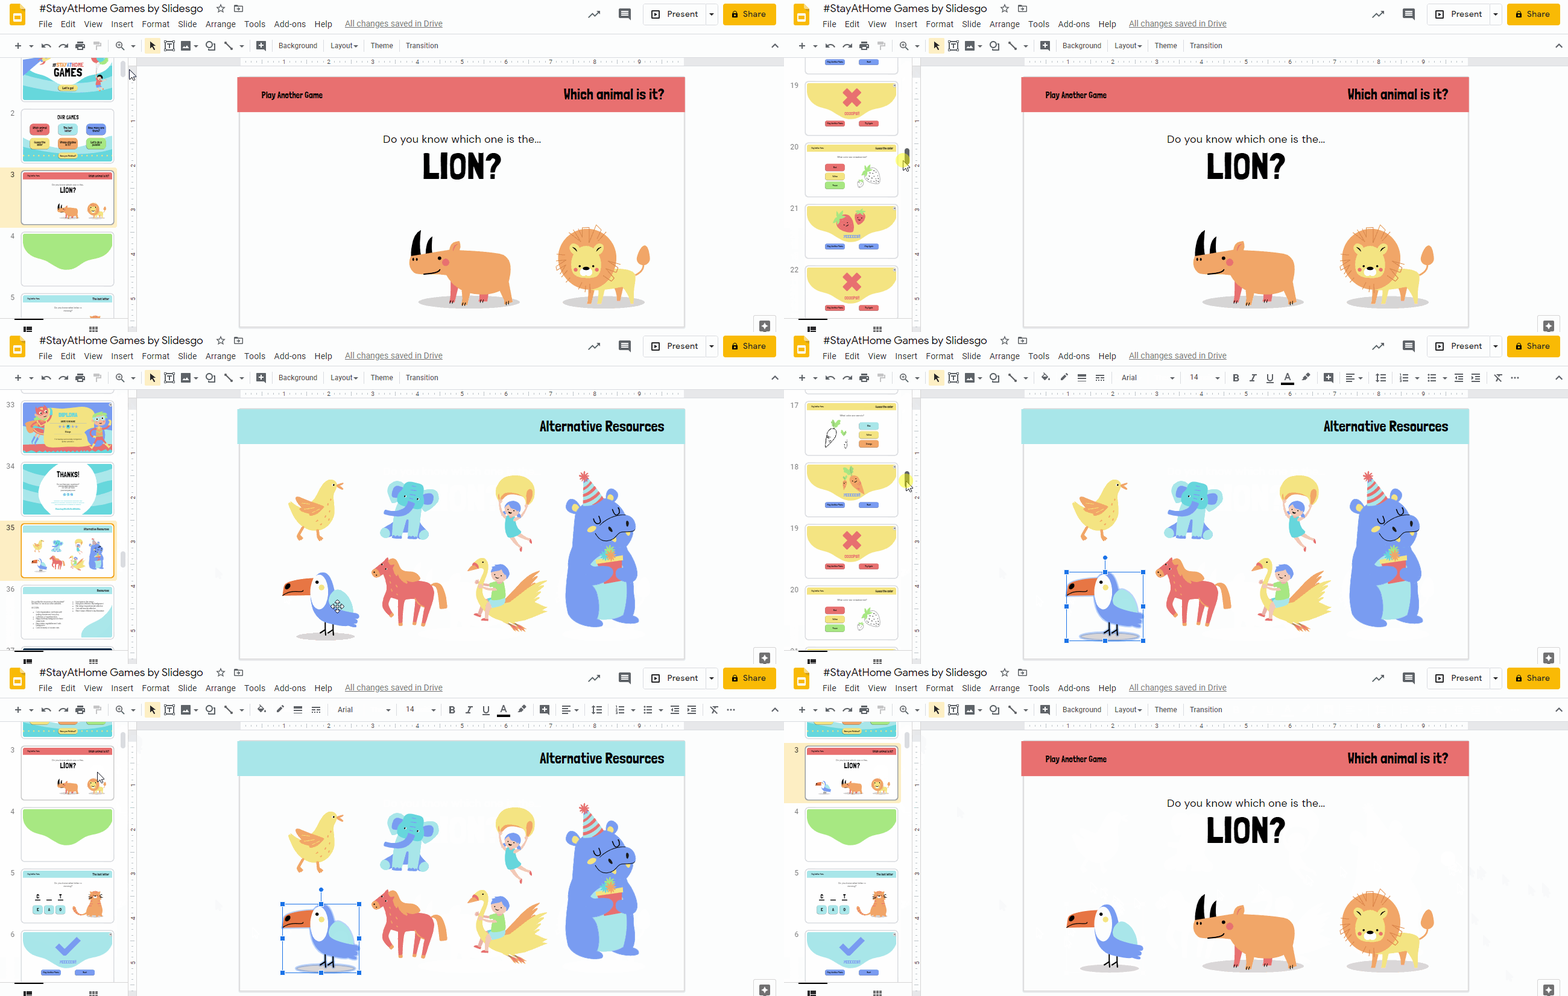
Pro tip: if you need more images or illustrations go to the Alternative resources slide at the end of the presentation.
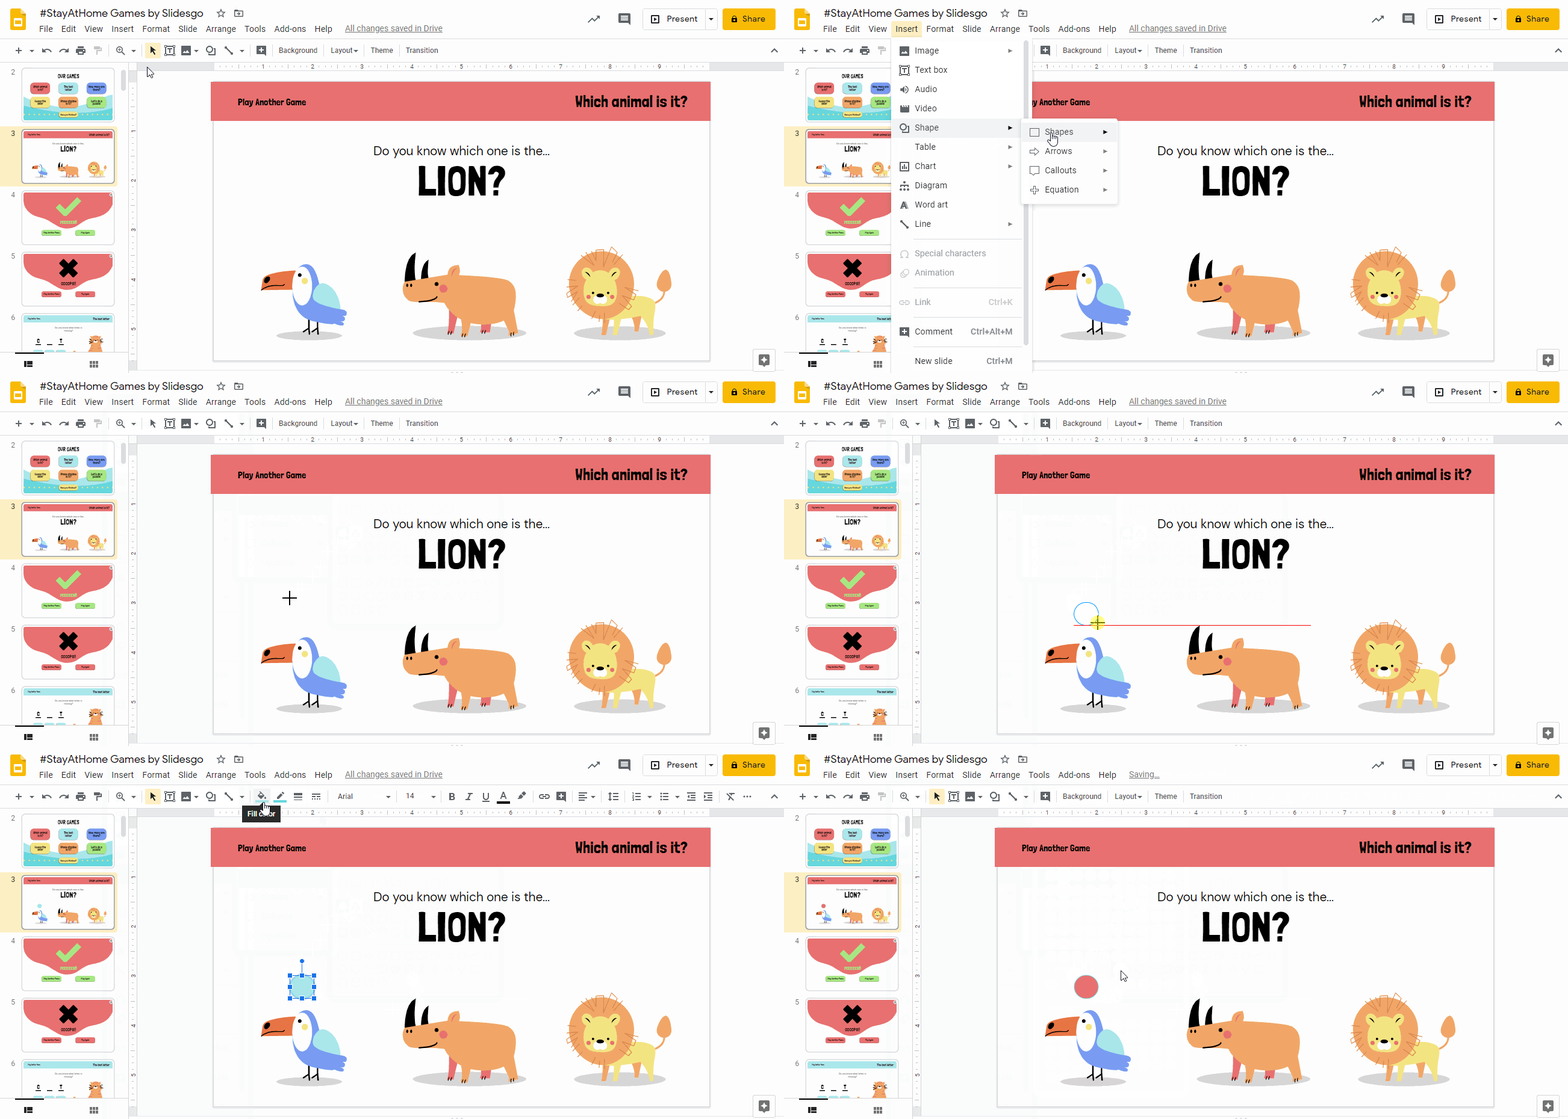
- You need to add button-like shapes to your options. Later on, we will link each button to a “correct” or “wrong answer” slide. We are going to use circles for our example. In Insert, select Shape → Shapes → Oval.
- Click and drag the cursor to add the circle.
- Resize it clicking and dragging the squares of the outline. If you keep pressed Shift, you’ll create a perfect circle.
- Change the color of the shape according to the colors of the theme.
- Click Fill color and choose the hue that appears in the inside of the shape.
- Click Border color and do the same for the border of the shape.
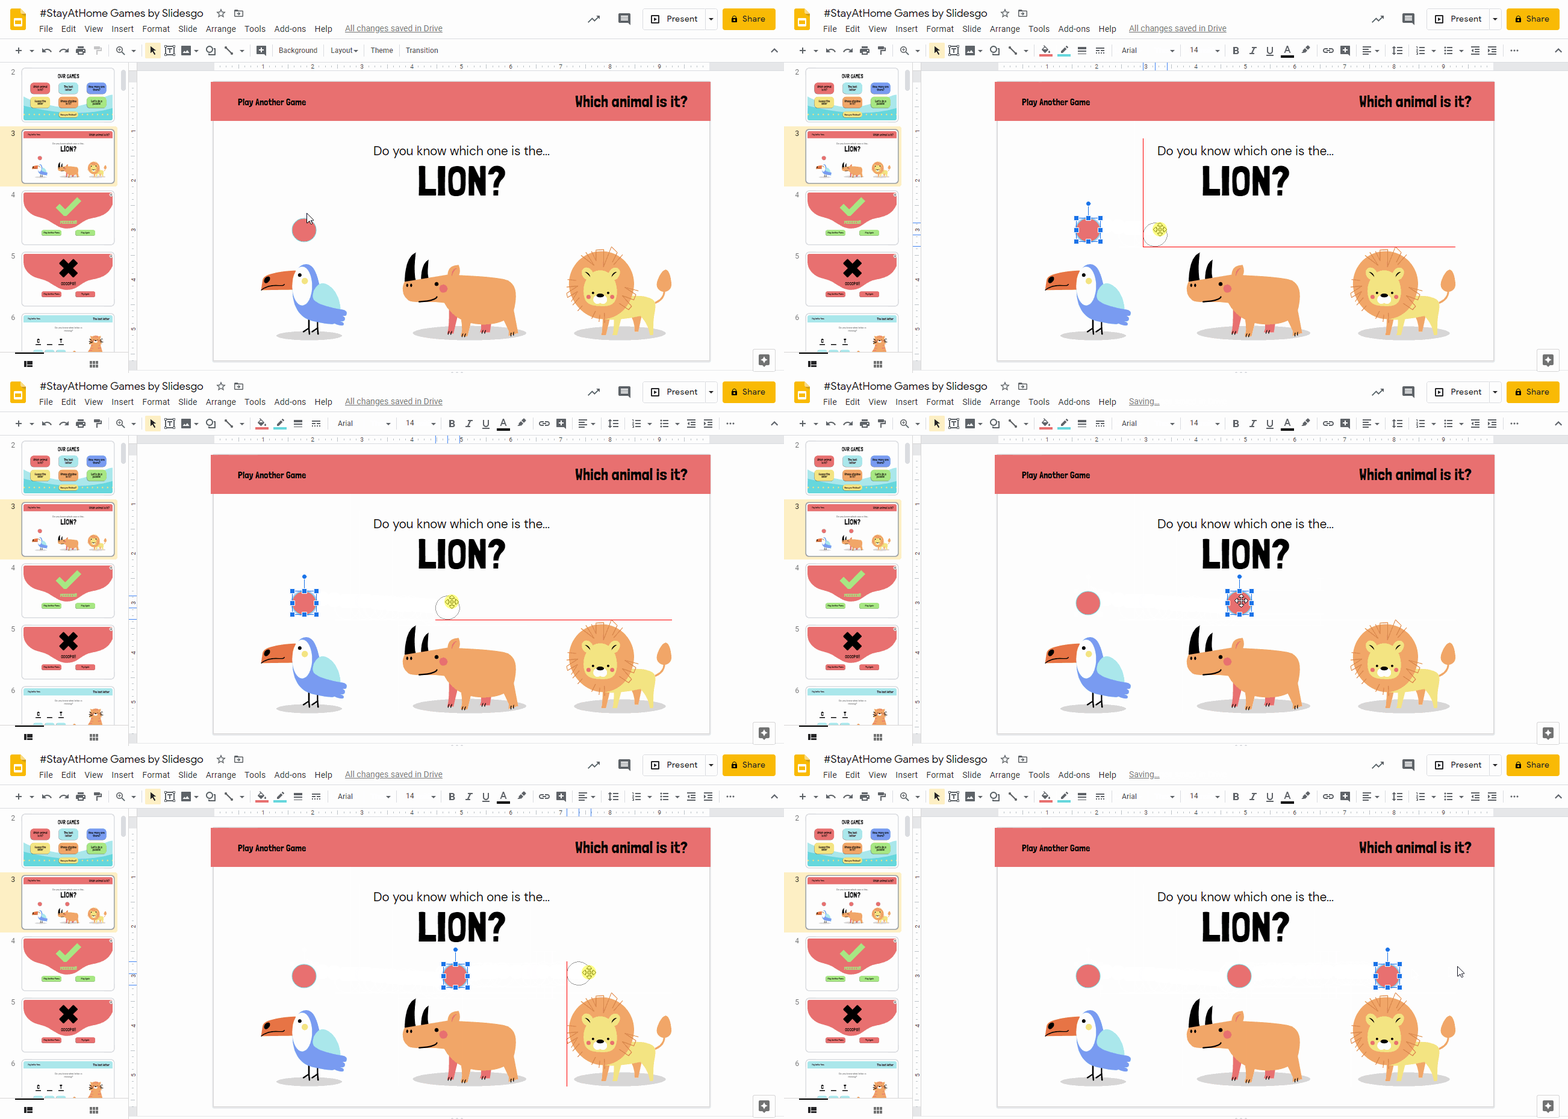
- To add more buttons, keep pressing the Ctrl button while you click on your first button and drag the copy close to the image of the other animals. Pressing Shift at the same time will keep them aligned.
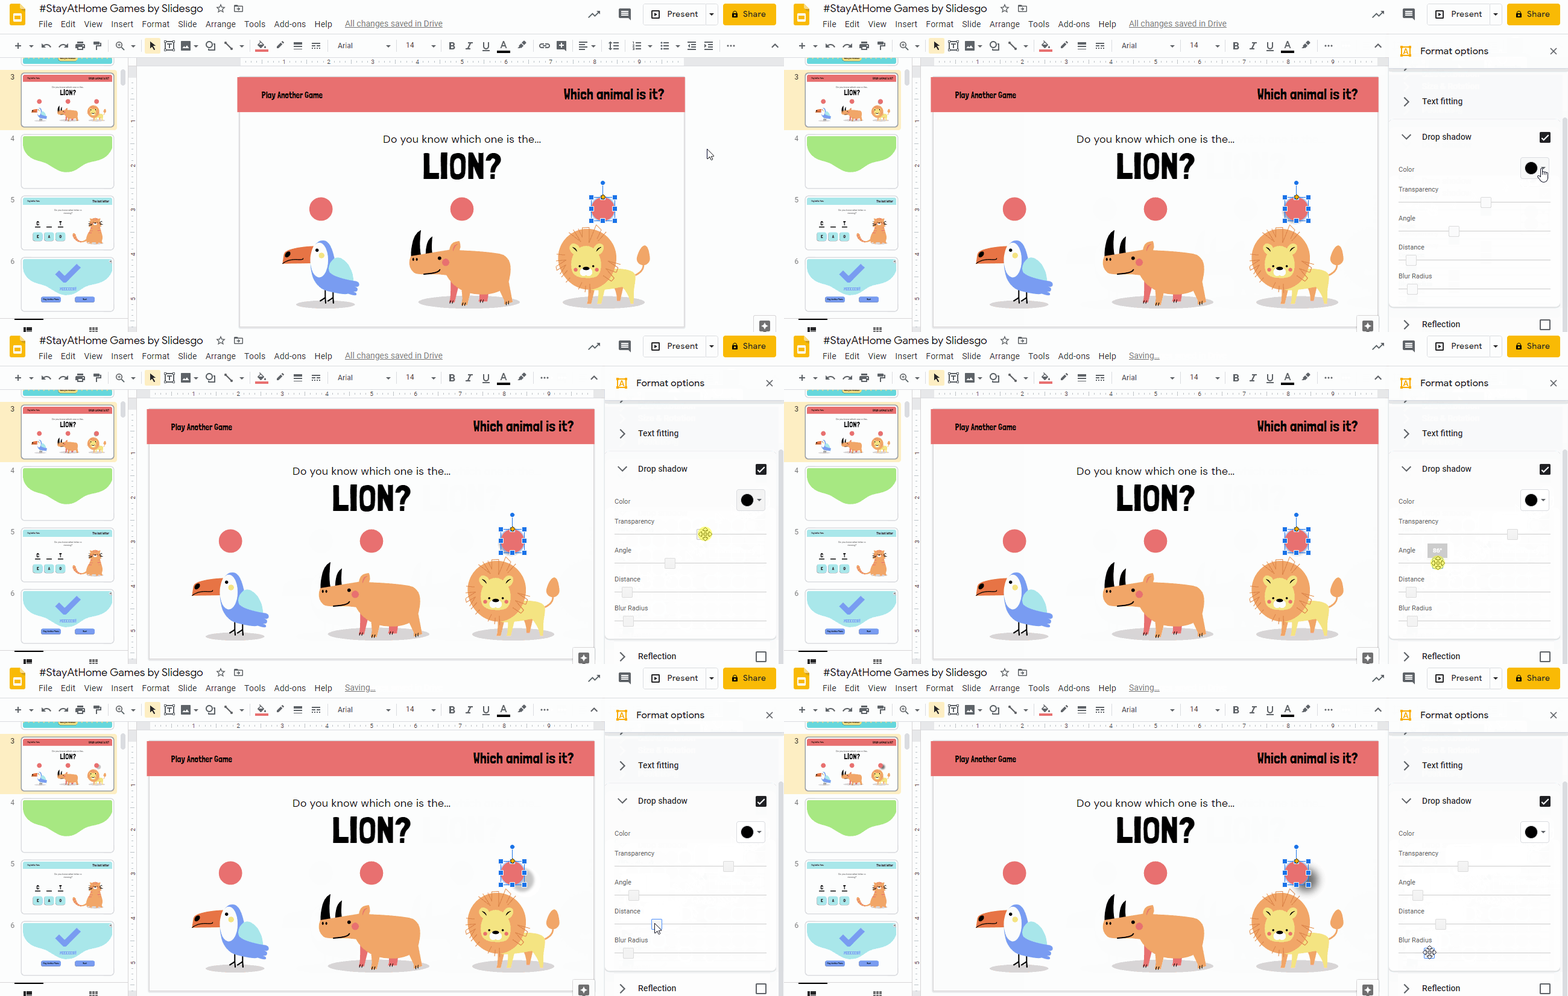
Pro Tip: You can add a shadow to your circles to make them look like real buttons. In the toolbar click on More (...) → Format options → Drop shadow and choose the effect that suits you best. To learn more about how to apply effects to an image in Google Slides, you can read this tutorial. If the screen resolution of your computer is high enough, the More (...) button won’t appear. Instead, the “Format options” button will appear directly on the toolbar.
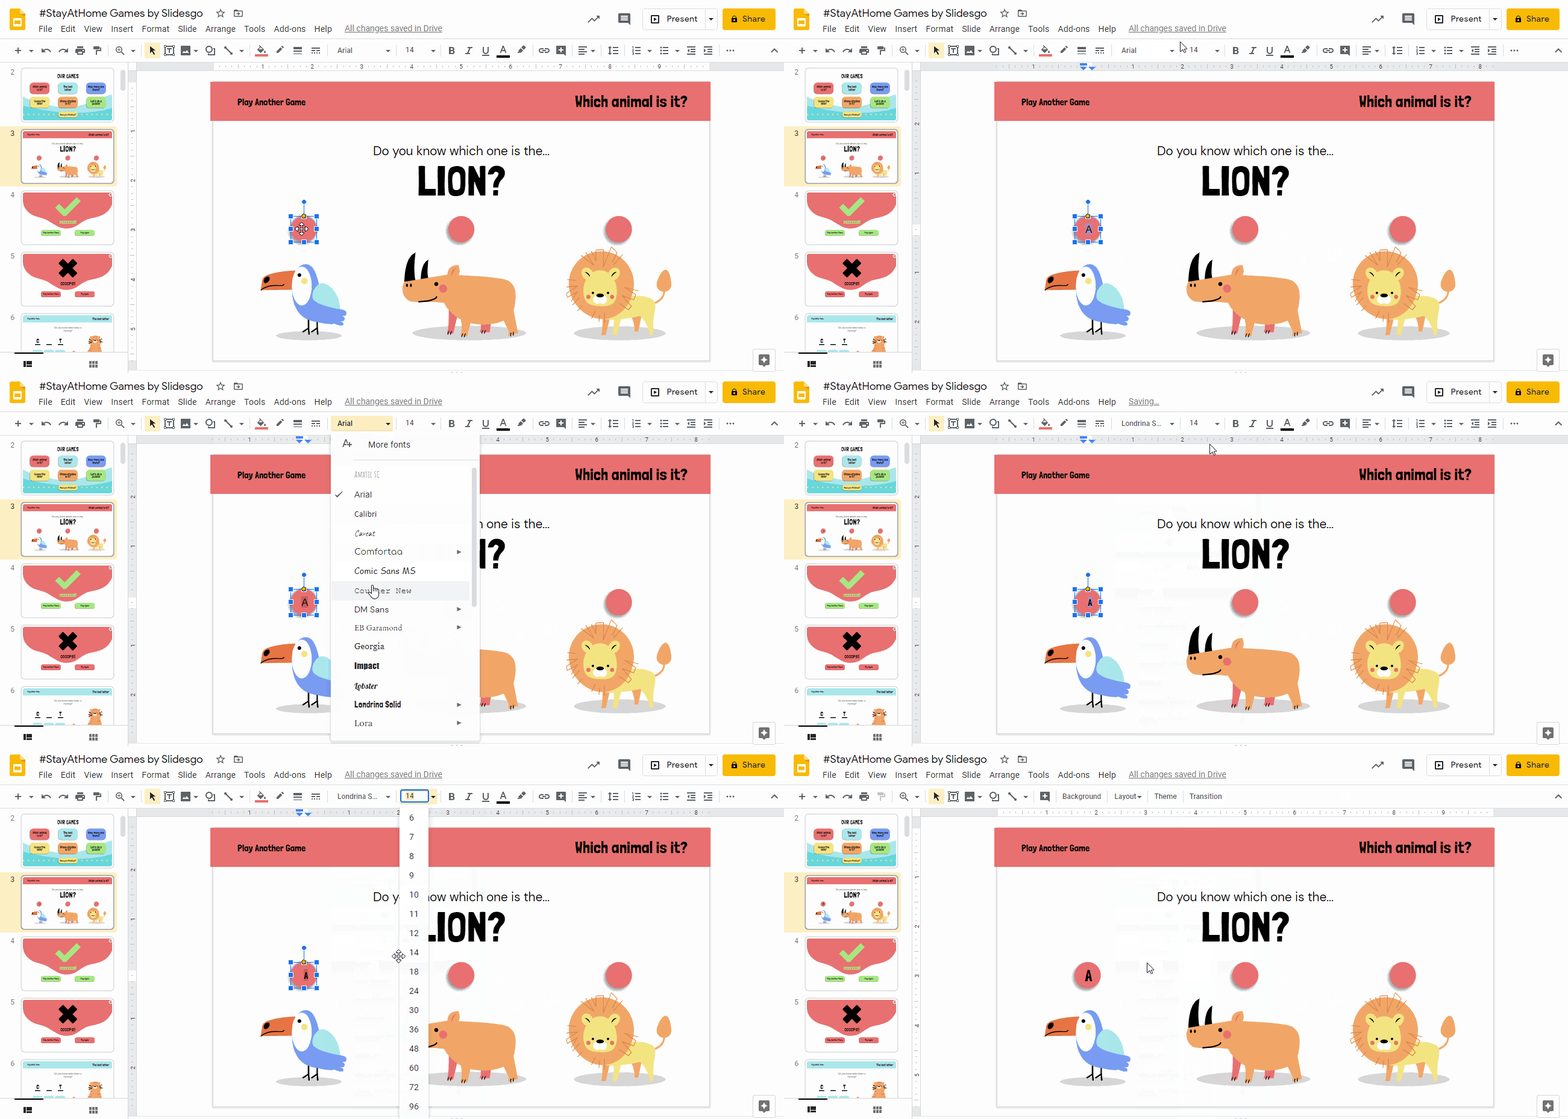
- Let’s continue with the buttons. As we have three options, we are going to name them A, B and C. Click on each circle and type directly into the shape.
- Change the font and size of the letters in the Font and Font size menus in the toolbar. Voilà!
Creating the “Right Answer” Slide
Once that the multiple-question slide is ready, we need to create two more slides: one that indicates that the answer that your audience has marked is correct and the other telling the opposite thing. Here we are going to show you how to design the “Right Answer” slide.
- Go to the toolbar. Select Insert → New Slide or simply. You need to create the new slide just after the “question” one, so be sure that you are there when you add a new one.
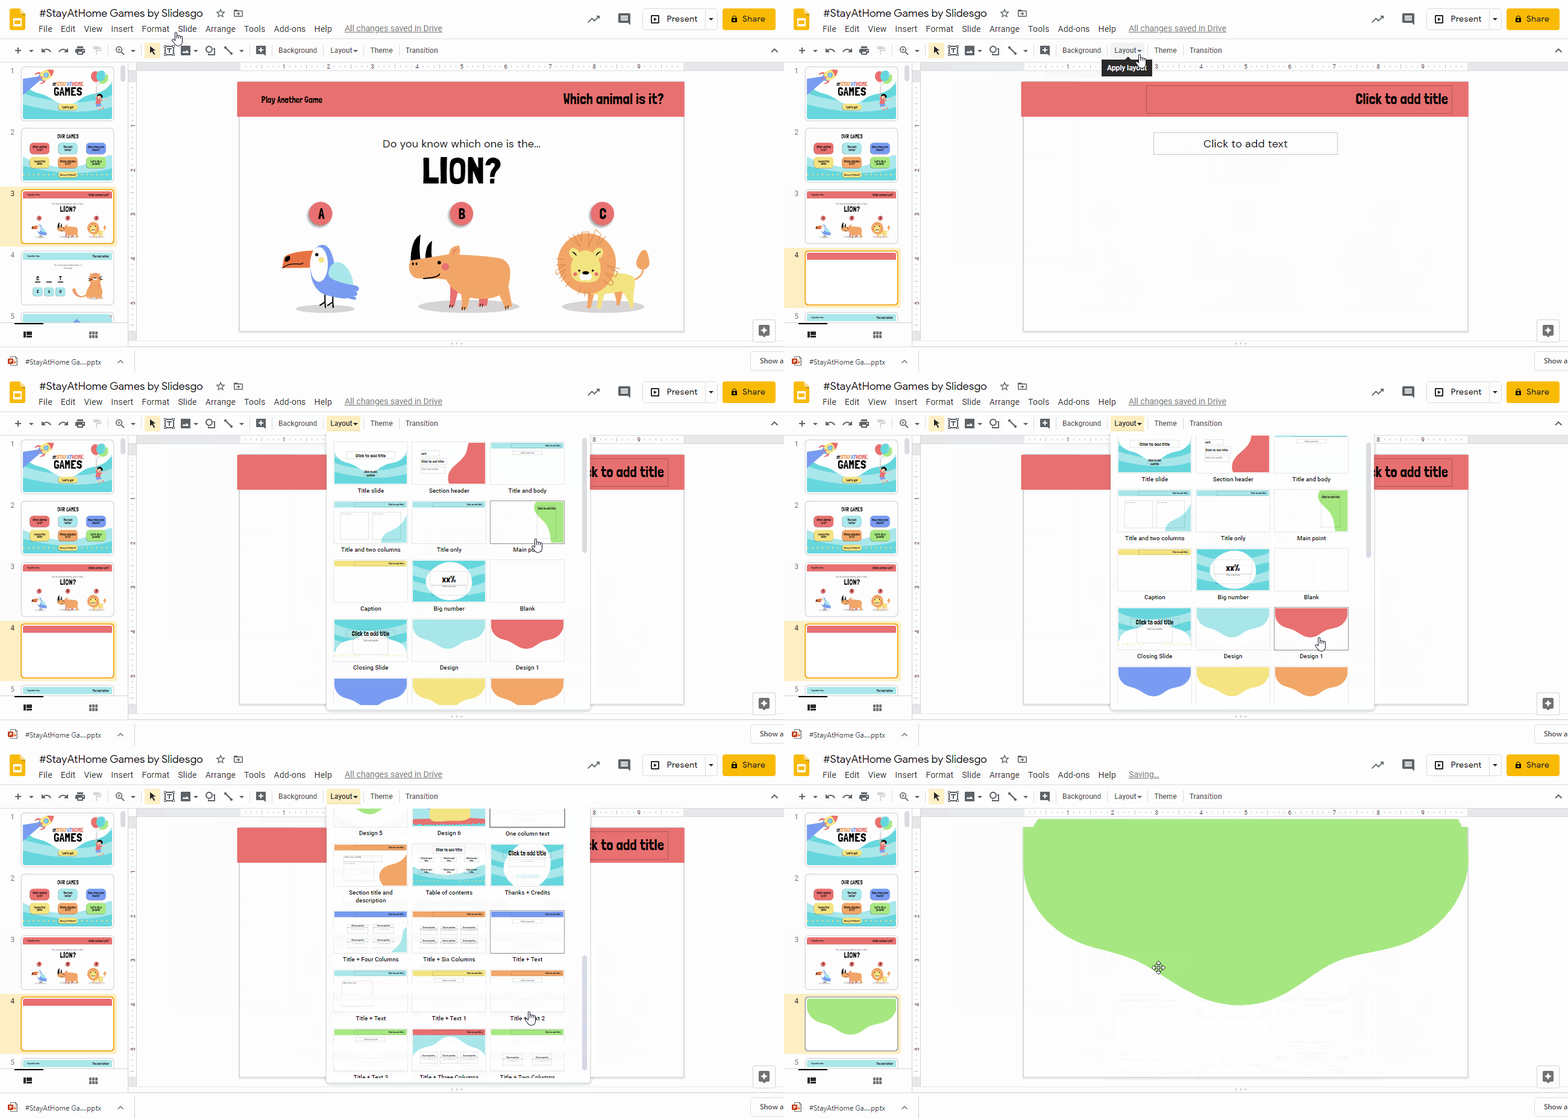
- It’s time for you to design the contents and layout. Choose the colors and fonts of the theme.
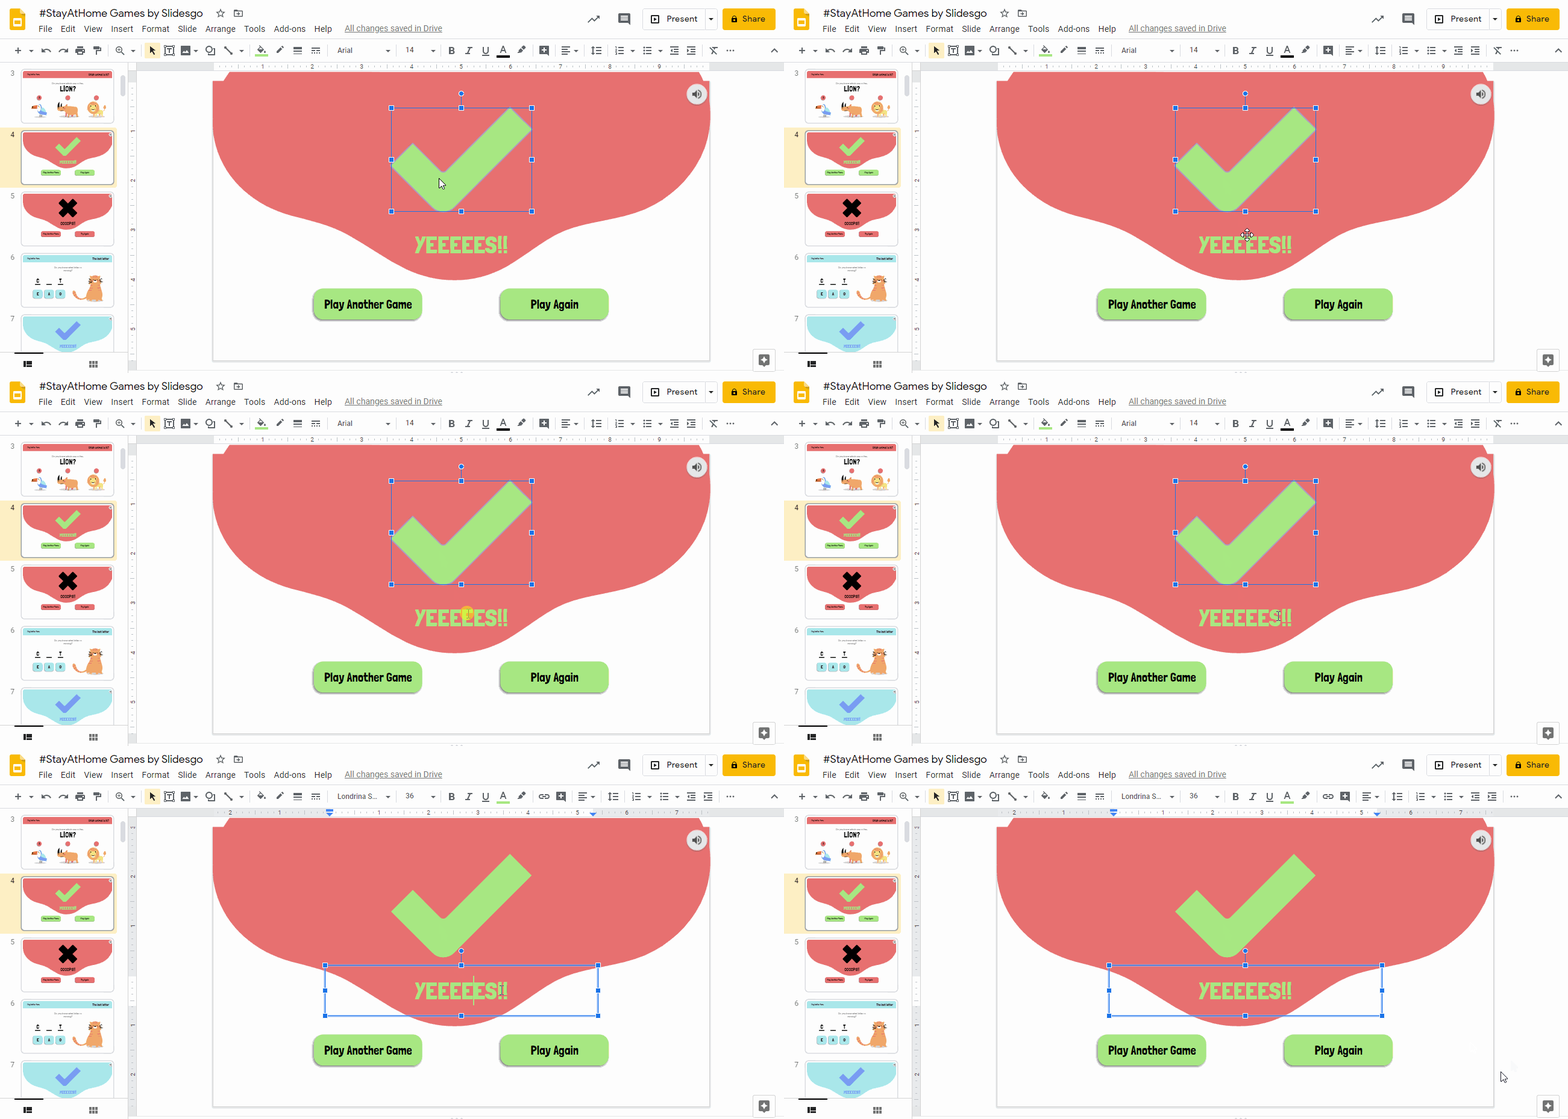
- It’s important for your students that you encourage them. Add symbols as a check mark and a message of the type “Correct!”, “Well done!”, “Yes!”, “You’ve made it” and the like.
- The “right answer” slide is ready!
Creating the “Wrong Answer” Slide
You need to add a new slide for those cases in which your student gives a wrong answer. The process is quite similar to the one above.
- Add and format a new slide. If you want to learn more about how to add, duplicate, move delete or hide slides, you can read this tutorial.
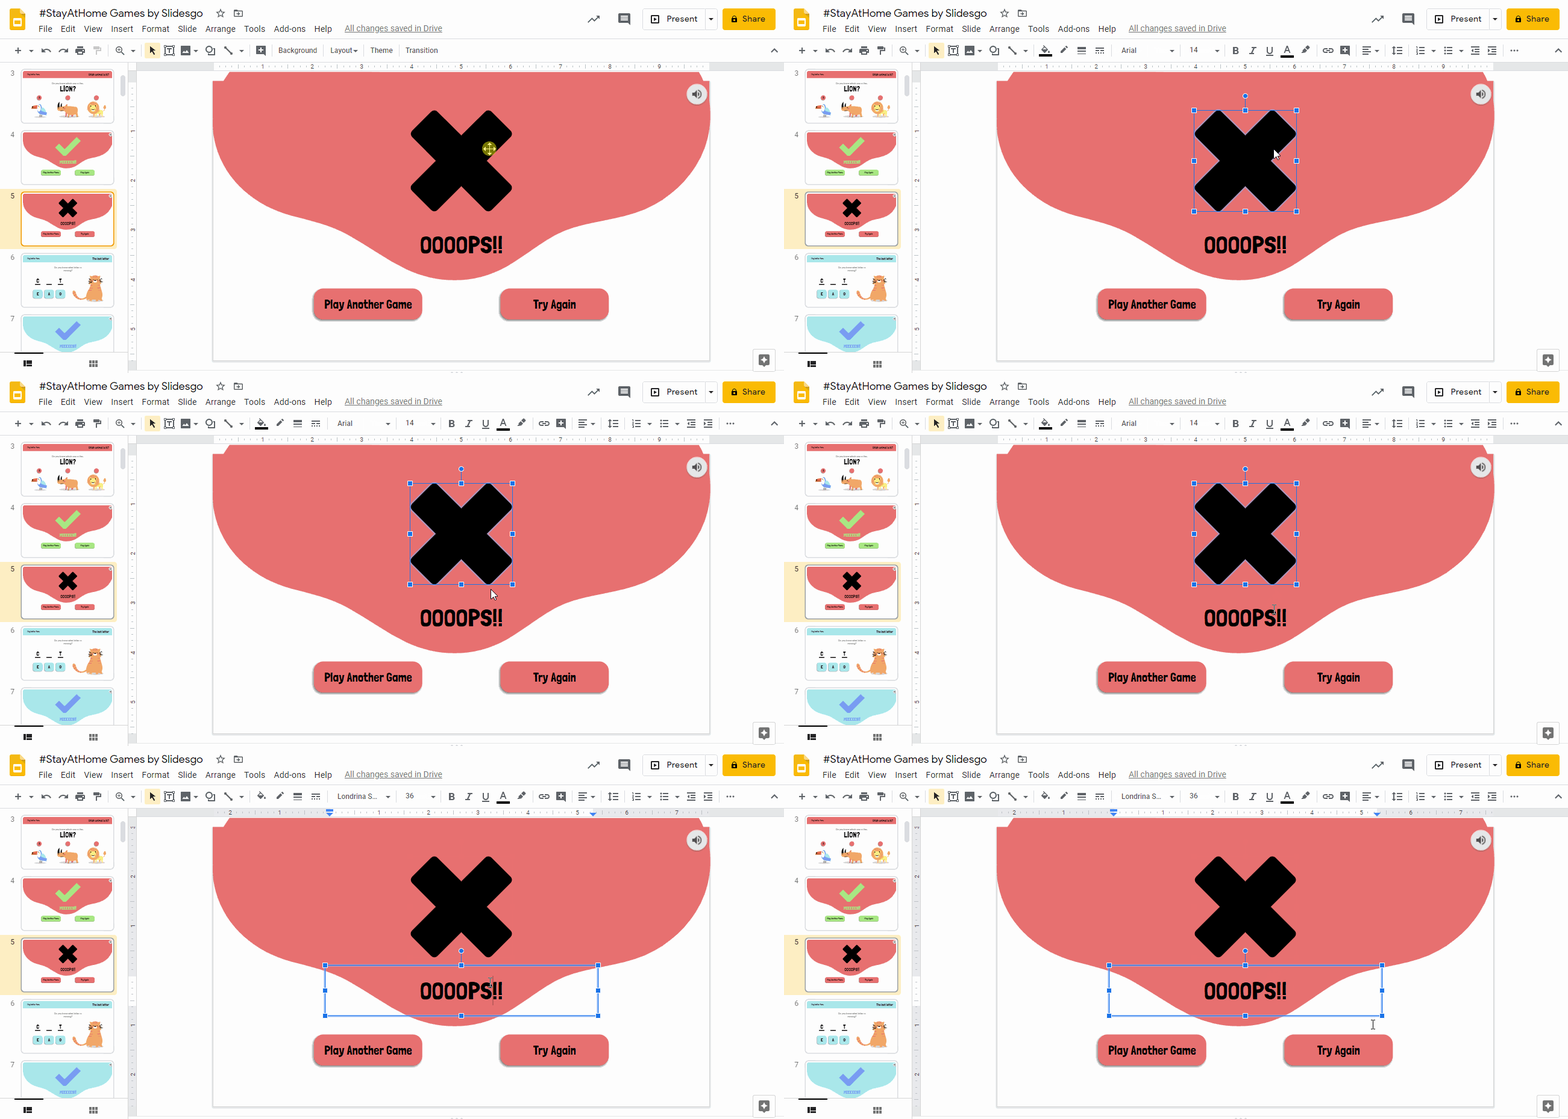
- In this case, you could add a symbol that represents that the answer is not correct, such as “X”. Add a message that lets your audience know that the response is incorrect, encouraging them: “Try again”, “Oops!”. It needs to be simple and understandable.
- Make sure that you add a button to redirect the student to the “question slide.” You can add a text such as “Try again” or something similar.
- To create the button, add a shape (as in the previous section) and apply different colors and effects.
Linking Slides
The main parts of this interactive quiz are ready. Now what we need to do is link the slides. Let’s see how to do it, although you can learn everything about how to add links, you can read How to Add Hyperlinks in Google Slides.
- Go to the answer slide. and add a link to each button.
- In our example, the first button/option is an incorrect answer. It should direct to the “wrong answer” slide.
- Click twice on the button and select the text that appears.
- You have two options: go to the toolbar and select Insert link or either right click on the text and select Link.
- As we need to link this slide to another within the same presentation, select the option Slides in this presentation.
- Remember that this corresponds to the incorrect option. Add the link to the “wrong answer.”
- Click Apply.
- If you don’t like it, remove the underlined effect in your text.
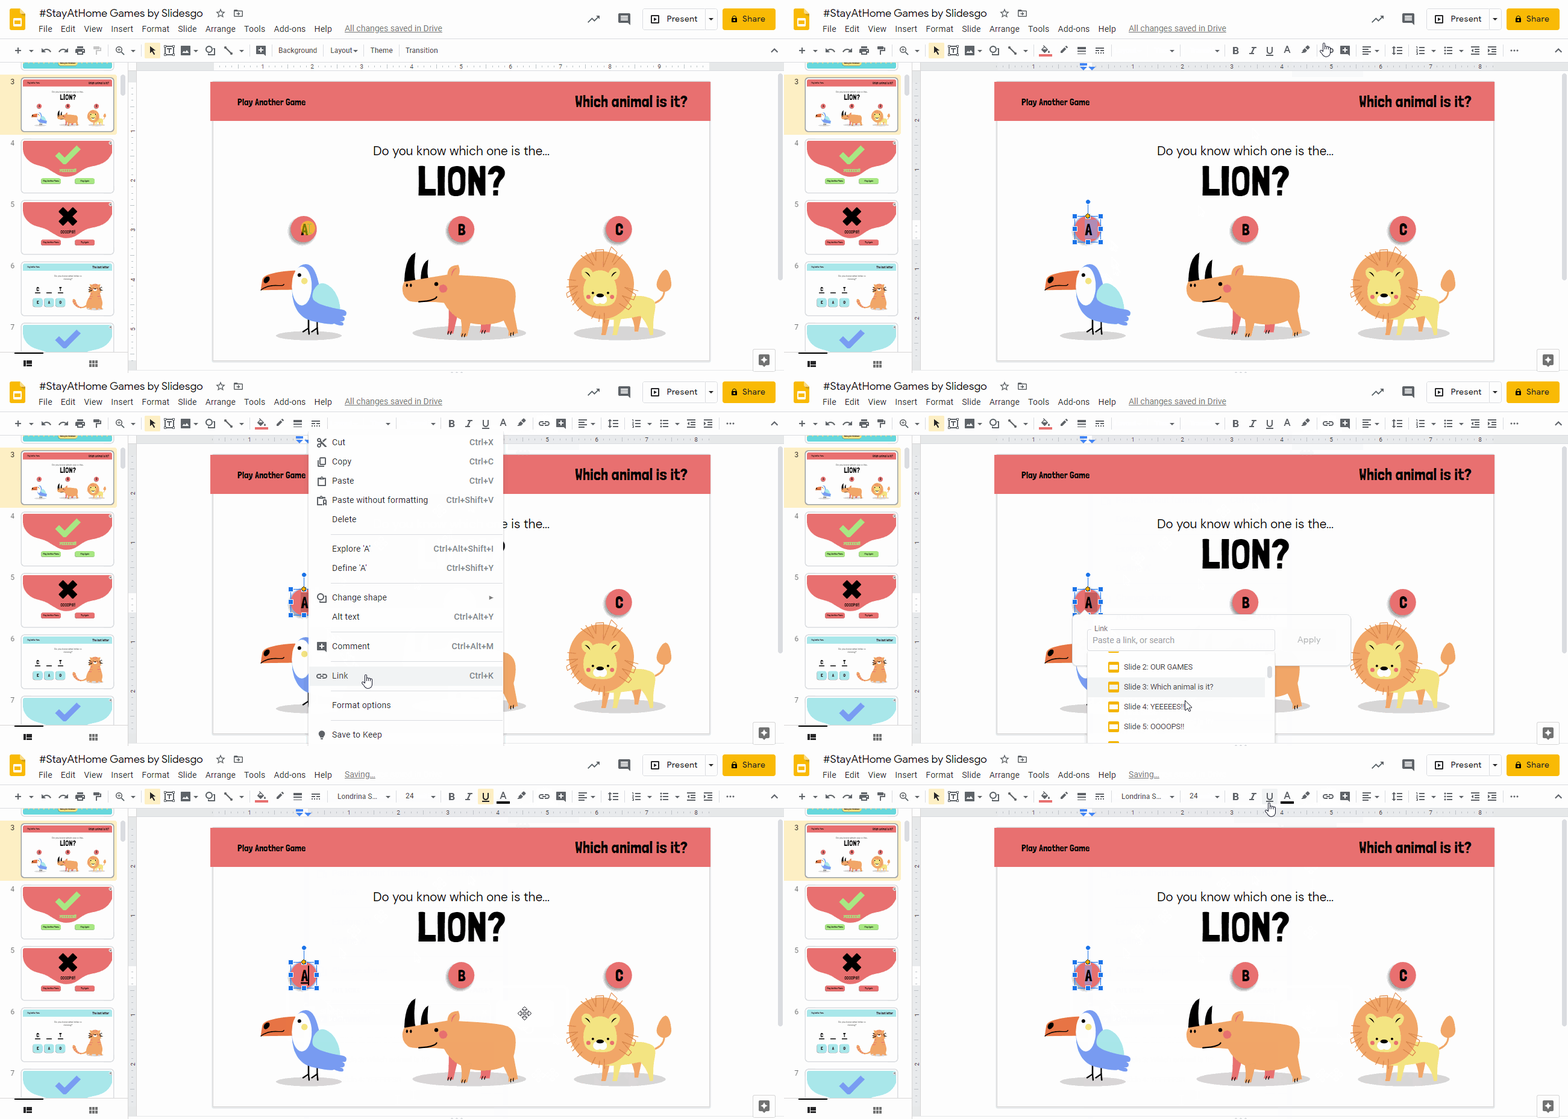
- Great! You have added the first link. Option b is wrong as well, so we need to repeat the same steps.
- Now let’s link option C to the “correct answer” slide! The steps are pretty much the same as in the two previous instances, but we’ll select the link of the “correct answer” slide.
- Hence: double click and select the text of the button.
- Go to the toolbar and select Insert link or either right click on the text and select Link.
- Select the option Slides in this presentation.
- Choose the “correct answer” slide.
- Click Apply.
- Remove the underlined effect if needed.
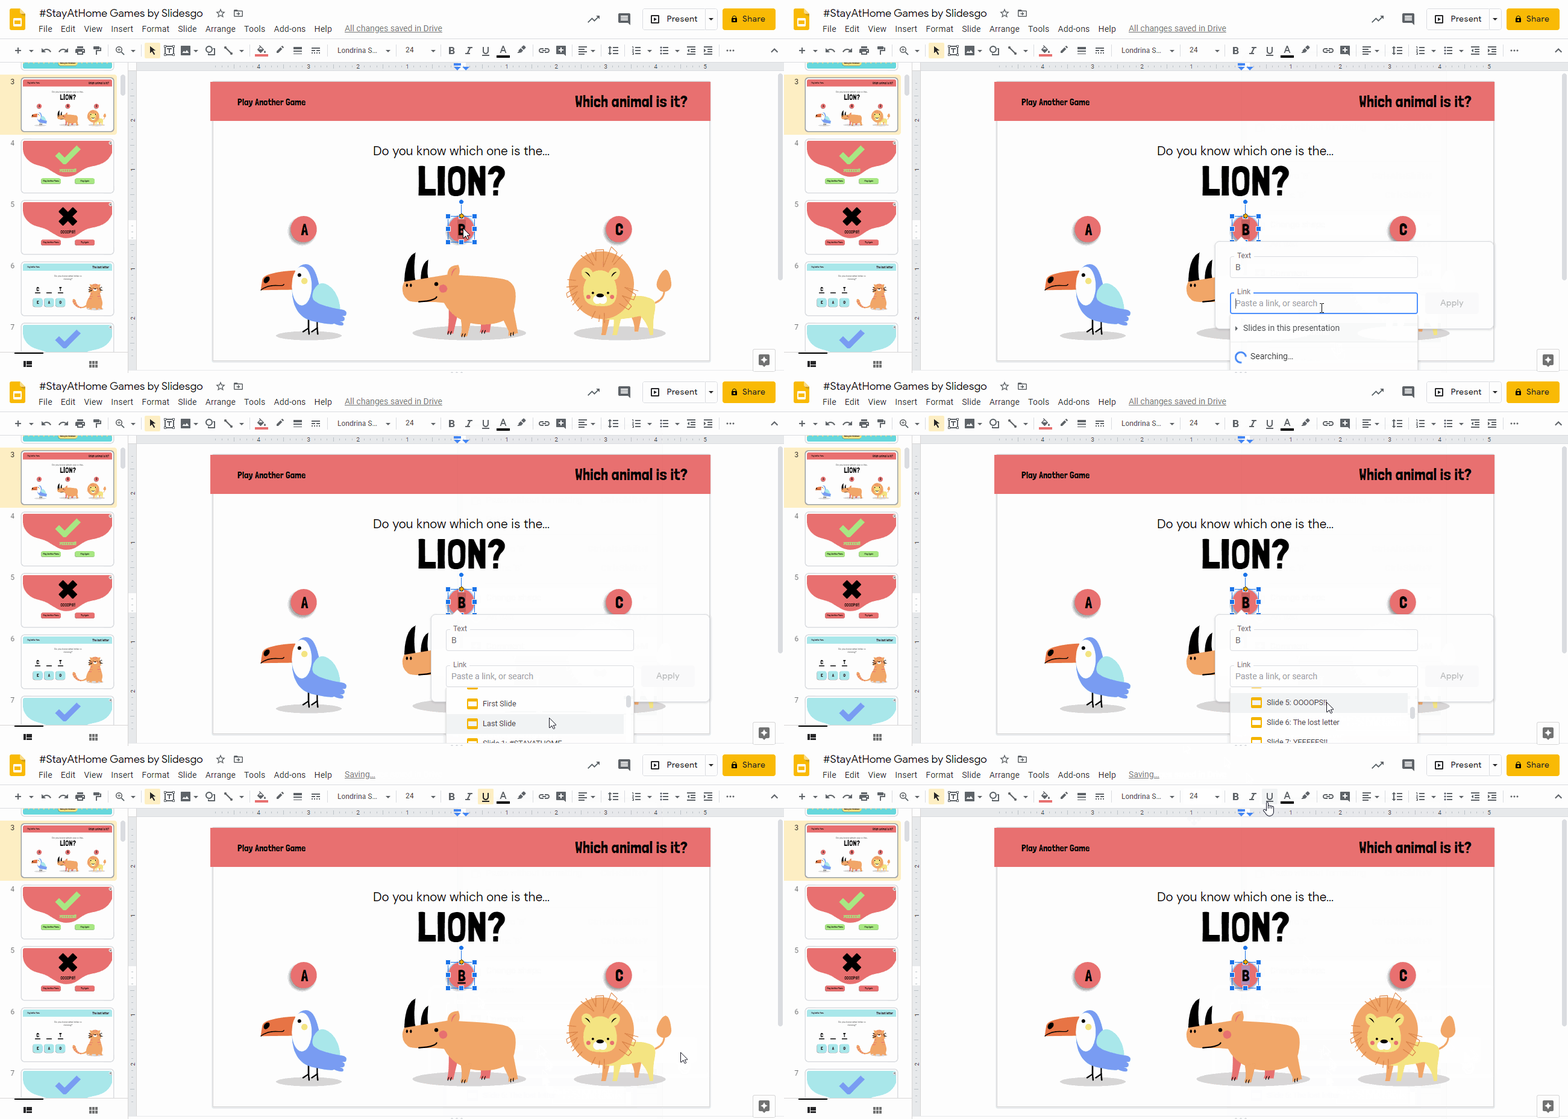
- Brilliant! You have linked the three options successfully. But we need to link the “wrong answer” slide to the “question slide”. Why? If your students provide an incorrect answer, the slides will redirect the child to the answer once again until he or she gets it right.
- Go then to the “wrong answer” slide. Remember that you created a button reading “Try again”.
- Select that button and select Insert link → Slides in this presentation.
- Choose the “question” slide.
- Click Apply.
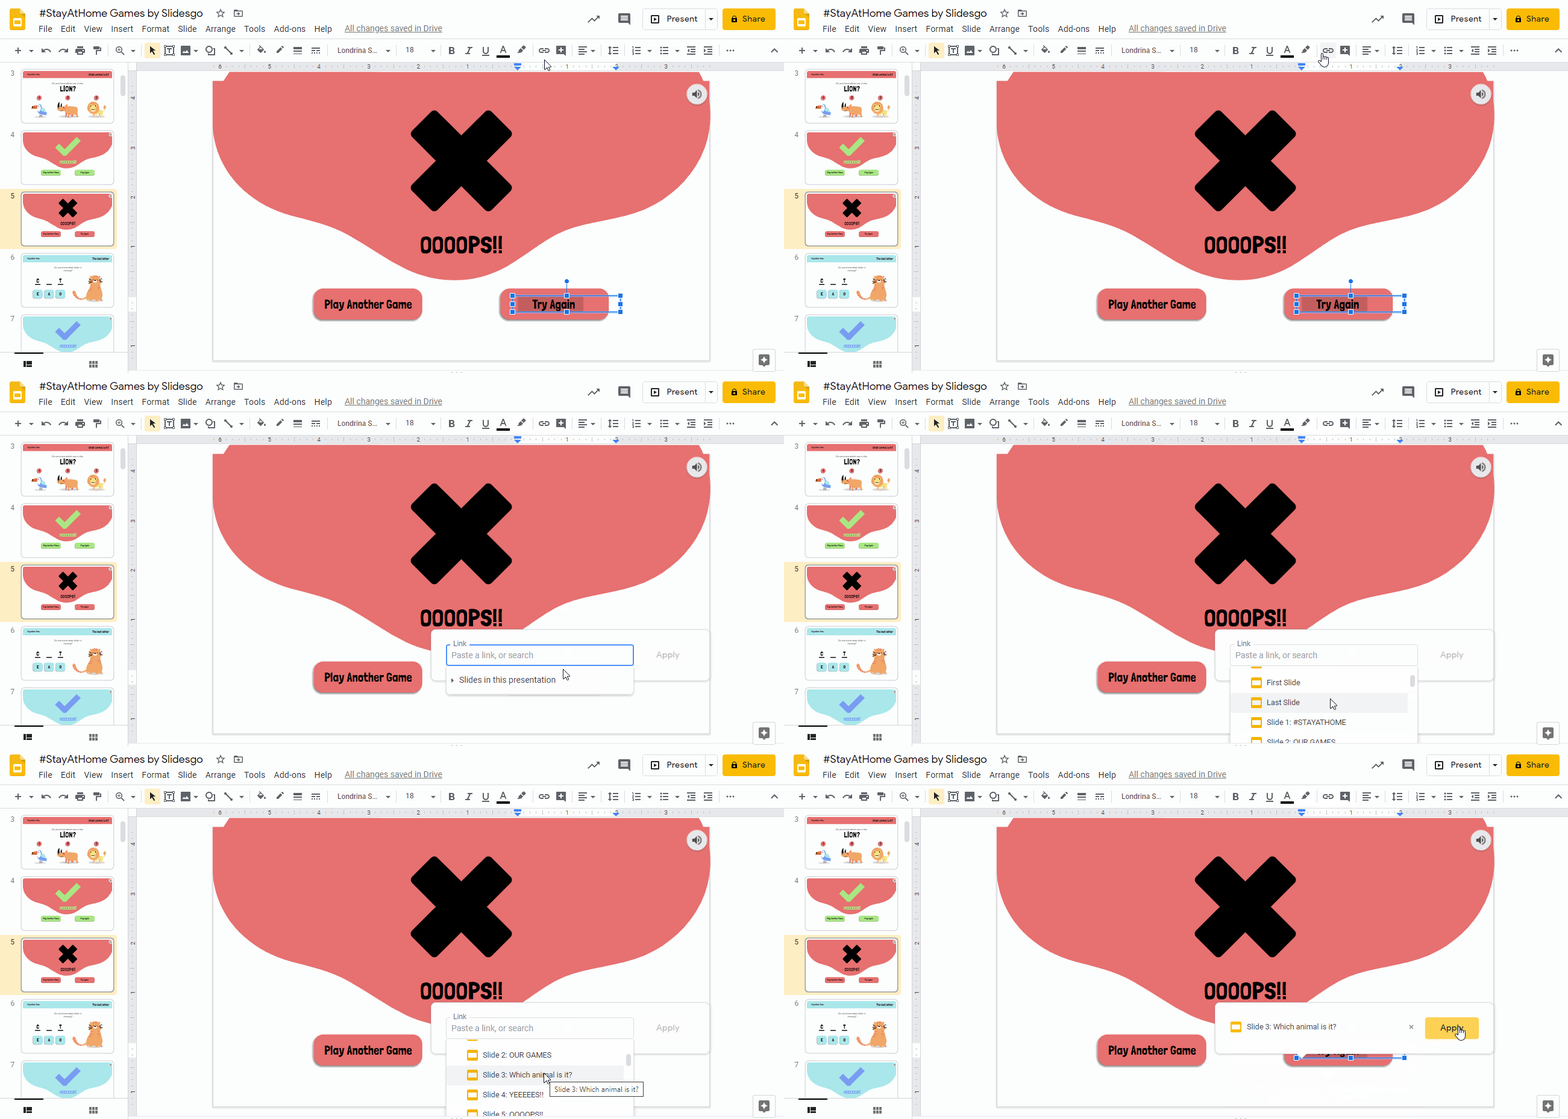
- Your interactive quiz is ready!
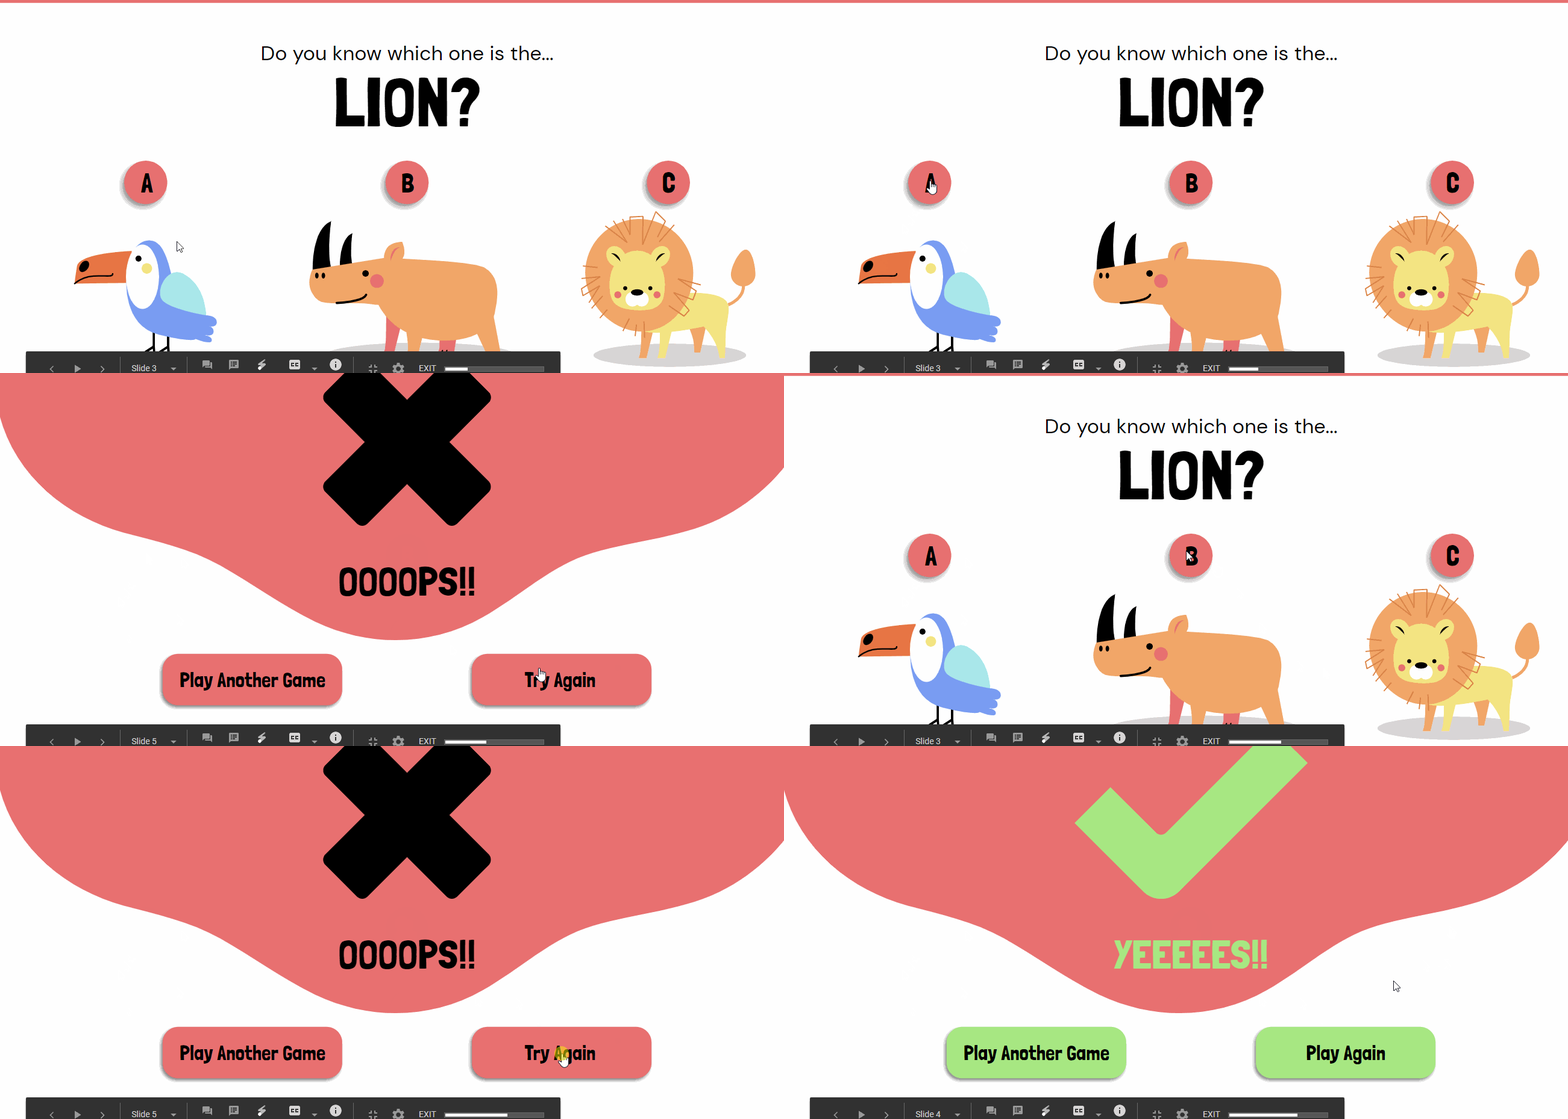
- If you liked the presentation that we have used for this tutorial, you can find #StayAtHome Games and other free education templates for Google Slides and PowerPoint on Slidesgo. Download it for free! It’s 100% editable and customizable.
Tags
Quiz & HyperlinksDo you find this article useful?
Related tutorials

How to Create a Jeopardy Game in Google Slides
Jeopardy is an American television game show in which contestants have some clues or answers, and they need to give their responses in the form of questions—and, of course, they can get some money! We’re sure you have watched this show several times. Jeopardy games are pretty useful! They are great to have fun with your friends or to play with your students to review some concepts related to different subjects, such as Medicine, English, Maths or sciences. In this tutorial, we are going to teach you how to create a Jeopardy board from scratch. Let’s get the party started!

How to Make a Jeopardy Game in PowerPoint
Thinking about new ways of reviewing concepts for your students? Do you simply want to have fun with your friends? Or are you a medical student and need a helping hand with the names of the different parts of the inner ear? We can help you! Gamification is always a good idea when trying to learn new things, don’t you think? We have created an educational Jeopardy using interactive slides. You can pick different subjects and questions clicking on different buttons! Does it sound like rocket science? In this tutorial, we’ll teach you how to create a funny Jeopardy from scratch....

How to Make a Quiz for Your Online Classes Using PowerPoint
Sometimes it is not easy to get your students involved when giving a presentation. One of the best ways to capture their attention is creating interactive quizzes and questions, so they will interact with the slides. This way, the learning process will turn into something fun and amazing for children. If you want to learn how to make some interactive quizzes for your pupils using PowerPoint presentations, read this tutorial. It’s an easy task, and it will only take you a few minutes!

How to Insert a Hyperlink in PowerPoint
In this tutorial, you’ll learn how to add links to other documents, websites, multimedia resources, email addresses or even other slides in the same presentation. Any of the resources included in the presentation, such as texts, images or shapes, can be linked.
