
How to Apply Effects to an Image in Google Slides
To improve how the images look in your presentations, there are several basic image editing tools at your disposal. In this Slidesgo School tutorial, you'll learn how to apply effects to the images in your Google Slides presentations.
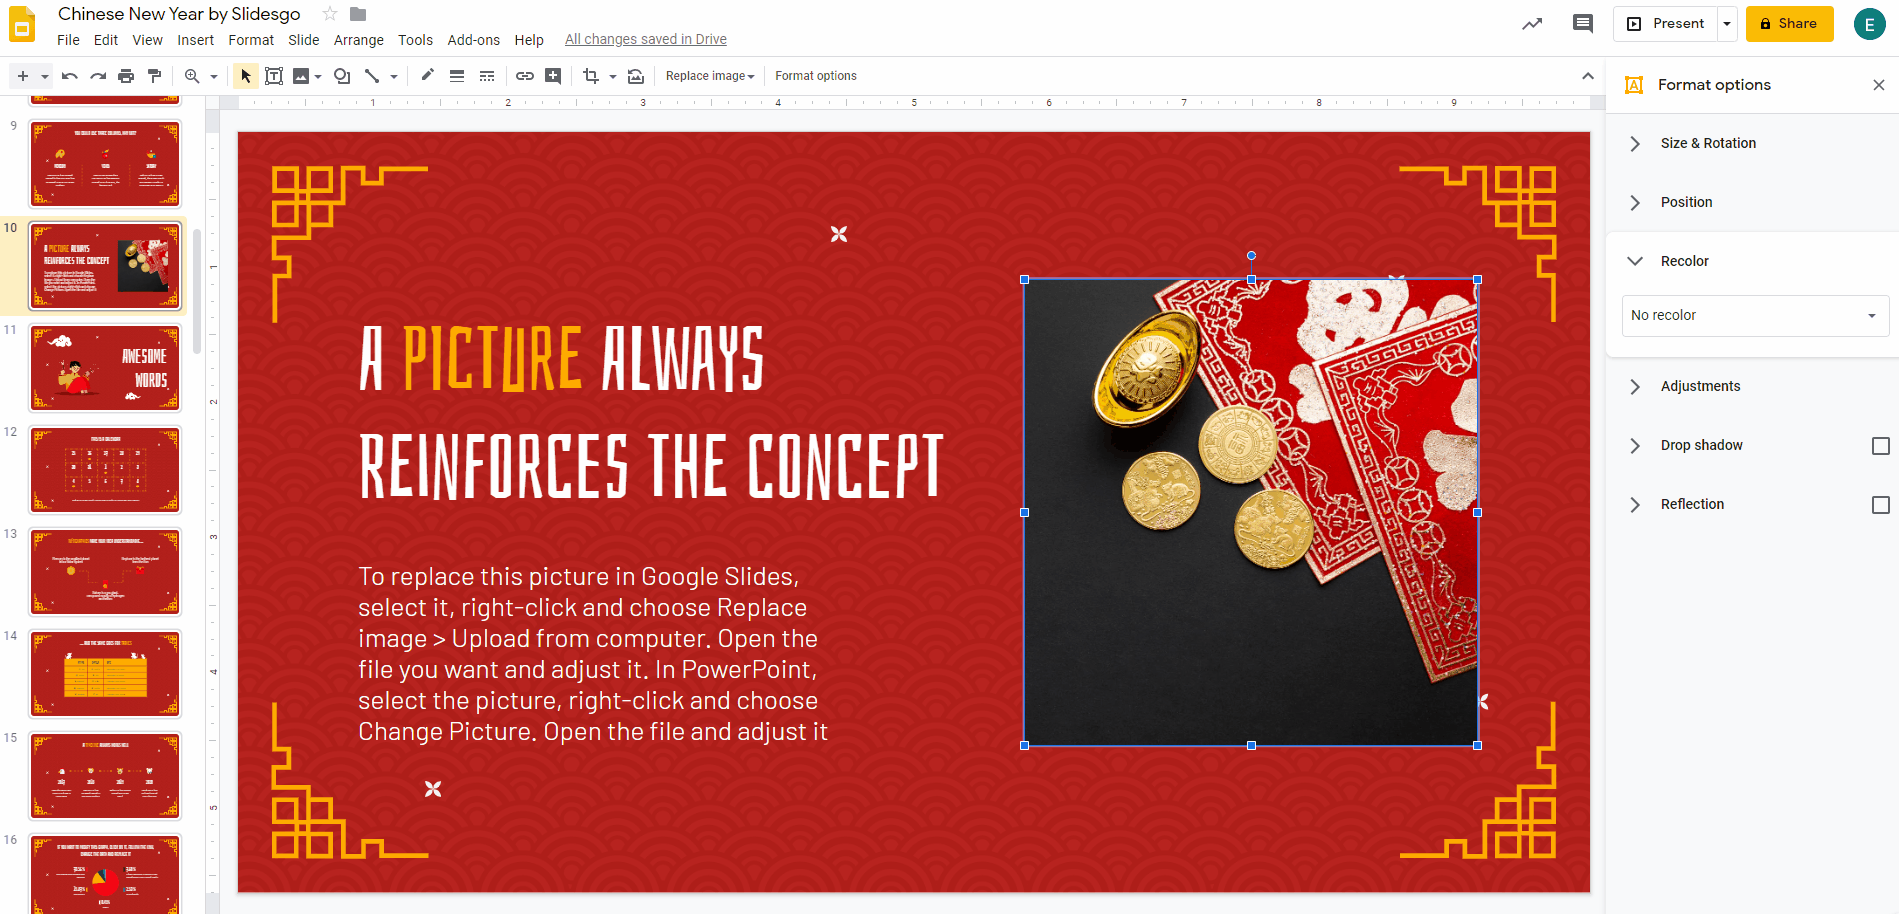
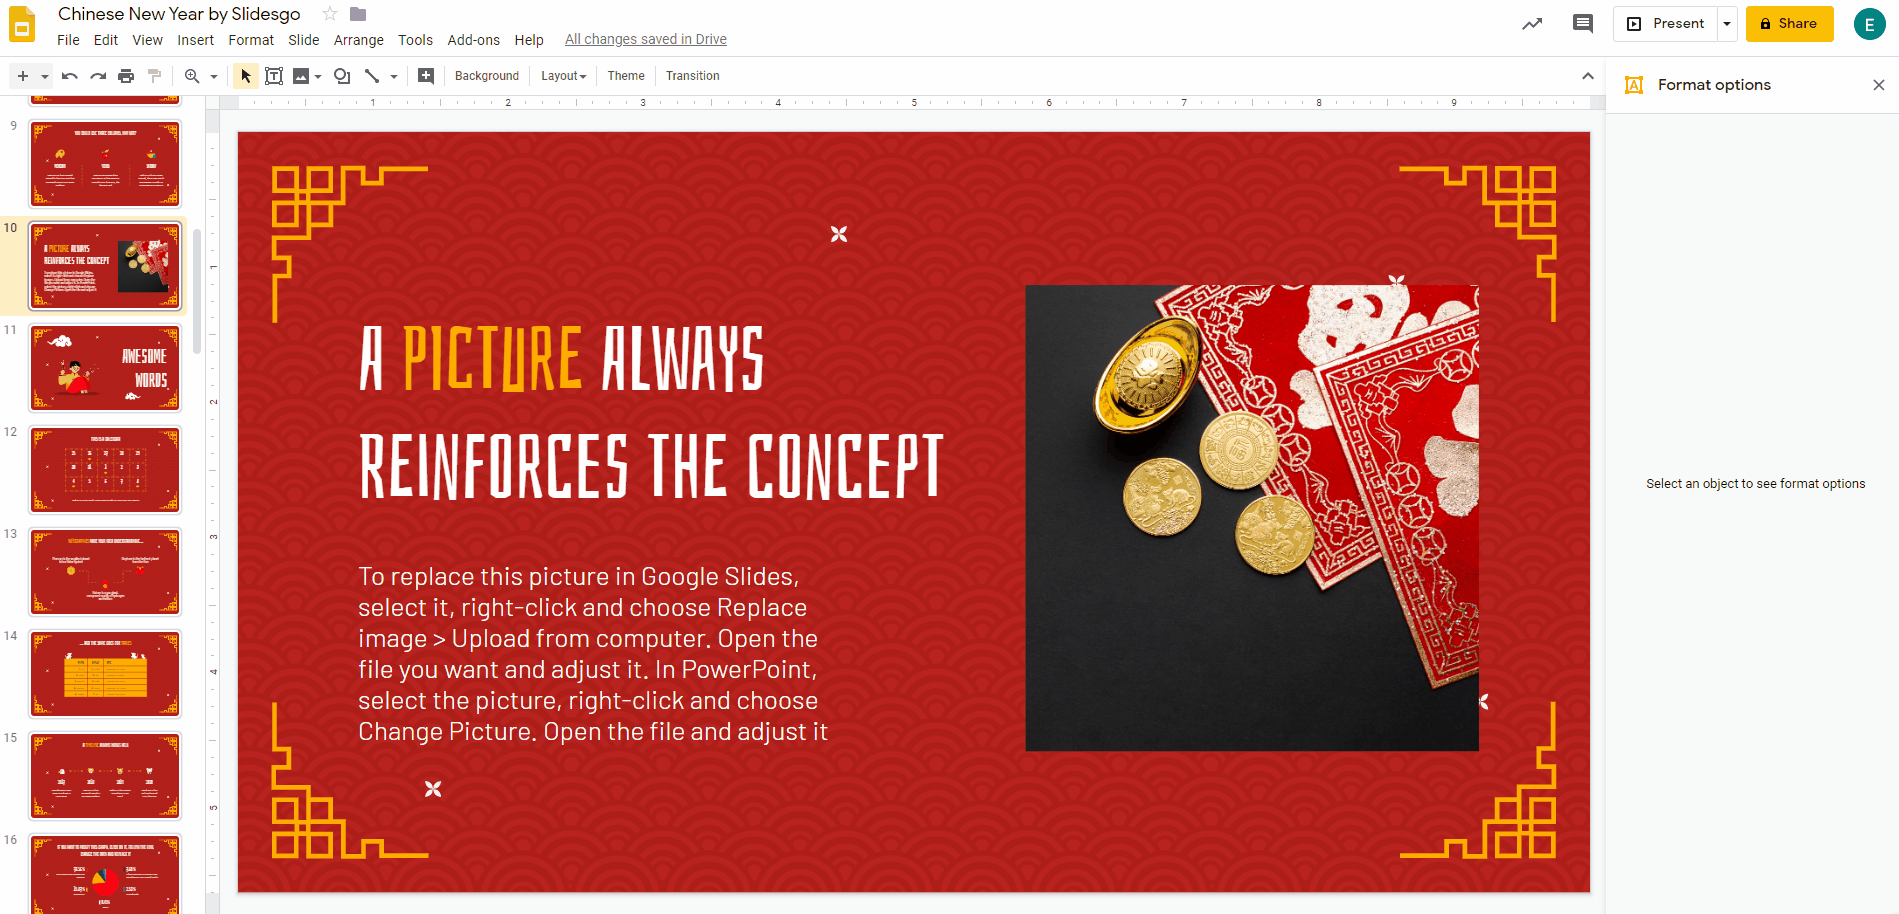
Recoloring an Image
- Select the image you want to modify in your Google Slides presentation.
- Go to Format options and open the Recolor tab.

- Now choose the desired option. If you want to revert an image to its original state, choose “No recolor”.
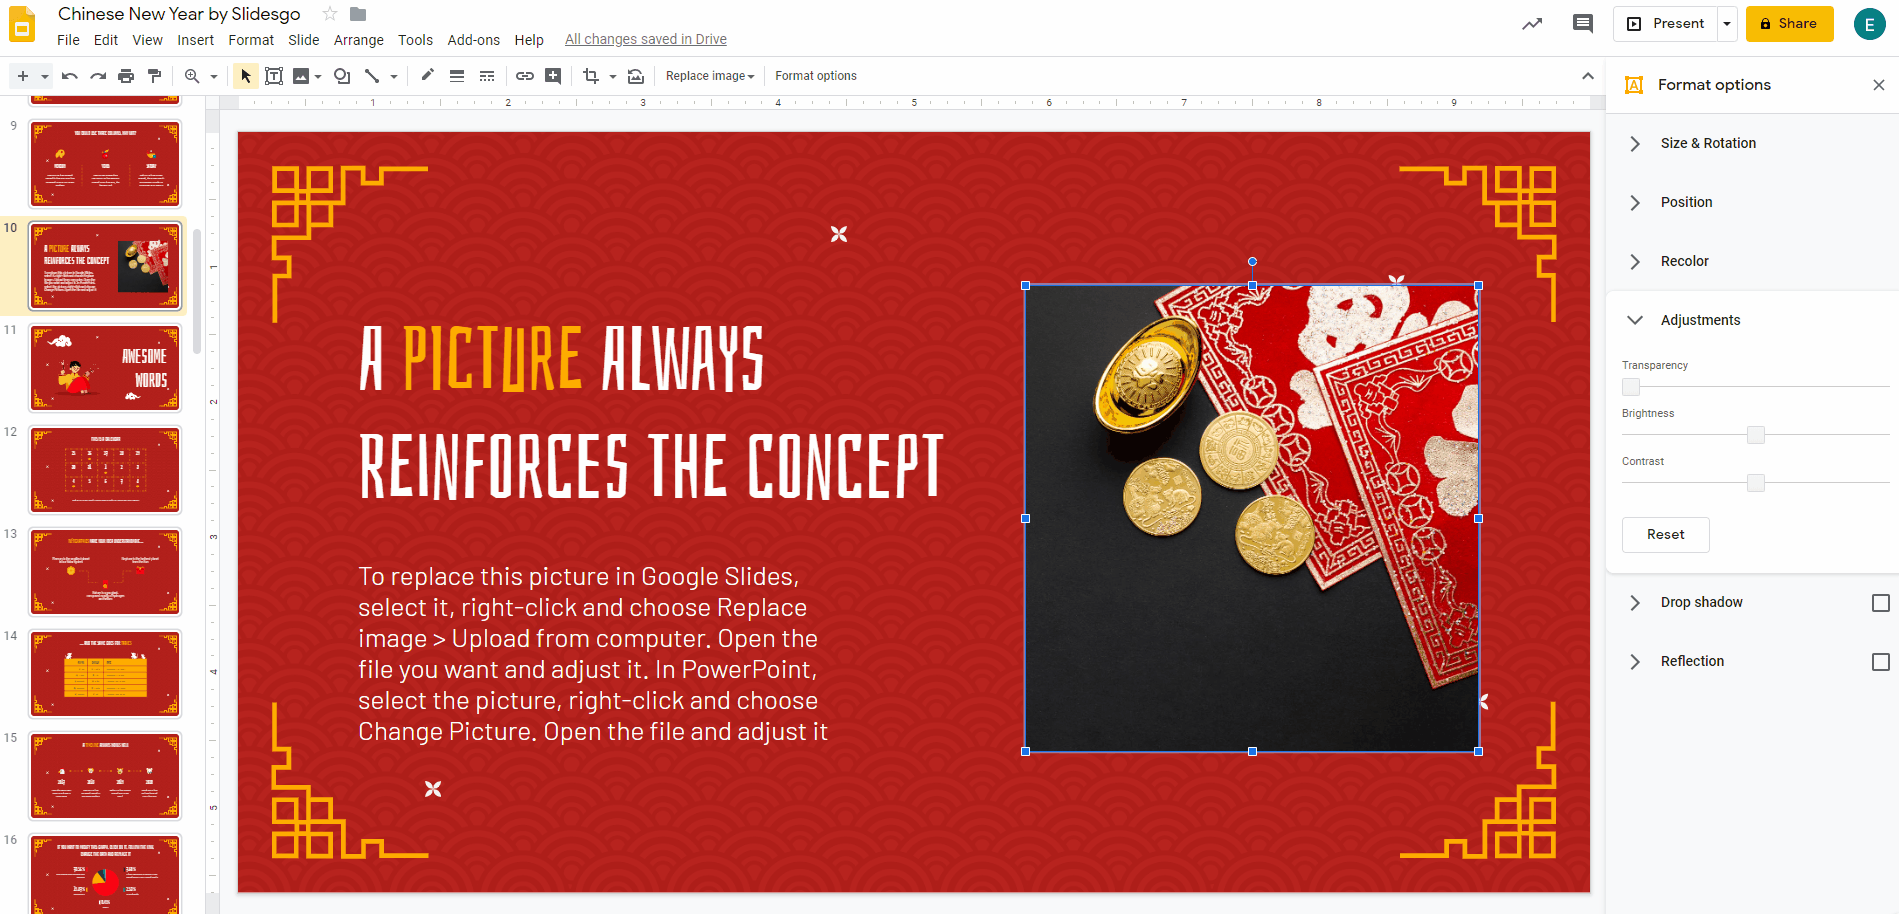
Changing the Transparency of an Image
- Open your Google Slides presentation and select the image you want to modify.
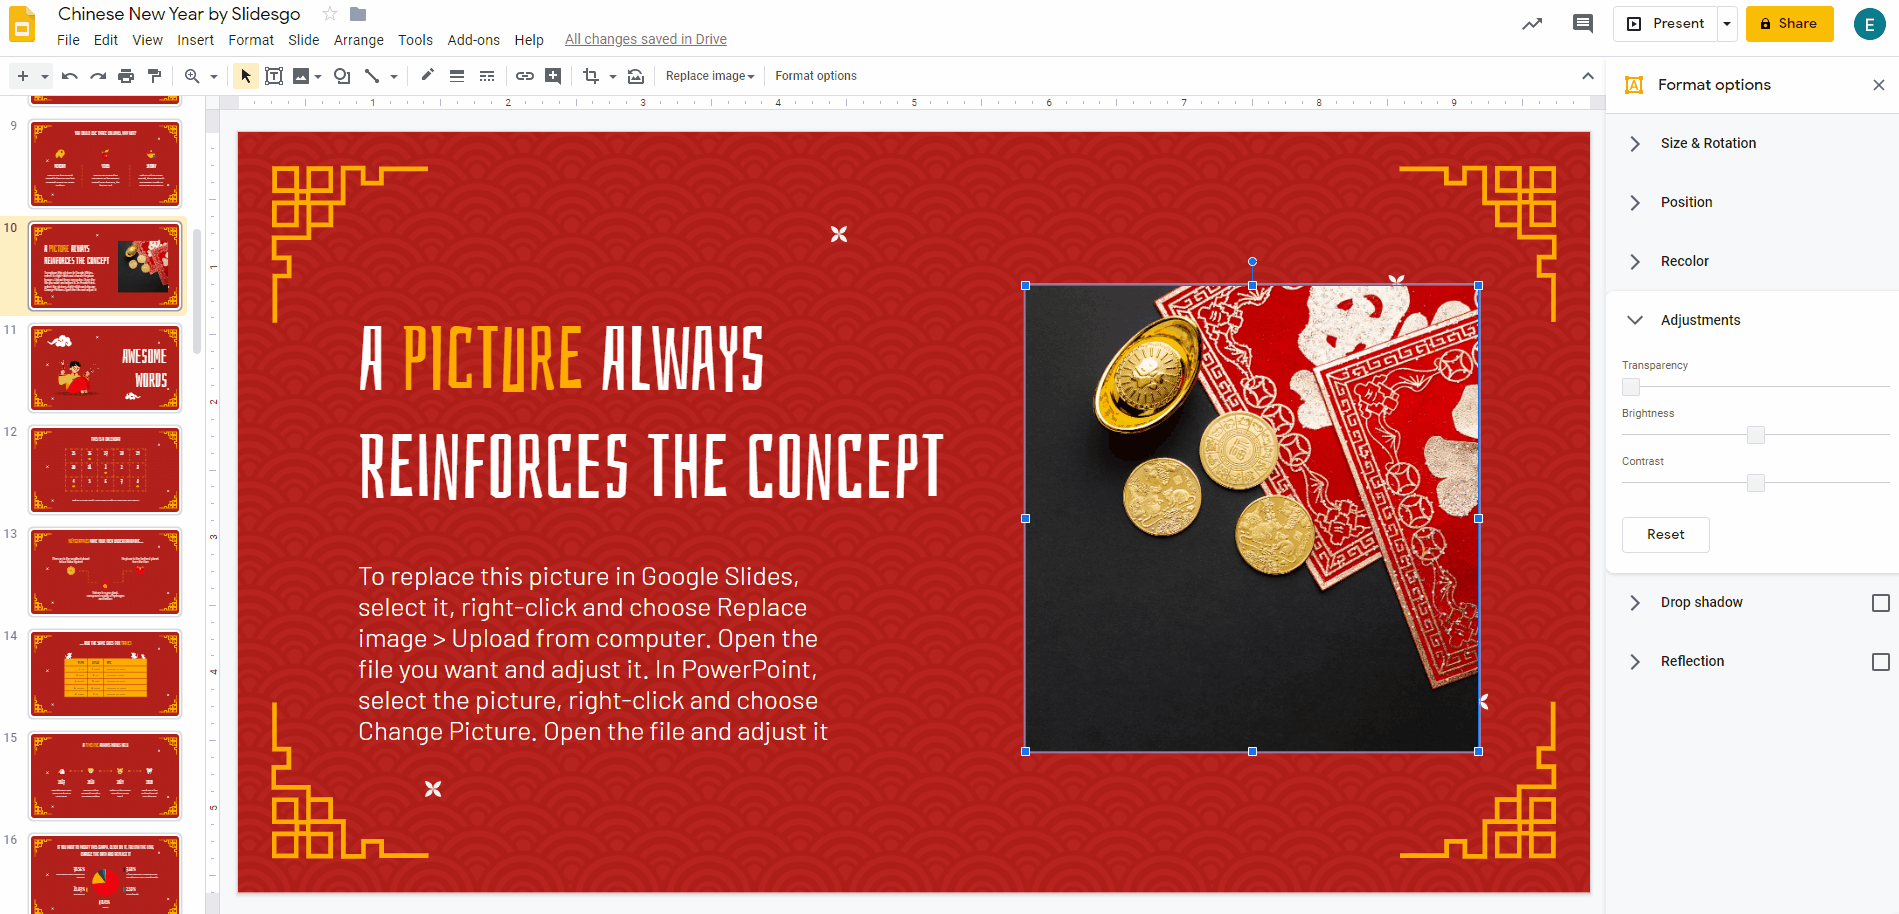
- Go to Format options and open the Adjustments tab.

- Click and drag the Transparency slider to adjust the transparency.
Changing the Brightness and Contrast of an Image
- Run Google Slides, open your presentation and select the image that you'd like to modify.
- Go to Format options and open the Adjustments tab.
- Click and drag the Brightness slider to adjust the brightness.
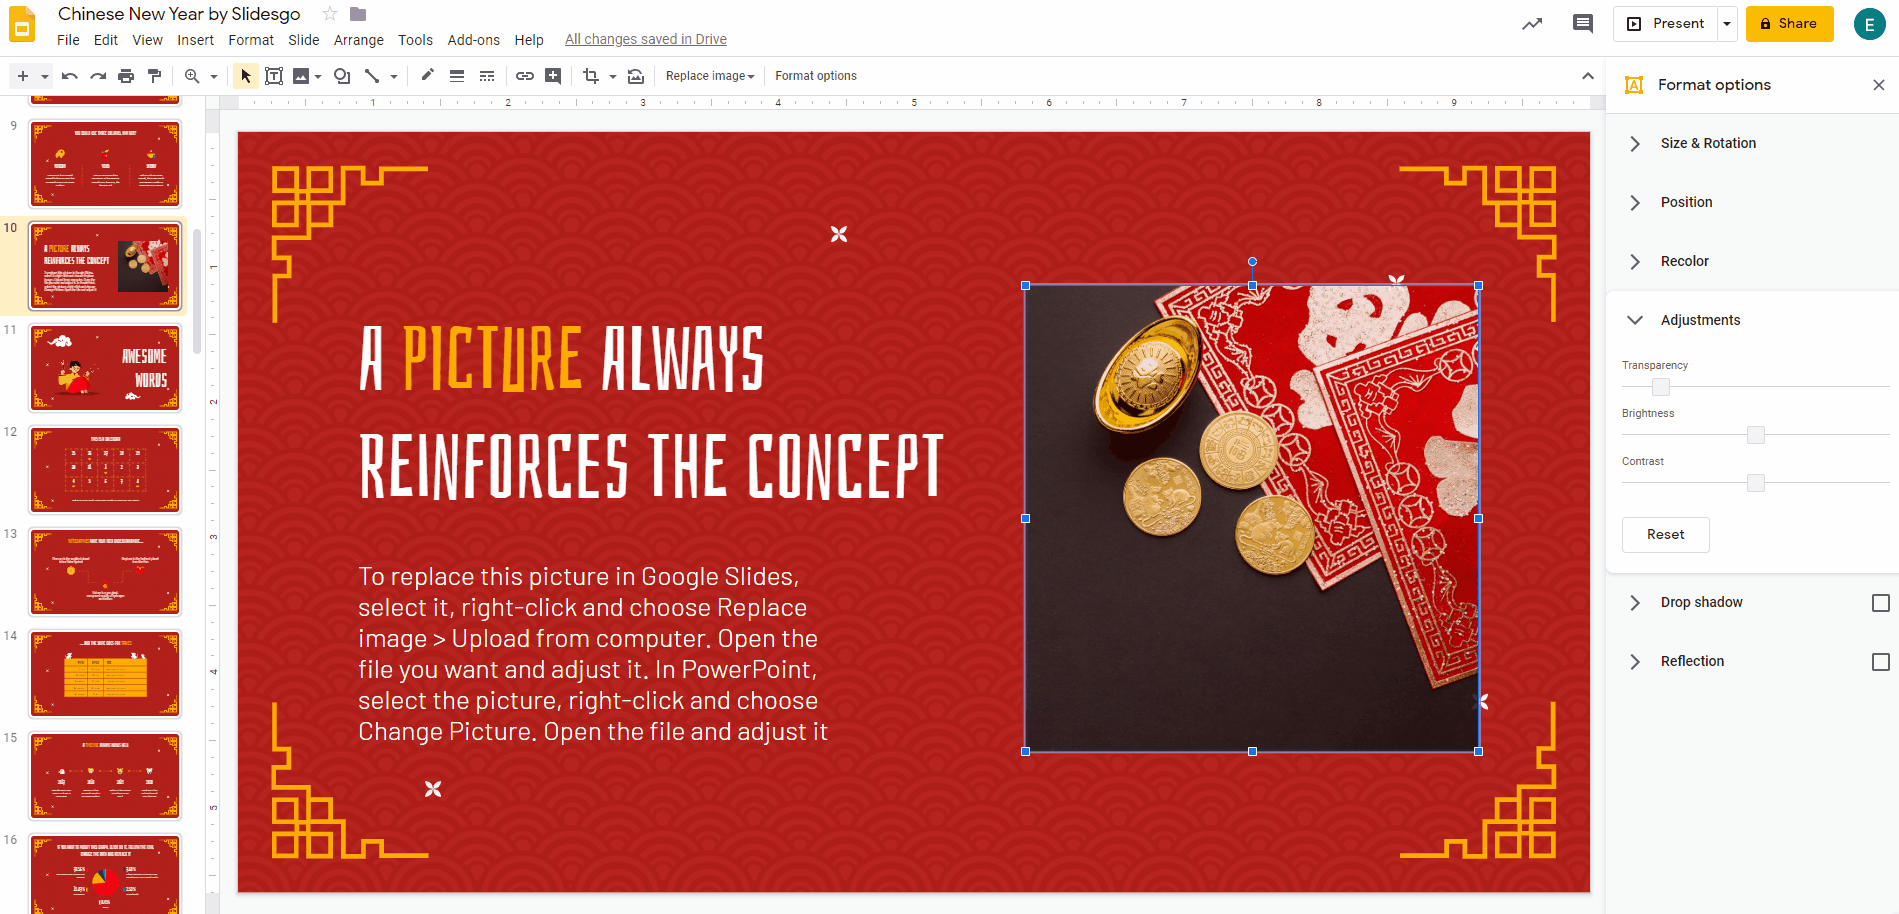
- Click and drag the Contrast slider to adjust the contrast.
Adding a Shadow to an Image
- Select the image you want to modify in your Google Slides presentation.
- Go to Format options and check the box next to Drop shadow. Then, open this tab to adjust the different settings for the shadow:
- Color: Here you can select the color of the shadow.
- Transparency: Click and drag the slider to adjust the transparency.
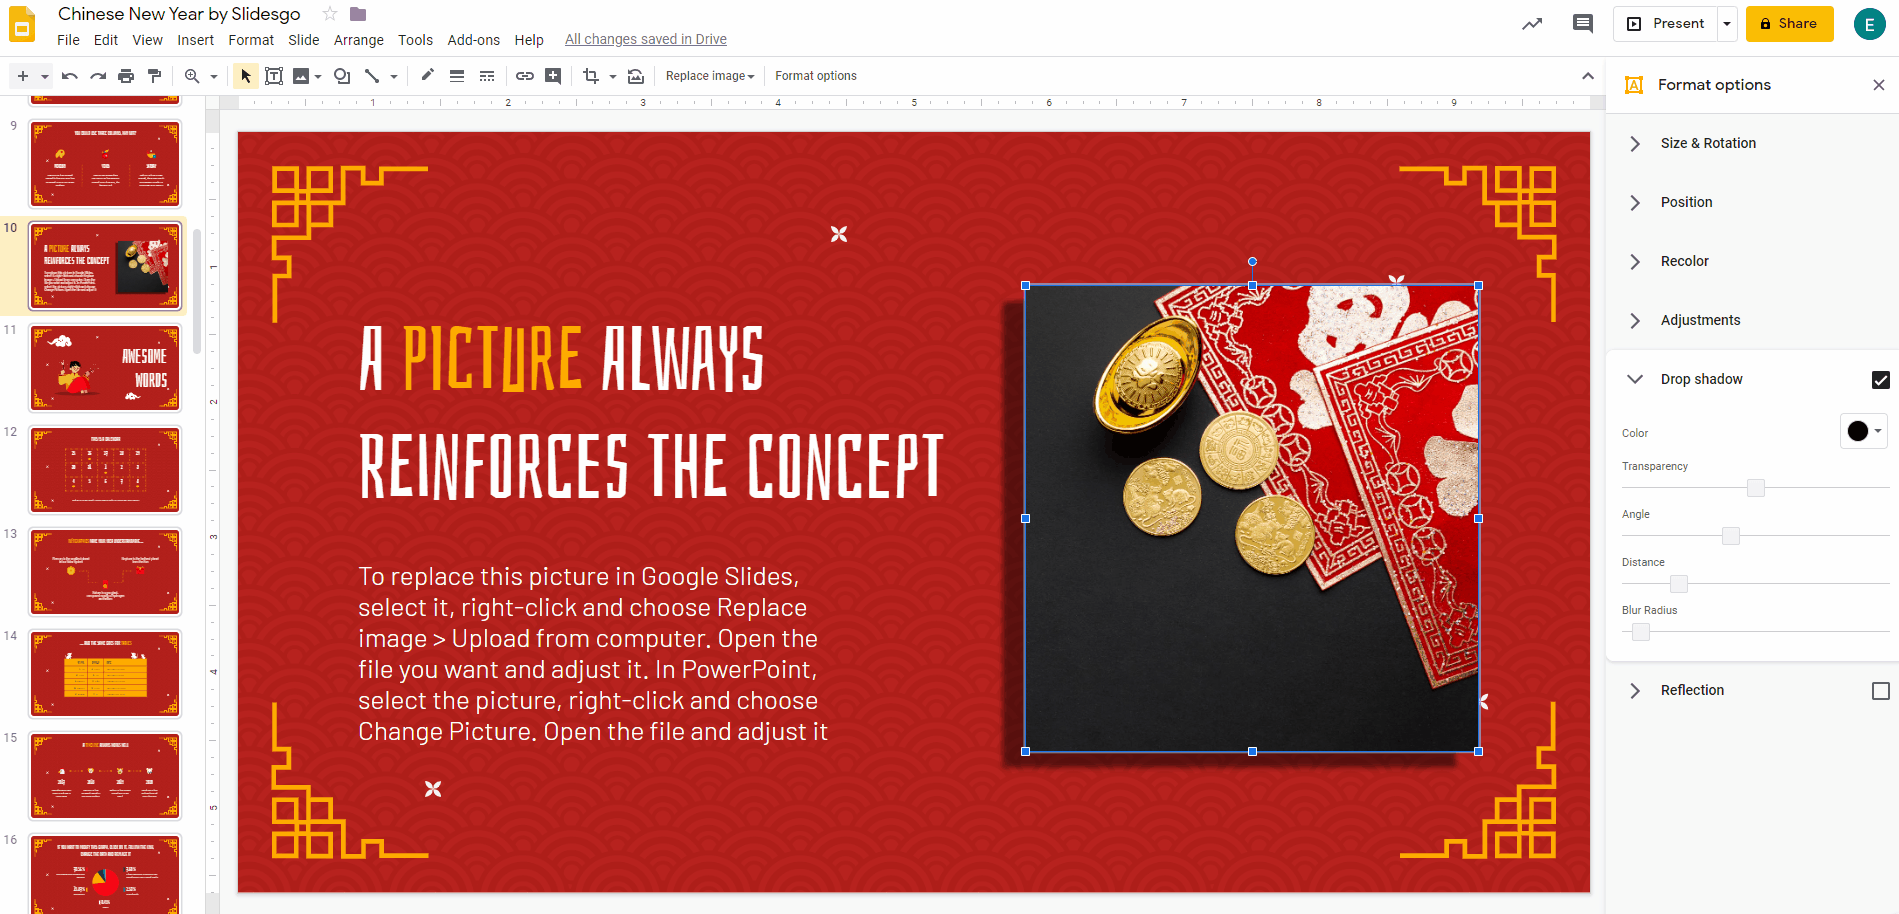
- Angle: Click and drag the slider to modify the angle from which the shadow is projected.

- Distance: Click and drag the slider to adjust the distance. The bigger the distance, the longer the shadow.
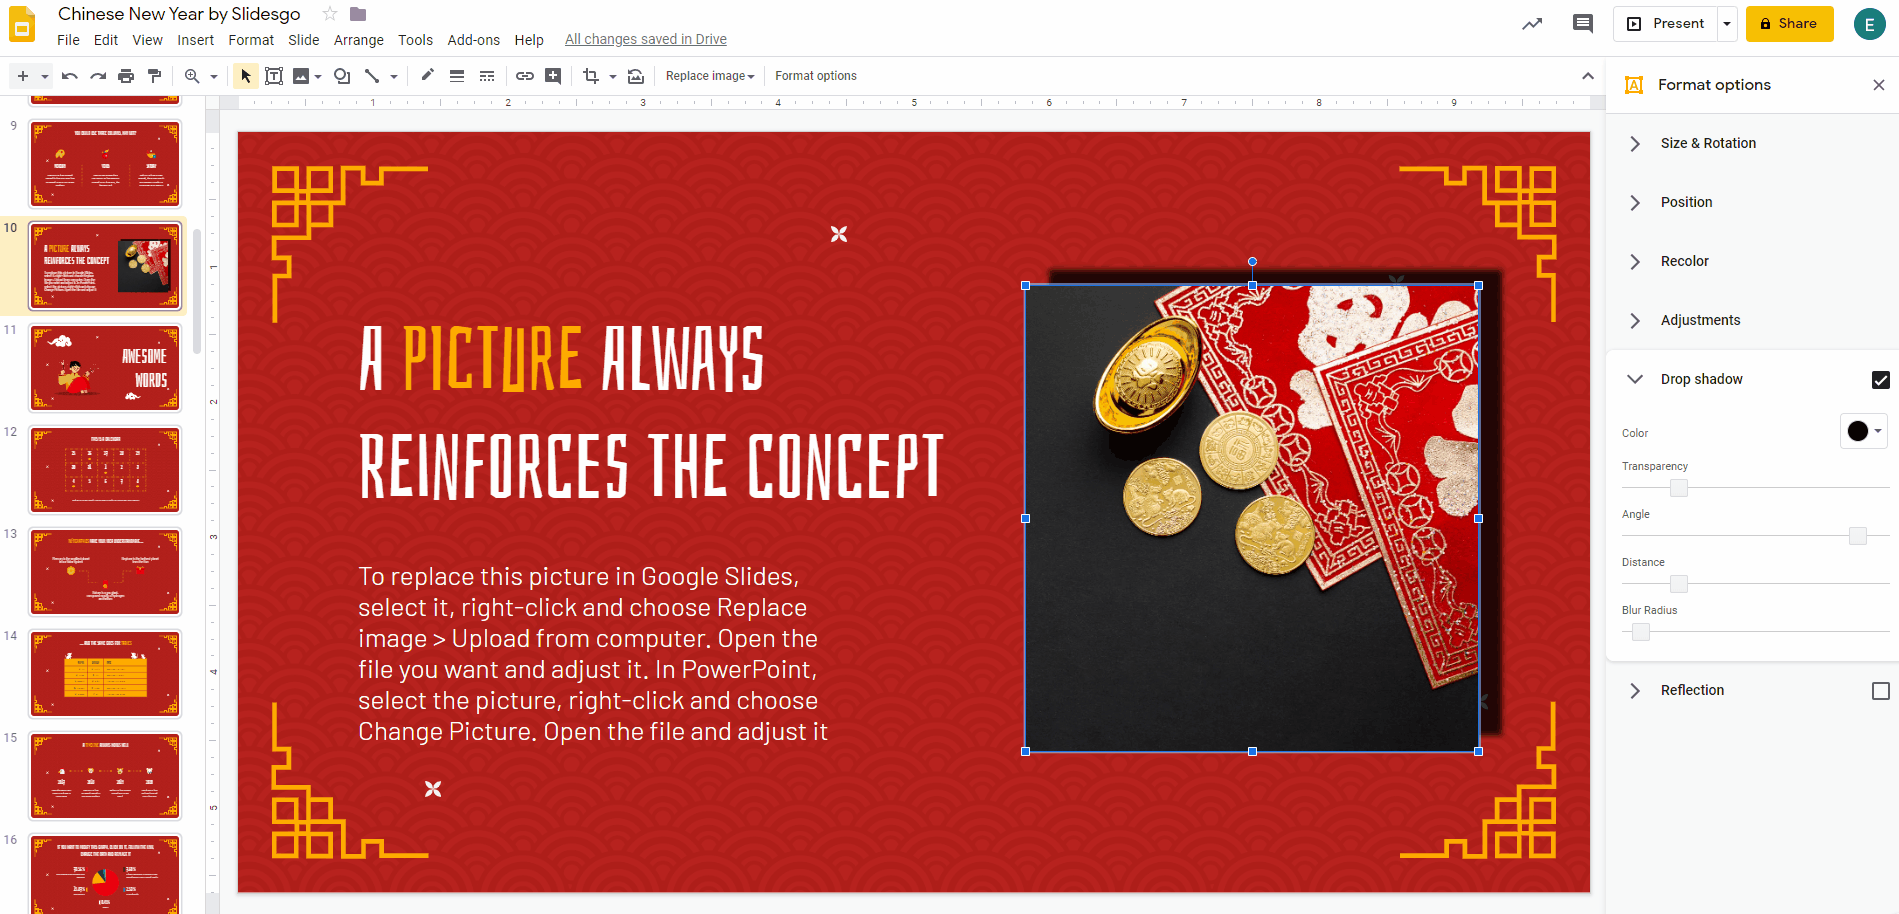
- Blur Radius: Click and drag this slider to adjust the blur radius of the shadow.
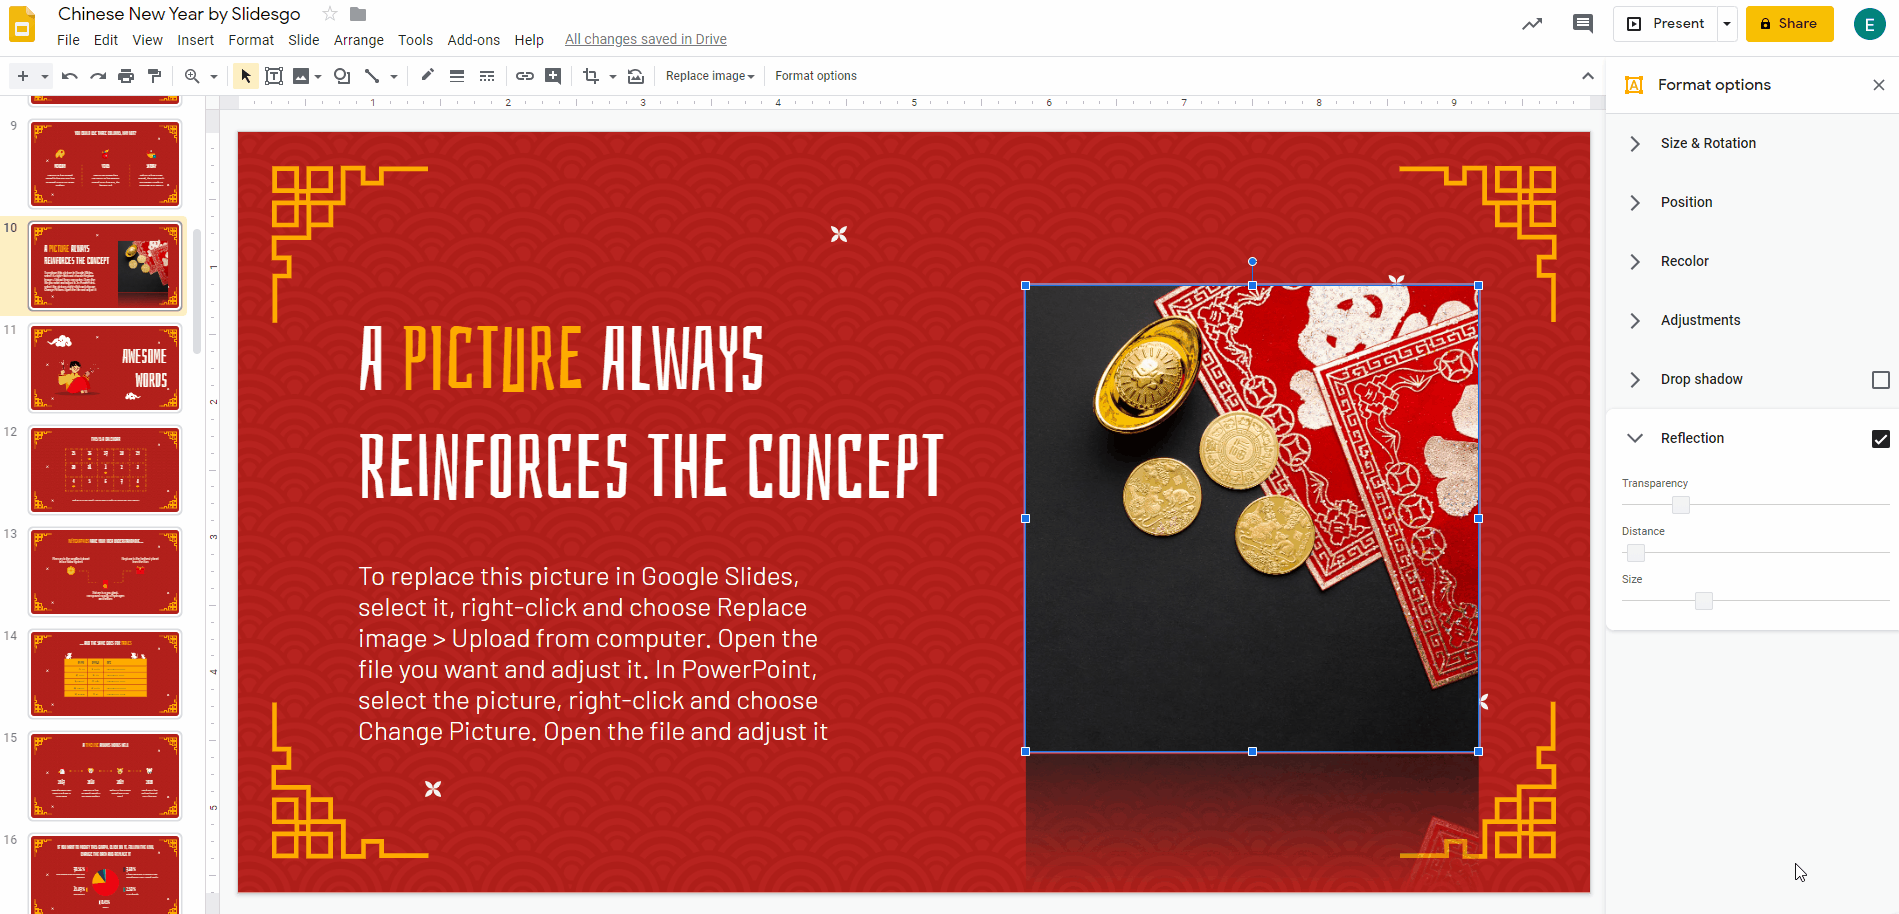
Adding a Reflection to an Image
- Open your presentation in Google Slides.
- Select the image you want to modify.
- Go to Format options and check the box next to Reflection. Now open this tab to adjust the different settings for the reflection.

- Transparency: Click and drag this slider to modify the transparency levels.

- Distance: Click and drag the slider to adjust the distance. The bigger the distance, the farther away the reflection will be.

- Size: Click and drag to modify the size of the reflection.
Tags
ImagesDo you find this article useful?
Related tutorials

How to Create a Banner in Google Slides
Banners have been around us (at least, when it comes to browsing the net or participating in forums, among other things) for a long time. Creating one is by no means a difficult task, and you can do it with free software such as Google Slides. The steps that you’ll need to follow are very simple, so we’re sure you’ll start creating banners one after another in a few minutes. Let’s see how to proceed!
How to Make a Banner in PowerPoint
The uses that a banner has are almost endless: from ads to sections for websites, or even signatures for certain types of emails. The purpose is up to you, but the thing is: how to design one? If you think that you need expensive software to make banners, think again. Here at Slidesgo, we know a lot about presentations and, thus, about programs such as PowerPoint. The truth is that PowerPoint is all you need to create your own design! Keep reading to learn how!
Storyset by Freepik: Awesome illustrations for creative presentations
With inspiration and the adequate resources, a PowerPoint or Google Slides presentation can be the most creative slide deck your audience has ever been, regardless of topic. In this Slidesgo School article, we’re going to introduce Storyset, a new Freepik project where you’ll find illustrated concepts to visually reinforce the message you want to convey, turning your work into a memorable experience.
How to Create a Watermark in PowerPoint
Watermarks are small elements or images that are inserted into digital creations to help identify who’s the author, preventing plagiarism. If you want to learn how to insert a watermark into your PowerPoint presentation, this tutorial will teach you in no time!